playbook更加强大, 等于说写了一个脚本来对多个被控机执行命令.playbook用的是yaml格式
执行示例:
#1. 编辑yml文件
vi p1.yml

- hosts: web  			# 主机组
  remote_user: root  	# 将以root用户在被控机上执行命令,默认就是root,这行可以不写
  tasks:
  - name: xxx  		 	# 执行的任务名字,自定义
  user: name=tom  		# 运用模块执行的命令

# 运行yml文件之前可以检查语法
ansible-playbook p1

#2. 运行yml文件
ansible-playbook p1.yml

# 运行过程中如果报错会产生.retry文件,这个文件没有作用,可以删除
一.playbook格式
基本格式与重要参数
Usage: ansible-playbook [options] playbook.yml [playbook2 ...]

-C, --check 			#检查执行,执行但是不会有结果
--list-hosts 			#列出符合的主机
-f FORKS, --forks=FORKS #做并发
--syntax-check 			#检查语法
-k, --ask-pass 			#输入密码
-t TAGS, --tags=TAGS  	# 执行指定标签
1.单个playbook
示例: 使用user模块添加用户
- hosts: web
  remote_user: root
  tasks:
  - name: createuser
    user: name=tom20 home=/opt/tom20 uid=4000
2.多个playbook
- hosts: web
  remote_user: root
  tasks:
  - name: createuser
    user: name=tom20 home=/opt/tom20 uid=4000
  - name: copyfile
    copy: src=/etc/fstab dest=/tmp/fs
play-book具有幂等性 不论执行多少次,得到的结果都是一样的
幂等性
- 在某二元运算下,幂等元素是指被自己重复运算(或对于函数是为复合)的结果等于它自己的元素。例如,乘法下唯一两个幂等实数为0和1。
- 某一元运算为幂等的时,其作用在任一元素两次后会和其作用一次的结果相同。例如,高斯符号便是幂等的。
- hosts: web
  remote_user: root
  tasks:
  - name: createuser
    user: name=tom20 home=/opt/tom20 uid=4000
  - name: copyfile
    copy: src=/etc/fstab dest=/tmp/fs
- hosts: db
  tasks:
  - name: copyfile
    copy: src=/etc/fstab dest=/tmp/fs
二.传参
第一种方式
执行命令时,加-e来指定参数
- hosts: web
  tasks:
  - name: create{{user}}
    user: name={{user}}
ansible-playbook -e user=BOB20 p3.yml
第二种方式
在/etc/ansible/hosts文件中的主机名后加参数
[web]
192.168.226.[101:102] user=tom30
192.168.226.104  user=tom100
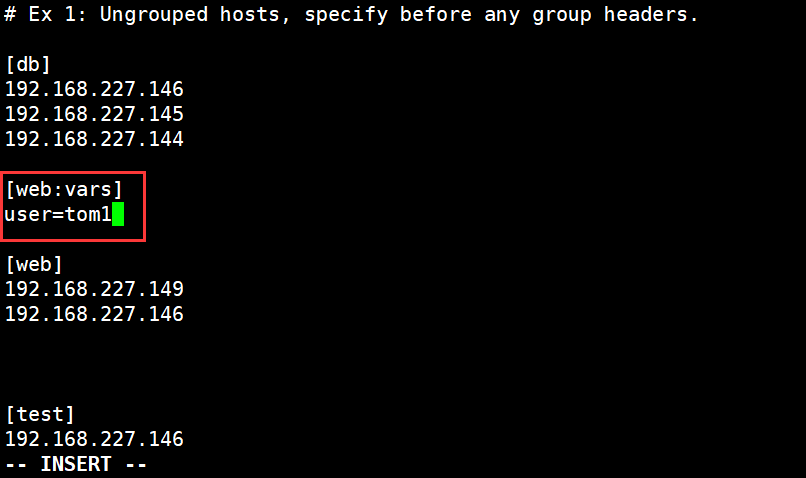
第三种方式
在/etc/ansible/hosts文件中专门加上一个组
[web:vars]  # web是自定义的组, :vars 必须这么写
user=tom31
第四种方式
在要执行的yml文件中添加vars
- hosts: web
  vars:  # 这一行
  - user: tom32
  tasks:
  - name: create{{user}}
    user: name={{user}}
第五种传参方式
使用register
- hosts: web
  tasks:
  - name: yum
    yum: name=bc
  - name: sum
    shell: echo 11+22|bc  # bc用于加法 安装方式为 yum install bc
    register: user  #  注册,将上面的返回值注册到下面,所有有返回值的都可以,不一定是shell
  - name: echo
    shell: echo {{user.stdout}} > /tmp/echo.txt
  - name: create{{user.stdout}}
    user: name=tom{{user.stdout}}
参数执行优先级
命令行 -e 参数 > playbook的yuml文件 > hosts文件
三.模块
1.setup模块
ansible命令执行自定义命令的默认第一个走的就是setup, 就是说要想ansible连接被控机,首先必须要实现setup模块,下面是执行之后返回的一些重要参数
ansible_all_ipv4_addresses #所有的ipv4地址
ansible_all_ipv6_addresses #所有的ipv6地址
ansible_architecture #系统的架构
ansible_date_time #系统时间
ansible_default_ipv4 #默认的ipv4地址
	address ip地址
	alias 网卡名称
	broadcast 广播地址
	gateway 网关
	netmask 子网掩码
	network 网段
ansible_default_ipv6 #默认的ipv6地址
ansible_device_links #系统的磁盘信息
ansible_distribution #系统名称
ansible_distribution_file_variety #系统的基于公司
ansible_distribution_major_version #系统的主版本
ansible_distribution_version #系统的全部版本
ansible_dns #系统的dns 默认udp 端口53
ansible_domain #系统的域 ldap
ipv4 #ipv4地址
ansible_env #系统的环境
ansible_fqdn #系统的完整主机名
ansible_hostname #系统的简写主机名
ansible_kernel #系统的内核版本
ansible_machine #系统的架构
ansible_memtotal_mb #系统的内存
ansible_memory_mb #系统的内存使用情况
ansible_mounts #系统的挂载信息
ansible_os_family #系统家族
ansible_pkg_mgr #系统的包管理工具
ansible_processor #系统的cpu
ansible_processor_cores #每颗cpu的核数
ansible_processor_count #cpu的颗数
ansible_processor_vcpus #cpu的个数=cpu的颗数*每颗cpu的核数
ansible_python #系统python信息
ansible_python_version #系统python的版本
ansible_system #系统名字
2.tags
在yuml文件中加入tags:属性,ansible-playbook -t tagname yuml.yml 可以仅直接执行tags所在的这个模块命令
- hosts: web
  tasks:
  - name: install
    yum: name=redis
  - name: copyfile
    copy: dest=/etc/redis.conf src=/etc/redis.conf
    tags: copy
  - name: start
    service: name=redis state=started
ansible-playbook -t copy p7.yml
3.handlers
添加notify参数指定handler的名称可以在ansible-playbook -t tagname yuml.yml之后自动执行handler中的内容, 直接执行这个yml文件,则handlers不执行
- hosts: web
  tasks:
  - name: install
    yum: name=redis
  - name: copyfile
    copy: dest=/etc/redis.conf src=/etc/redis.conf
    tags: copy
    notify: restart
  - name: start
    service: name=redis state=started
  handlers:
  - name: restart
    service: name=redis state=restarted
四.template
使用模版语言渲染变量,可以非常方便的执行渲染变量
下面实现的是配置redis.conf文件实现监听被控机的ip地址,在redis.conf中配置如下
bind {{ansible_default_ipv4.address}}
# setup中的参数,直接拿过来渲染,因为ansible连接必先执行setup
绝对路径
- hosts: web
  tasks:
  - name: install
    yum: name=redis
  - name: copyfile
    template: dest=/etc/redis.conf src=/etc/redis.conf  # 这里的src是绝对路径
    tags: copy
    notify: restart
  - name: start
    service: name=redis state=started
  handlers:
  - name: restart
    service: name=redis state=restarted
相对路径
给conf文件加后缀 : mv redis.conf{,.j2} = mv redis.conf redis.conf.j2
- hosts: web
  tasks:
  - name: install
    yum: name=redis
  - name: copyfile
    template: dest=/etc/redis.conf src=redis.conf.j2  # 这里的src是相对路径
    tags: copy
    notify: restart
  - name: start
    service: name=redis state=started
  handlers:
  - name: restart
    service: name=redis state=restarted
在当前目录下创建一个templates的目录,就可以使用相对路径
vi编辑器使用小技巧 : d$ 从当前位置删除到结尾
五.嵌套循环
1.when
判断centos系统版本为7或者6时执行的动作
- hosts: web
  tasks:
  - name: copyfile
    copy: content="大弦嘈嘈如急雨" dest=/tmp/a.txt
    when: ansible_distribution_major_version=="7"
  - name: copyfile
    copy: content="小弦切切如私语" dest=/tmp/a.txt
    when: ansible_distribution_major_version=="6"
- hosts: web
  tasks:
  - name: copyfile
    copy: content="大弦嘈嘈如急雨" dest=/tmp/a.txt
    when: user=="4"
  - name: copyfile
    copy: content="小弦切切如私语" dest=/tmp/a.txt
    when: user=="3"
2.with_items
遍历选项
示例1
- hosts: web
  tasks:
  - name: createuser
    user: name={{item}}
    with_items:
    - tom50
    - Robert50
    - mike50
示例2, 当两组循环时
- hosts: web
  tasks:
  - name: createuser
    user: name={{item}}
    with_items:
    - tom51
    - BOB51
    - mike51
  - name: creategroup
    group: name={{item}}
    with_items:
    - tom60
    - BOB60
    - mike60
嵌套循环
- hosts: web
  tasks:
  - name: crateuser
    user: name={{item.name}}  group={{item.group}}
    with_items:
    - {"name":tom52,"group":tom60}
    - {"name":BOB52,"group":BOB60}
    - {"name":mike52,"group":mike60}