下面通过地图持续定位的方式,完成App进入后台保存成功继续运行:
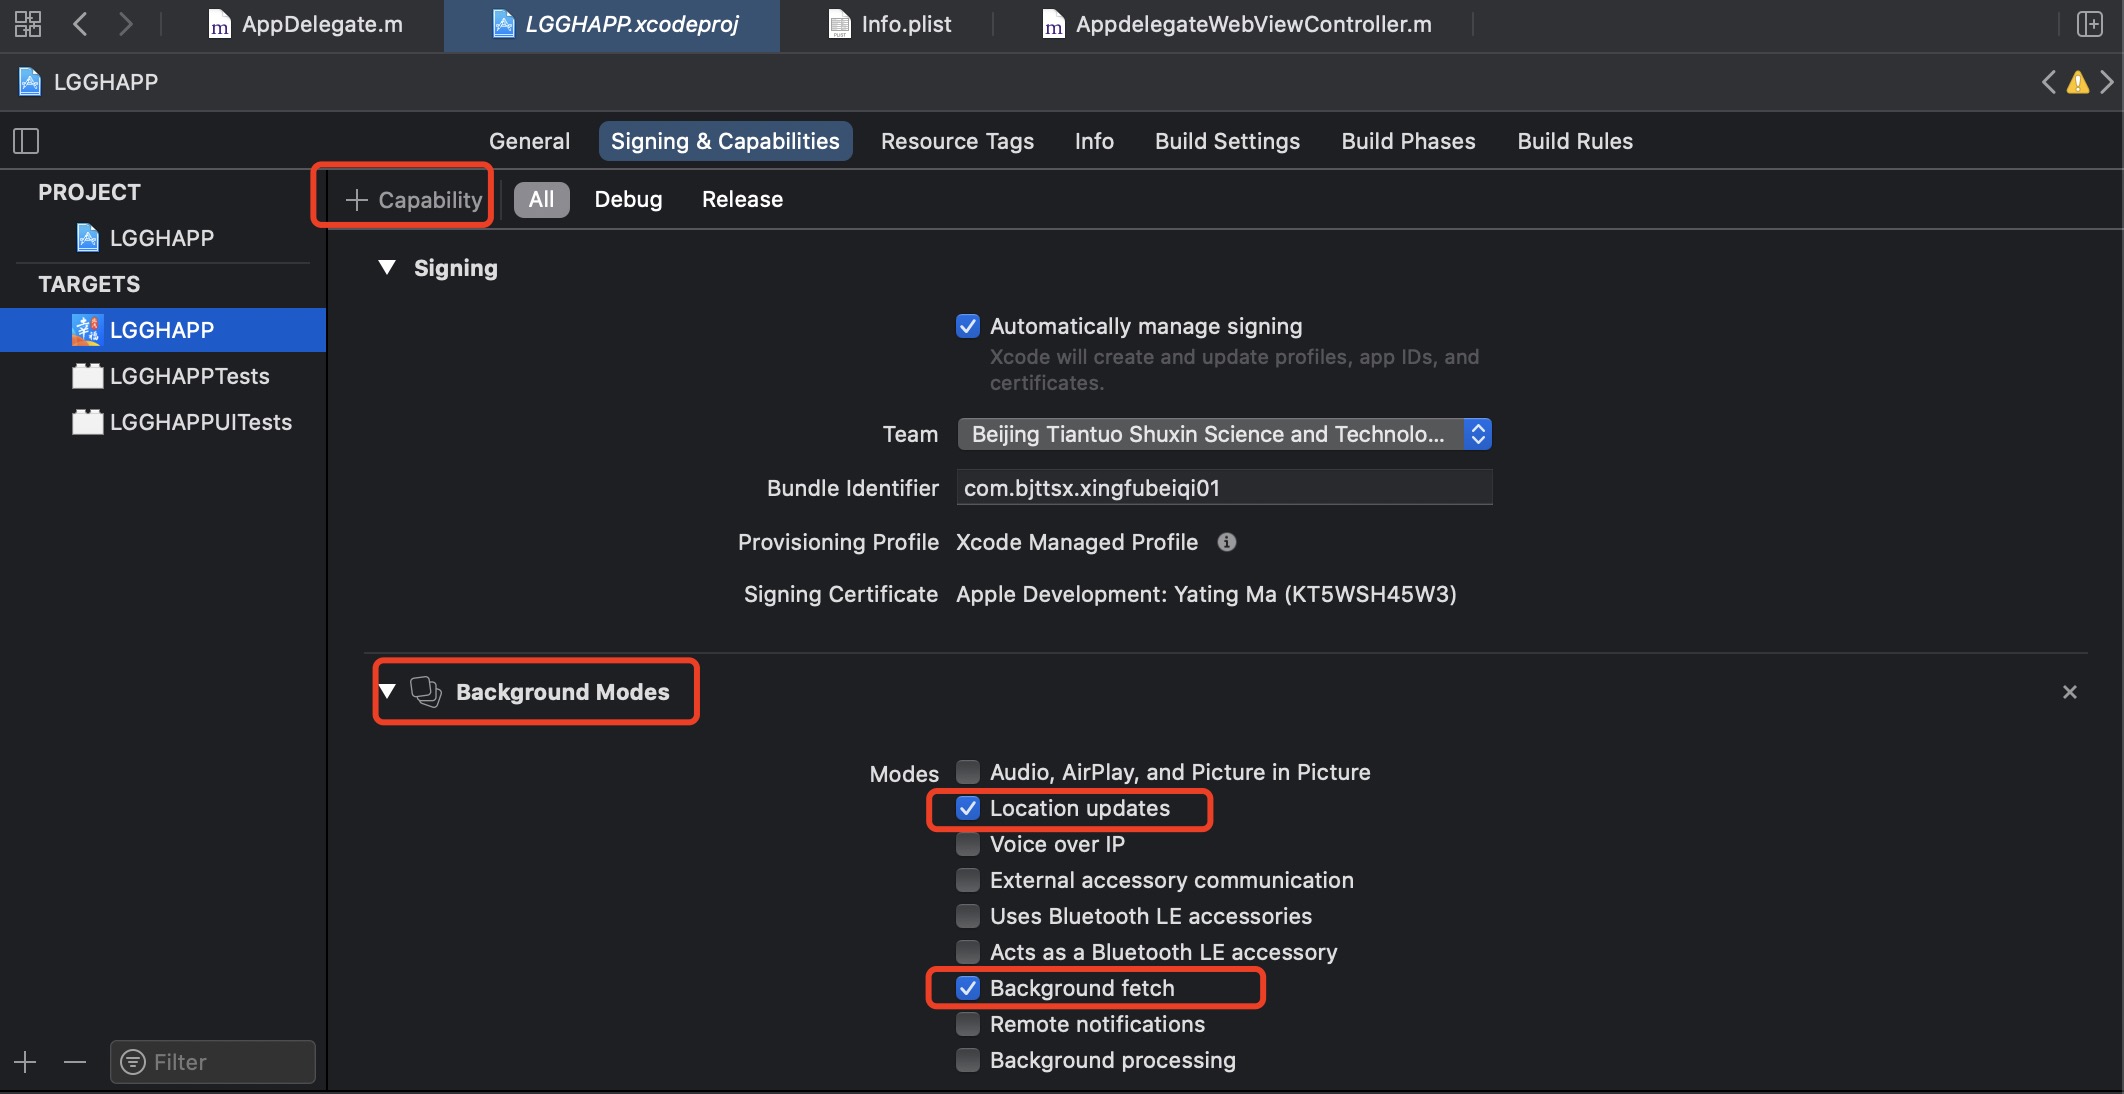
第一步:开启后台服务
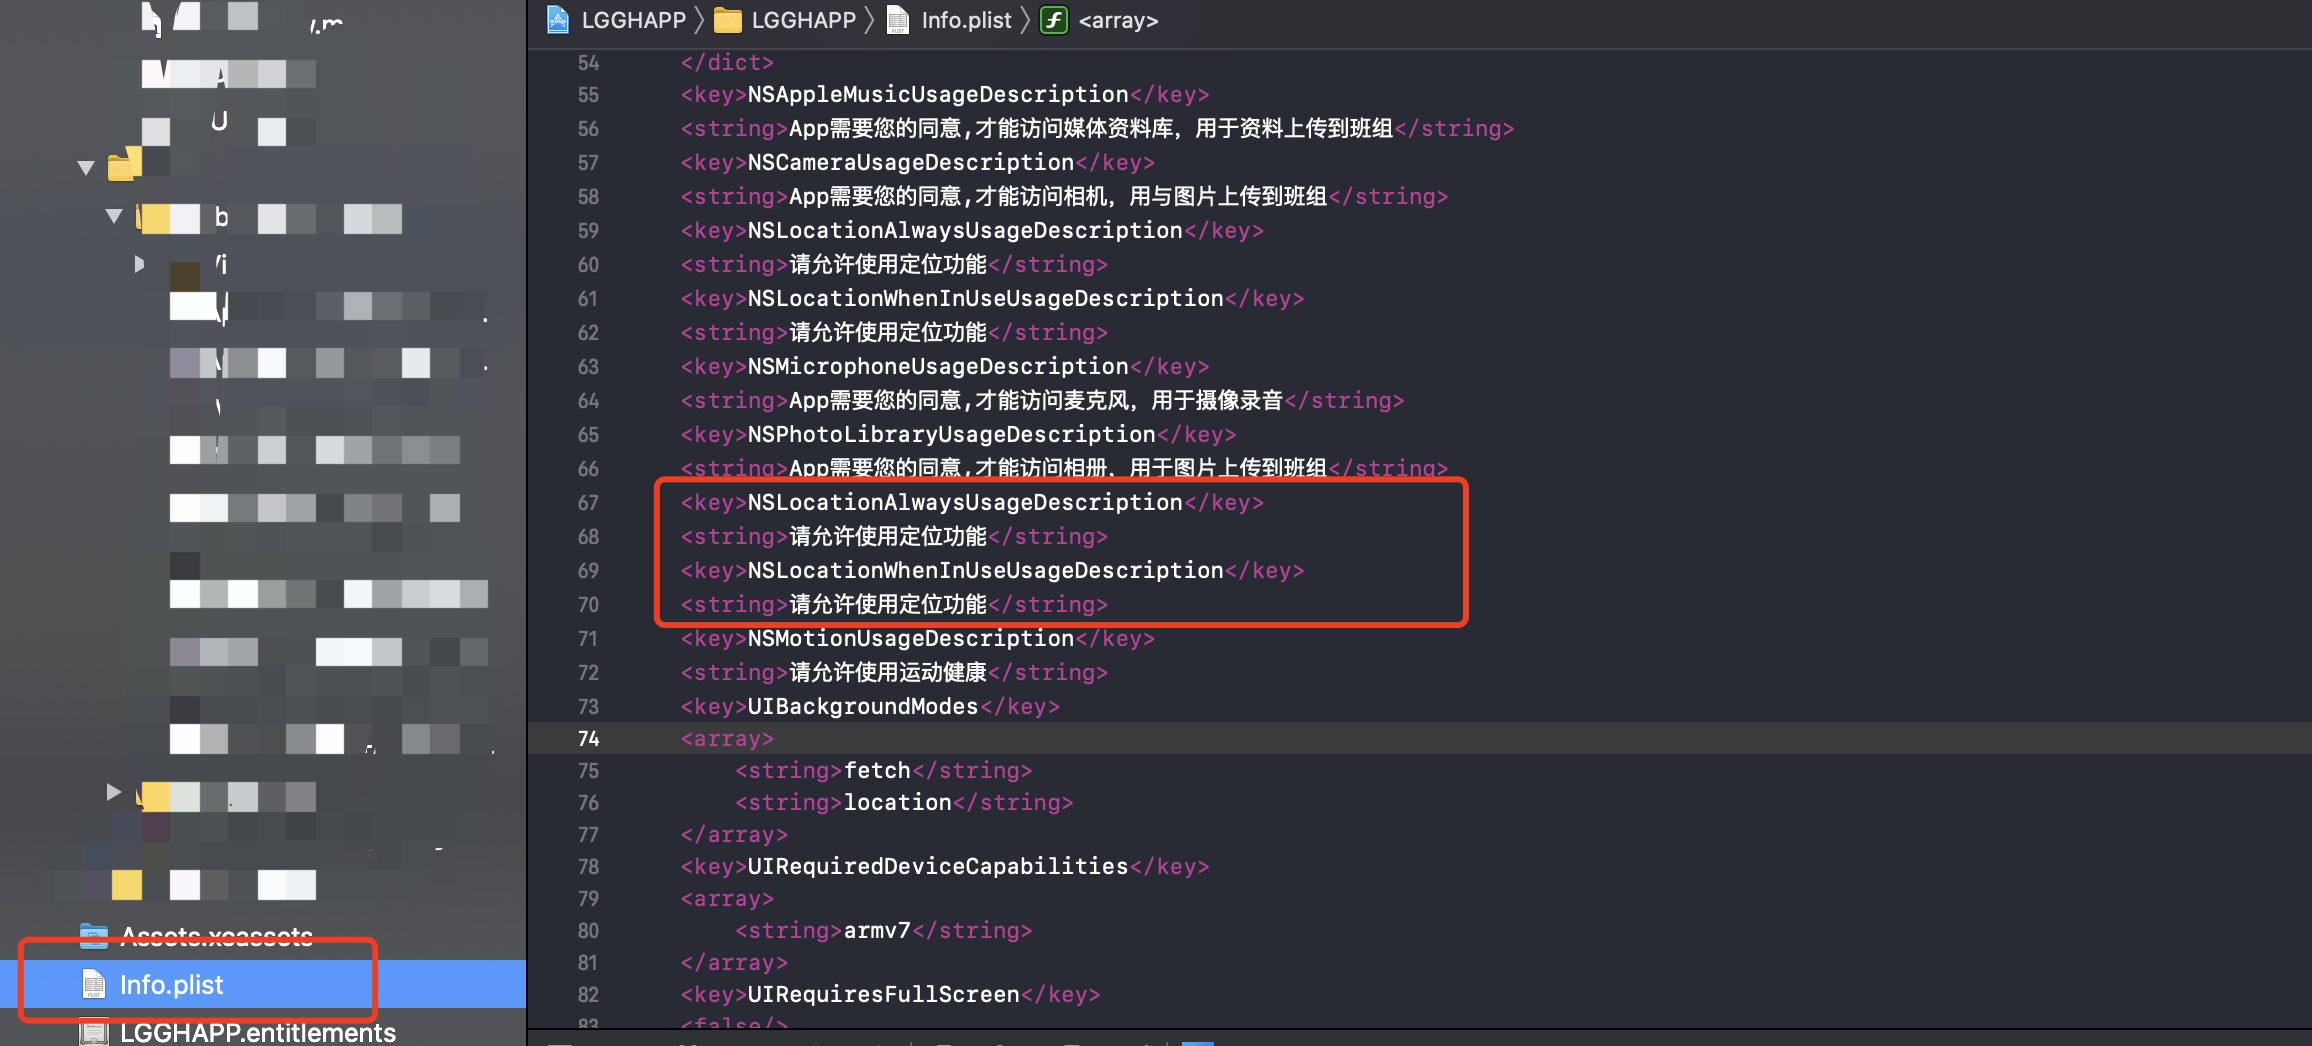
第二步:在info.l <key>NSLocationAlwaysUsageDescription</key>
    <string>请允许使用定位功能</string>
    <key>NSLocationWhenInUseUsageDescription</key>
    <string>请允许使用定位功能</string<key>UIBackgroundModes</key>
<key>UIBackgroundModes</key>
<array>
<string>fetch</string>
<string>location</string>
</array>
第三步:创建CLLocationManager对象,并且设置CLLocationManagerDelegate的代理
#import <CoreLocation/CLLocationManager.h>
<CLLocationManagerDelegate>
@property (nonatomic, strong) CLLocationManager *locationManager;
@property (nonatomic , strong)dispatch_source_t timer;
#pragma mark - 应用进入后台执行定位 保证进程不被系统kill
-(void)rjxContinuedLocationManager
{
    //1.创建定位管理对象
    _locationManager = [[CLLocationManager alloc]init];

    //2.设置属性 distanceFilter、desiredAccuracy
    [_locationManager setDistanceFilter:kCLDistanceFilterNone];//实时更新定位位置
    [_locationManager setDesiredAccuracy:kCLLocationAccuracyBest];//定位精确度
    if([_manager respondsToSelector:@selector(requestAlwaysAuthorization)]){
        [_locationManager requestAlwaysAuthorization];
    }
    //该模式是抵抗程序在后台被杀,申明不能够被暂停
    _locationManager.pausesLocationUpdatesAutomatically = NO;

    if ([[[UIDevice currentDevice] systemVersion] floatValue] >= 8) {
        //在后台也可定位
        [_locationManager requestAlwaysAuthorization];
    }
    if ([[[UIDevice currentDevice] systemVersion] floatValue] >= 9) {
        _locationManager.allowsBackgroundLocationUpdates = YES;
    }
    //3.设置代理
    _locationManager.delegate = self;
    //4.开始定位
    [_locationManager startUpdatingLocation];
    //5.获取朝向
    [_locationManager startUpdatingHeading];
    NSLog(@"_locationManager---%@",_locationManager);

    // 一.请求接口获取时间间隔,开启定时器,纪录当前当前的时间
    [self startTimeWithInterval:5.0];
}

// 开启定时器
- (void)startTimeWithInterval:(double)time {
    // 纪录当前的时间
    self.startdata = [NSDate date];

    NSTimeInterval period = time;//设置时间间隔
    dispatch_queue_t queue = dispatch_get_global_queue(DISPATCH_QUEUE_PRIORITY_DEFAULT, 0);
    _timer = dispatch_source_create(DISPATCH_SOURCE_TYPE_TIMER, 0, 0, queue);
    dispatch_source_set_timer(_timer, DISPATCH_TIME_NOW, period * NSEC_PER_SEC, 0 * NSEC_PER_SEC);
    dispatch_source_set_event_handler(_timer, ^{
        dispatch_async(dispatch_get_main_queue(), ^{
            // 调用上传步数的方法
            NSLog(@"11111");
            [self getHealthStep];
        });
    });
    dispatch_resume(_timer);
}
- (void)applicationDidEnterBackground:(UIApplication *)application {
    // Use this method to release shared resources, save user data, invalidate timers, and store enough application state information to restore your application to its current state in case it is terminated later.
    // If your application supports background execution, this method is called instead of applicationWillTerminate: when the user quits.
    NSLog(@"2-------applicationDidEnterBackground");

    UIApplication *app = [UIApplication sharedApplication];
        __block  UIBackgroundTaskIdentifier bgTask;
        bgTask = [app beginBackgroundTaskWithExpirationHandler:^{
            dispatch_async(dispatch_get_main_queue(), ^{

                if (bgTask != UIBackgroundTaskInvalid){
                    bgTask = UIBackgroundTaskInvalid;

                    NSLog(@"=========");

                }
            });
        }];
        dispatch_async(dispatch_get_global_queue(DISPATCH_QUEUE_PRIORITY_DEFAULT, 0), ^{
            dispatch_async(dispatch_get_main_queue(), ^{
                if (bgTask != UIBackgroundTaskInvalid){
                    bgTask = UIBackgroundTaskInvalid;

                    NSLog(@"---------------");

                }
            });
        });

        [self.locationManager startUpdatingLocation];
}
第四步:在didFinishLaunchingWithOptions方法里面调用rjxContinuedLocationManager这个方法
- (BOOL)application:(UIApplication *)application didFinishLaunchingWithOptions:(NSDictionary *)launchOptions {

    //地图定位
    [self rjxContinuedLocationManager];

    /** 应用进入后台执行定位 保证进程不被系统kill */
   [[UIApplication sharedApplication] beginReceivingRemoteControlEvents];
   [self.locationManager startUpdatingLocation];

    return YES;
}