一、安装node环境(自带npm)

二、替换下载源
// 淘宝 NPM 镜像
npm install -g cnpm --registry=https://registry.npm.taobao.org

三、全局安装vue-cli脚手架
npm install --global vue-cli
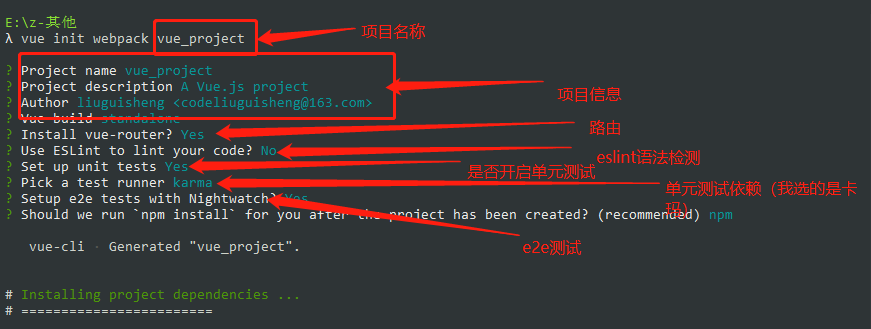
四、vue2.* webpack模板下载
vue init webpack vue_project
五、安装vuex
npm install vuex --save

在main.js中注入vuex
// vuex
import Vuex from 'vuex'
Vue.use(Vuex)
六、安装axios
npm install axios --save

在main.js导入并全局使用
// axios请求
import axios from "axios"
Vue.prototype.$axios = axios
七、安装elementUI
npm install element-ui --save

在main.js中引入elementUI
// element样式框架
import ElementUI from 'element-ui'
import 'element-ui/lib/theme-chalk/index.css'
Vue.use(ElementUI)
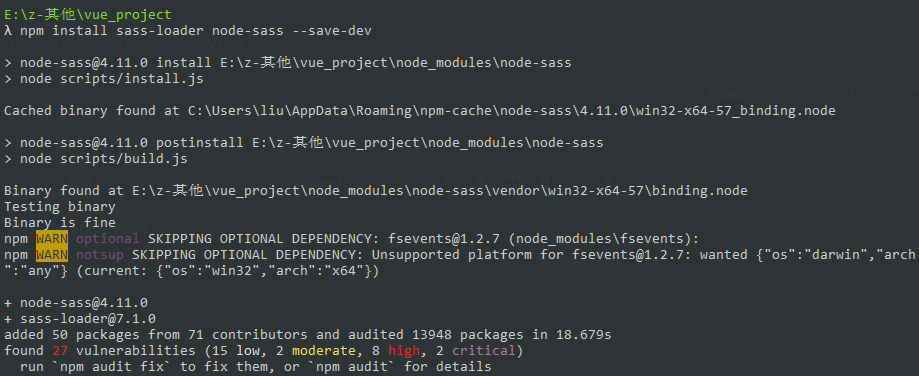
八、vue项目使用sass
npm install sass-loader --save-dev
npm install node-sass --save-dev

//连写
npm install sass-loader node-sass --save-dev
想要使用sass,需要修改build目录下的webpack.base.conf.js文件,增加以下规则:
{
  test: /.sass$/,
  loaders: ['style', 'css', 'sass',"scss"]
}
在组件中使用sass语法
<style lang="scss">

  $size:50px;
  html {
    font-size: $size;
  }

</style>
或者外部引用:
<style lang="scss">

  @import "./main.scss"
  // 或者
  // @import url(./main.scss);

</style>
若出现:
Modele build failed: TypeError: this.getResolve is not a function at Object.loader...
是因为sass-loader版本过高,webpack编译不过去,降级即可
"sass-loader": "^8.0.0",更换成"sass-loader": "^7.3.1",
九、修改webpack配置,新增项目启动方式
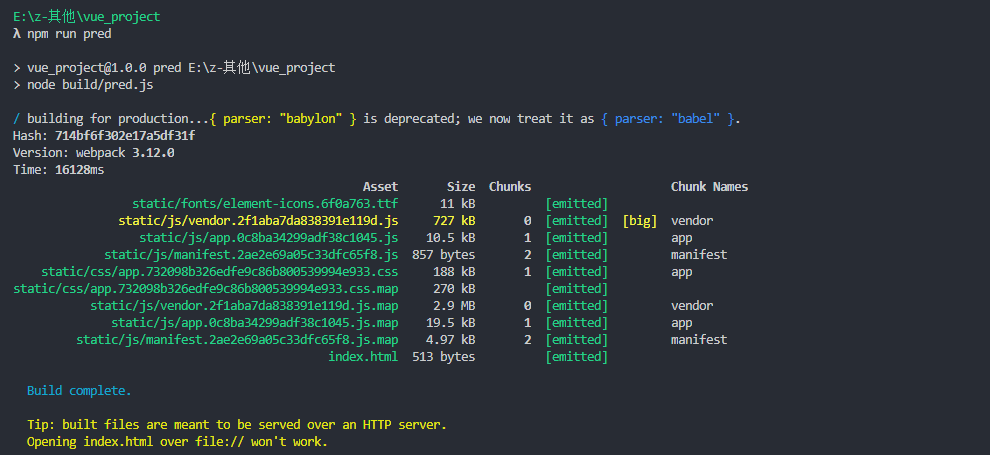
以 pred 为例:
1,首先更改package.json配置

2,在build目录下增加pred.js,内容和build.js文件相同,更改以下三处变量即可

3.修改build目录下webpack.prod.conf.js配置,替换如下代码:
'use strict'
const path = require('path')
const utils = require('./utils')
const webpack = require('webpack')
const config = require('../config')
const merge = require('webpack-merge')
const baseWebpackConfig = require('./webpack.base.conf')
const CopyWebpackPlugin = require('copy-webpack-plugin')
const HtmlWebpackPlugin = require('html-webpack-plugin')
const ExtractTextPlugin = require('extract-text-webpack-plugin')
const OptimizeCSSPlugin = require('optimize-css-assets-webpack-plugin')
const UglifyJsPlugin = require('uglifyjs-webpack-plugin')

/** 删除内容
  const env = process.env.NODE_ENV === 'testing'
  ? require('../config/test.env')
  : require('../config/prod.env')
*/

// 替换成
  const ENV_MAP = {
    'testing': require('../config/test.env'),
    'production': require('../config/prod.env'),
    'pred': require('../config/pred.env')
  }
  const env = process.env.NODE_ENV = ENV_MAP[process.env.NODE_ENV];
4.在config目录新增 pred.env.js文件,内容如下
'use strict'
module.exports = {
  NODE_ENV: '"pred"'
}
5.修改config目录下的index.js,复制build对象并修改成pred
build: {
    // Template for index.html
    index: path.resolve(__dirname, '../dist/index.html'),

    // Paths
    assetsRoot: path.resolve(__dirname, '../dist'),
    assetsSubDirectory: 'static',
    assetsPublicPath: '/',

    /**
     * Source Maps
     */

    productionSourceMap: true,
    // https://webpack.js.org/configuration/devtool/#production
    devtool: '#source-map',

    // Gzip off by default as many popular static hosts such as
    // Surge or Netlify already gzip all static assets for you.
    // Before setting to `true`, make sure to:
    // npm install --save-dev compression-webpack-plugin
    productionGzip: false,
    productionGzipExtensions: ['js', 'css'],

    // Run the build command with an extra argument to
    // View the bundle analyzer report after build finishes:
    // `npm run build --report`
    // Set to `true` or `false` to always turn it on or off
    bundleAnalyzerReport: process.env.npm_config_report
  },
  pred: {
    // Template for index.html
    index: path.resolve(__dirname, '../dist/index.html'),

    // Paths
    assetsRoot: path.resolve(__dirname, '../dist'),
    assetsSubDirectory: 'static',
    assetsPublicPath: '/',

    /**
     * Source Maps
     */

    productionSourceMap: true,
    // https://webpack.js.org/configuration/devtool/#production
    devtool: '#source-map',

    // Gzip off by default as many popular static hosts such as
    // Surge or Netlify already gzip all static assets for you.
    // Before setting to `true`, make sure to:
    // npm install --save-dev compression-webpack-plugin
    productionGzip: false,
    productionGzipExtensions: ['js', 'css'],

    // Run the build command with an extra argument to
    // View the bundle analyzer report after build finishes:
    // `npm run build --report`
    // Set to `true` or `false` to always turn it on or off
    bundleAnalyzerReport: process.env.npm_config_report
  }
6,控制台输入 npm run pred,看到如下内容即成功: