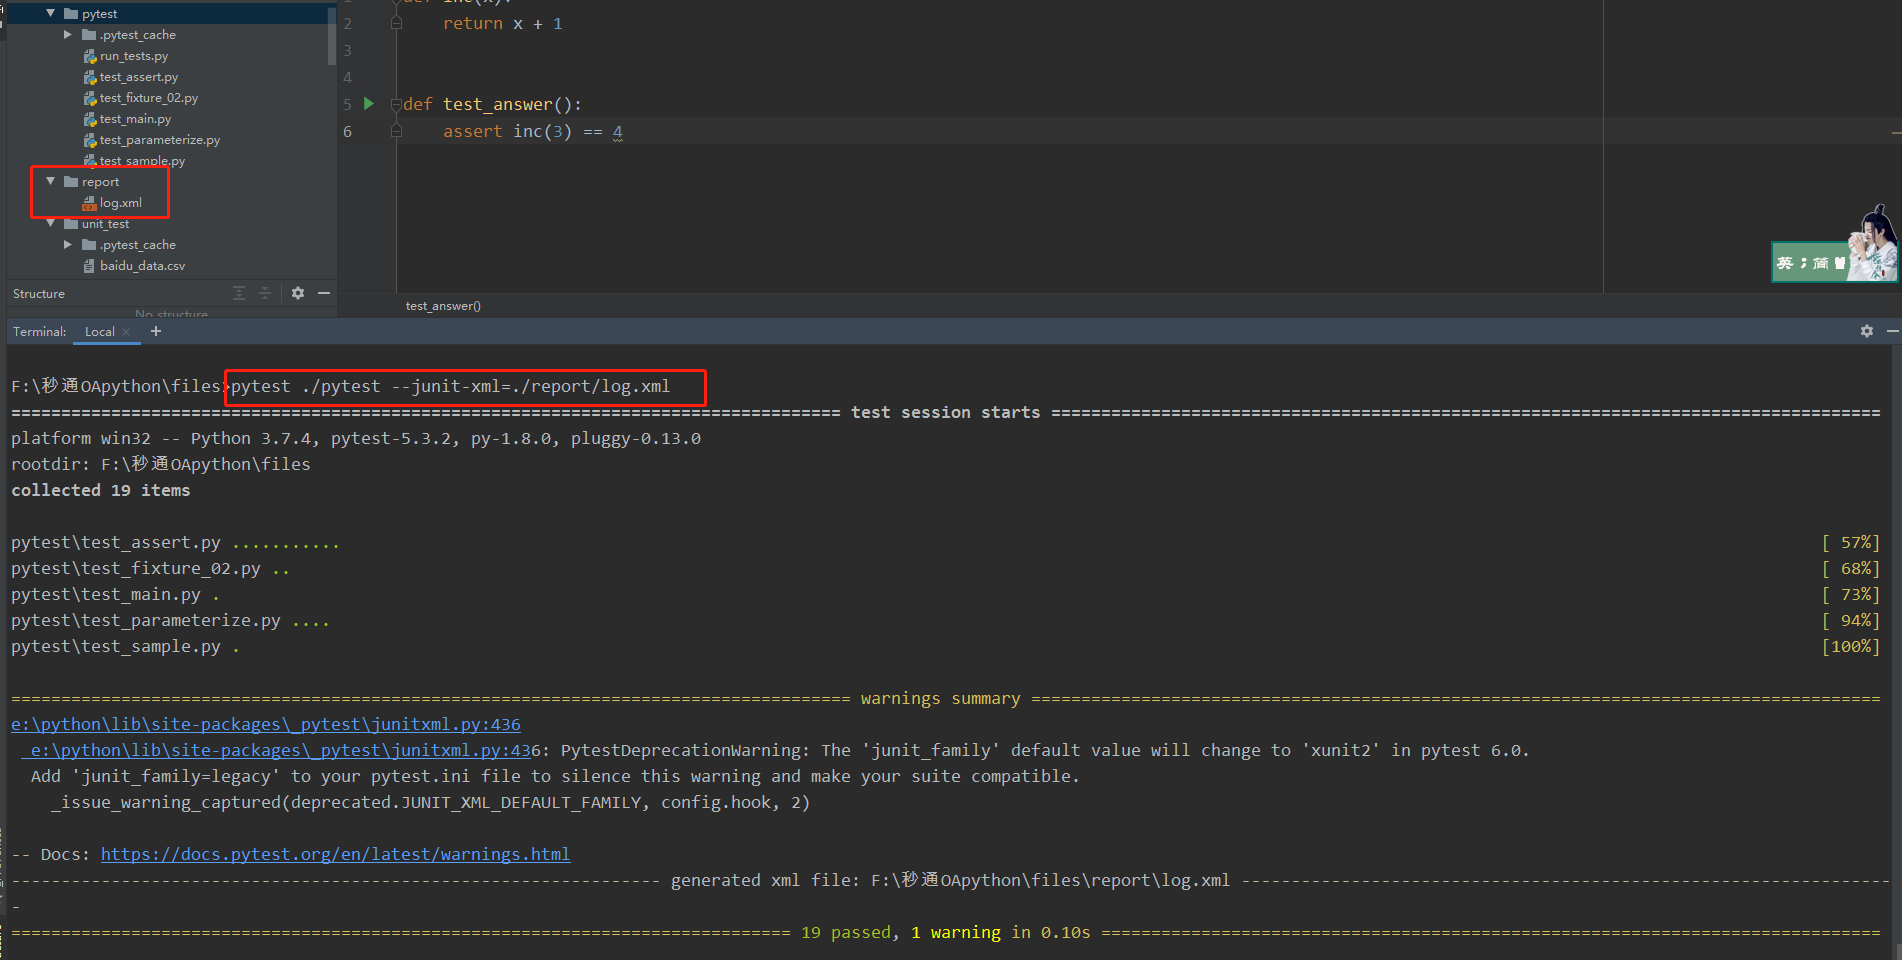
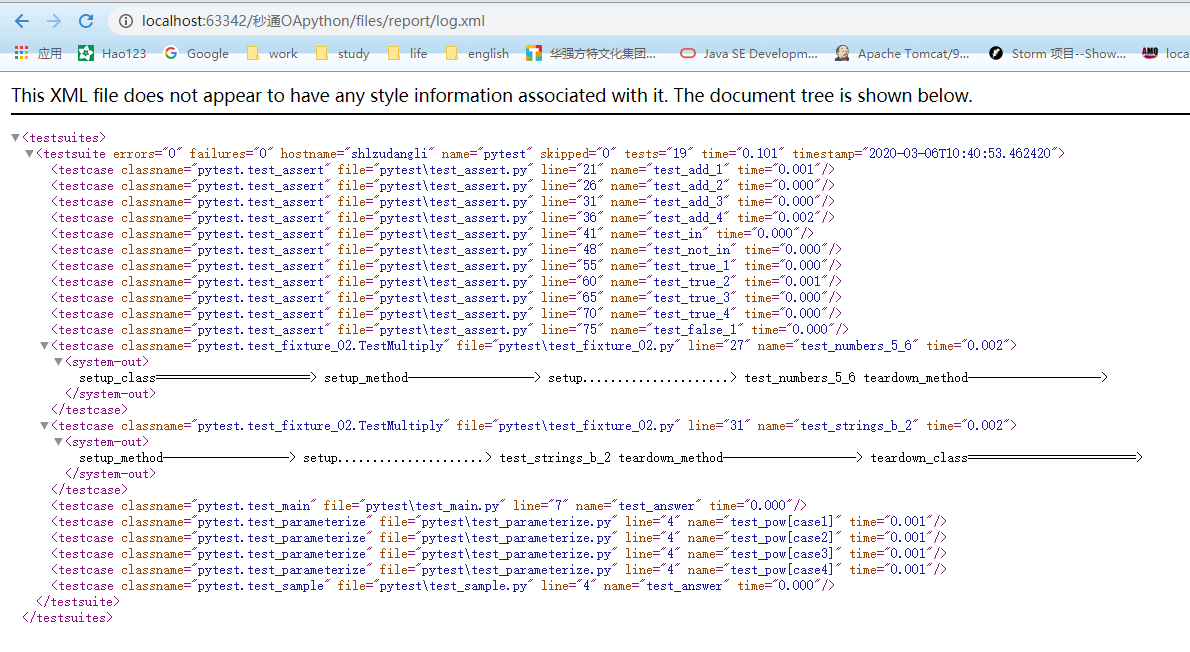
1.生成JUnit XML文件 pytest dir --junit-xml=**/log.xml

XML类型的日志主要用于存放测试结果,方便利用里面的数据定制自己的测试报告。

2.生成在线测试报告 pytest dir --pastebin=all

这条命令可生成一个session-log链接,复制链接,通过浏览器打开,会得到一张HTML格式的测试报告

3.conftest.py
conftest.py是pytest特有的本地测试配置文件,既可以用来设置项目级别的Fixture,也可以用来导入外部插件,还可以用来指定钩子函数。
创建test_project/conftest.py测试配置文件
1 import pytest
2
3 # 设置测试钩子
4 @pytest.fixture()
5 def test_url():
6     return "http://www.baidu.com"
创建test_project/test_sub.py
1 def test_baidu(test_url):
2     print(test_url)
这里创建的函数可以直接调用conftest.py文件中的test_url()钩子函数,测试结果如下:

需要说明的是,conftest.py只作用于它所在的目录及子目录。
4.pytest-html
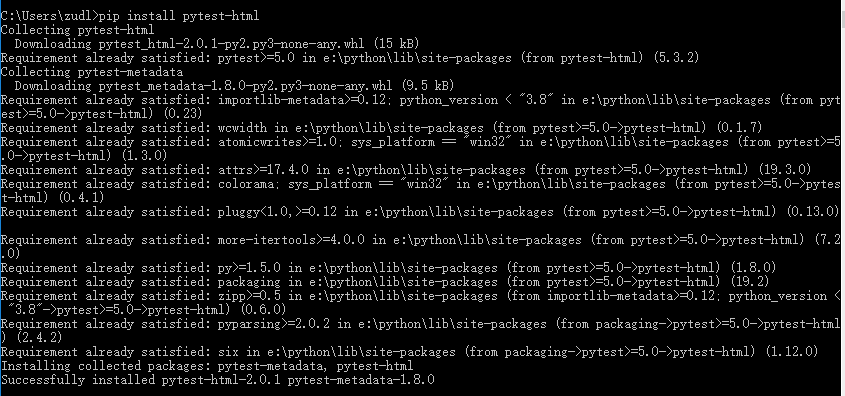
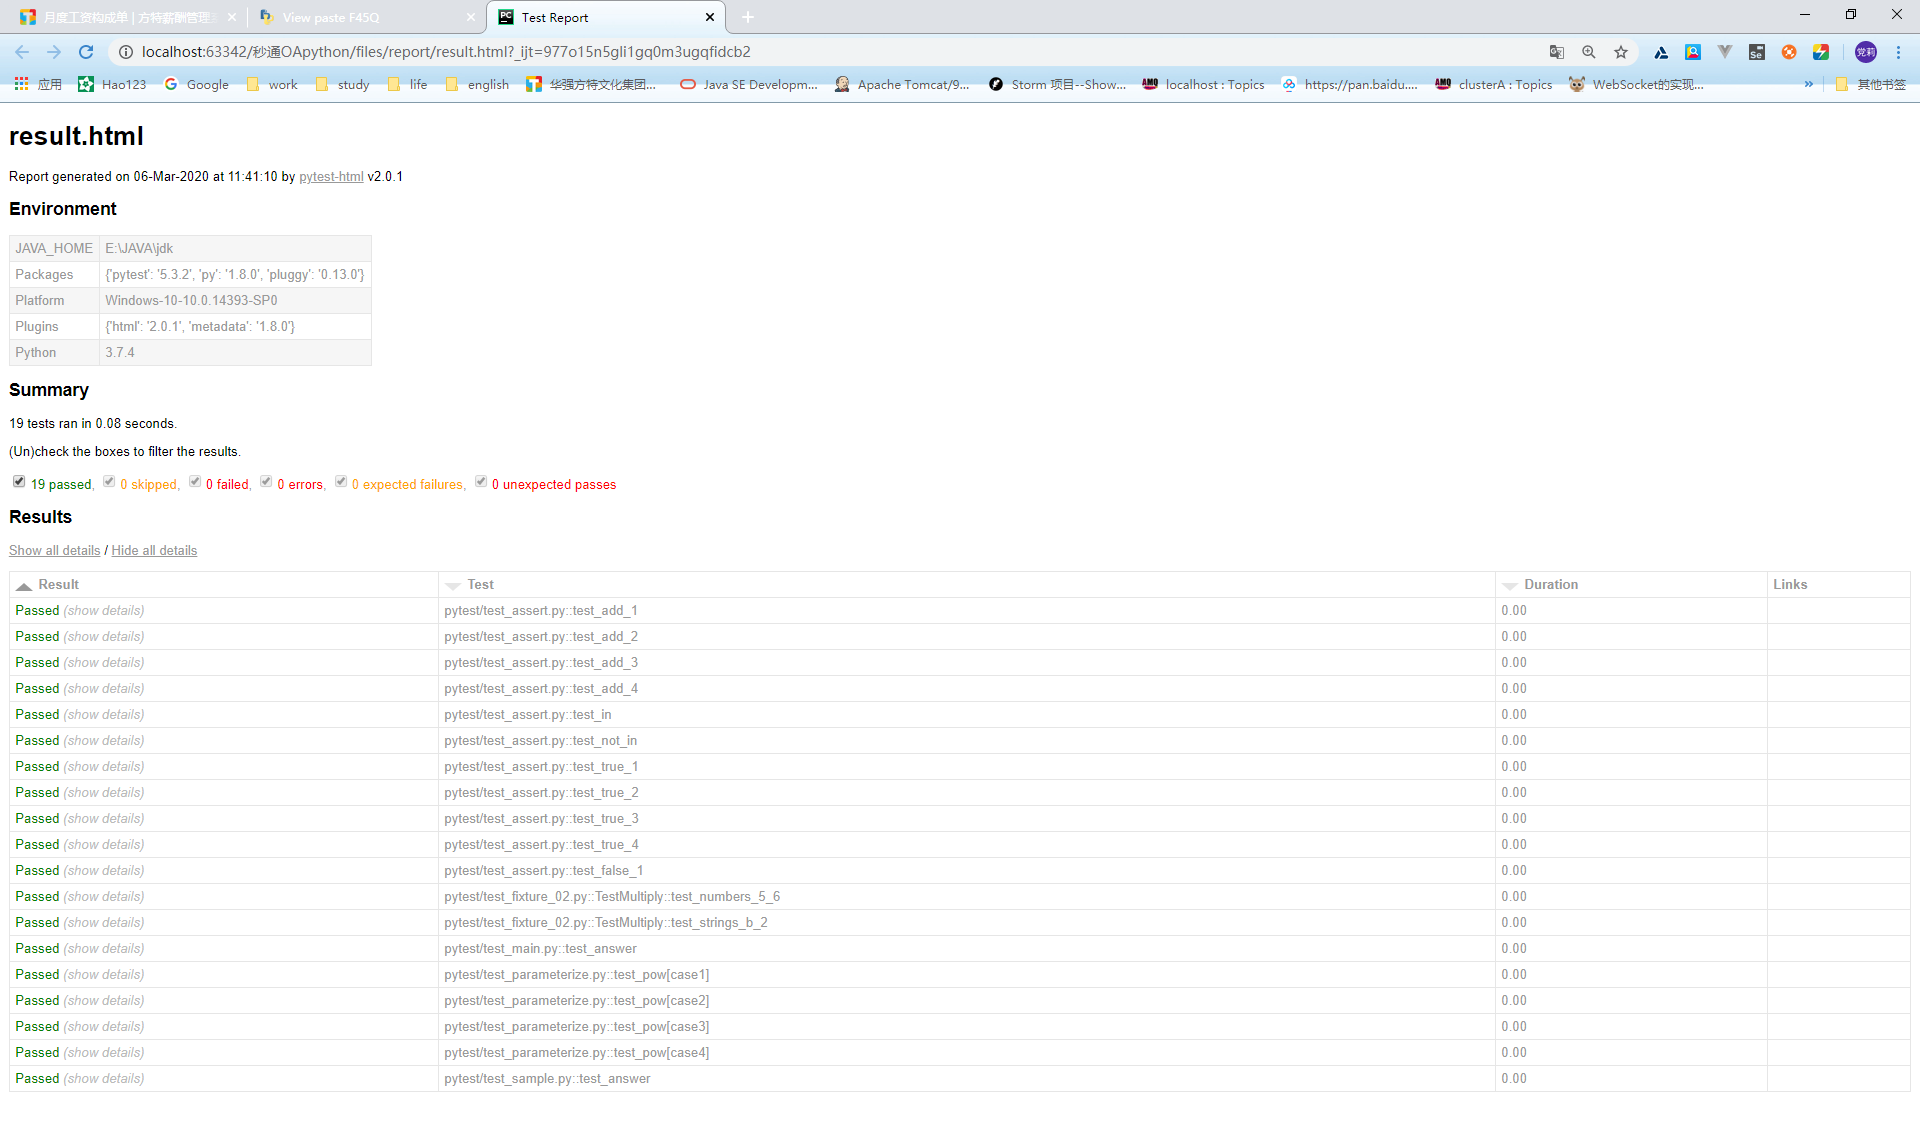
pytest-html可以生成HTML格式的测试报告。首先通过pip命令安装pytest-html扩展 pip install pytest-html

>pytest ./pytest --html=./report/result.html


pytest-html还支持测试用例失败的截图,这对Web自动化测试来说非常有用。
6.pytest-rerunfailures
用来在测试用例执行士百士进行重试的。创建test_rerunfailures.py:
1 def test_fail_rerun():
2     assert 2 + 2 == 5

从运行结果可以看到,在测试用例运行失败后进行了三次重试,因为Web自动化测试会因为网络等因素导致测试用例执行失败,而重试机制可以增加测试用例的稳定性。
7.pytest-parallel-实现测试用例的并行运行
安装:>pip install pytest-parallel
创建test_parallel.py文件:
 1 from  time import sleep
 2
 3 def test_01():
 4     sleep(3)
 5
 6 def test_02():
 7     sleep(5)
 8
 9 def test_03():
10     sleep(6)

不使用线程运行测试用例 ,勇士14.07s,使用线程>pytest test.py --tests-per-worker auto

虽然并行运行测试可以非常有效地缩短测试的运行时间,但是Web自动化测试本身非常脆弱,在运行并行测试时很可能会产生相互干扰,从而导致测试用例失败。