http://www.haroldnguyen.com/blog/2015/01/setting-up-storm-and-running-your-first-topology/
------------------------------------------------------------------------------------------------------------------------
Setting up Storm and Running Your First Topology
This guide will setup Storm on a single Ubuntu instance, and show you how to run a simple Word Count Topology. This guide assumes no experience with Storm.
Storm was created by Nathan Marz, and is designed for real-time event processing, and improves on some of Hadoop’s distributed design. Storm provides excellent documentation, which you are highly encouraged to go through. If you’re pressed for time, though, the following guide gets you started with running a simple real-time event processor (this is called a topology, but I assume you haven’t read any documentation and just want to get the thing up and running. Though this puts you at a conceptual disadvantage, there’s nothing like getting your hands dirty right away).
Setting up Storm
First grab version 0.9.2 of Storm (already compiled version)
$ wget http://apache.mesi.com.ar/storm/apache-storm-0.9.2-incubating/apache-storm-0.9.2-incubating.tar.gz
Extract the files:
$ tar -zxvf apache-storm-0.9.2-incubating.tar.gz
Grab the latest version of maven:
$ sudo apt-get install maven
If you are on a Mac:
$ brew install maven
also set the JAVA_HOME path in Mac through the ~/.bash_profile file:
$ export JAVA_HOME=$(/usr/libexec/java_home)
Check the maven version to see that it installed correctly:
$ mvn -version

If you checked out the src version of Storm, you can build and install the Storm jars locally with the following command (requires pom.xml file). This doesn’t need to be done if you already downloaded the compiled version as this guide has shown. However, it’s worth noting now because you’ll be using this command to compile your projects if you modify any of the source code.
Instead of building jars for the Storm project (since we’ve checked out the compiled version), let’s build the jar file for the storm-starter example project. First go into the storm-starter project within the apache-storm-0.9.2-incubating/examples folder:
$ cd apache-storm-0.9.2-incubating/examples/storm-starter
Now compile and build the jar files:
$ mvn clean install -DskipTests=true
It should take a few minutes, and you’ll see a lot of output. At the end of the output, you should see:

You are now ready to run your first Storm job (called a “topology”). We are going to run the topology located in apache-storm-0.9.2-incubating/examples/storm-starter/src/jvm/storm/starter/WordCountTopology.java
Let’s run the topology first, and then go briefly into the details of what is happening.
In the storm-starter directory, issue:
$ mvn compile exec:java -Dstorm.topology=storm.starter.WordCountTopology
The whole process will take about 50 seconds, and you will see a whole bunch of output. The main thing to look for in this output is something like this:

It should occur near the middle of all the output being shown. The end of the output should a bunch of shutdown messages, along with a success message like this:

Congratulations! You have ran your first Storm topology!
Storm has a local mode (called “Local Cluster”) and a production-cluster mode. The local mode is helpful for development and debugging, while the production-cluster mode is intended to run in a production environment. You just submitted the WordCountTopology in local mode.
Let’s take a look at what you just did.
A Storm topology consists of “Spouts” and “Bolts”. You can think of Spouts as obtaining the data, and Bolts as transforming the data. In a topology, you typically have one or more Bolts stemming from one Spout. The “data” in a Storm topology is called a “Tuple”.

In the WordCountTopology, the Spout used is the RandomSentenceSpout:

RandomSetenceSpout is located at apache-storm-0.9.2-incubating/examples/storm-starter/src/jvm/storm/starter/spout/RandomSentenceSpout.java
If you take a peak at this file, you can see the sentences being used:

That explains our output in our example – the words being “emitted” are taken from these sentences. The nextTuple method is common in all Spouts, and determines what you want the Spout to do. As you can see, it is a method that is commonly overridden.
Let’s now take a look at the Bolts in WordCountTopology.java:

These bolts are methods defined with the same file (WordCountTopology.java). By their name, we can guess what they do. Let’s take a look at “SplitSentence”:

It looks like it is calling a python script called “splitsentence.py”. Doing a little digging, we find this script located in apache-storm-0.9.2-incubating/examples/storm-starter/multilang/resources/splitsentence.py
We’ve just stumbled upon a cool thing that Storm can do – bolts are allowed to be language-agnostic! This means, we can write our logic in any language we please. In this case, we are splitting sentences with Python! Here is the splitsentence.py logic:

As you can see, it’s splitting the sentences by a single space, and “emitting” each word in that sentence.
So our first bolt “SplitSentence” is actually a python script that splits the sentences into words. Let’s take a look at our second bolt, “WordCount”, which is defined in WordCountTopology.java:

As you can see, a HashMap called “counts” is created, which stores the counts of each word going through.
This is the basic and fundamental template of a Storm topology. All other topologies you see are just different variations on this.
Just for completeness, let’s take a look at the rest of WordCountTopology:

As you might guess based on the names of the variables, the rest of the file is used for configuration information.
conf.setDebug controls the verbosity of the output. The block of code within the “if” statement is configuration for production, and the block of code in the “else” statement is for local mode (which is what we just saw). The topology being submitted is called “word-count”, and we’ve asked the job to run for 10 seconds.
In the meantime, as a “homework” assignment, you are encouraged to get the ExplanationTopology.java working, located in examples/storm-starter/src/jvm/ExclamationTopology.java
If you are feeling ambitious, try modifying the input Spout (TestWordSpout.java), and see how things change. However, you will need to download the source version and build storm-core from scratch, as TestWordSpout.java is part of storm-core. Remember to issue the compile command at the top storm level after each modification of the code:
$ mvn clean install -DskipTests=true
Deploying Storm on Production
Package the project for use on a Storm cluster. For instance, in storm-starter, do:
$ mvn package
The package should be in:
target/storm-starter-{version}-jar-with-dependences.jar
You can check out the binary version of storm (as we did above), and use the “storm” command from there. You can also add the bin path to $PATH.
Read this to fill in the storm.yam part.
I only modified the following in storm.yam:
storm.zookeeper.servers:
– “localhost”
# – “server2”
nimbus.host: “localhost”
Then start nimbus, supervisor, and UI:
$ storm nimbus$ storm supervisor$ storm ui
(localhost:8080 by default)
Then, from the machine that has the storm-jar-dependencies.jar, submit it:
$ storm jar /Users/haroldnguyen/workspace/storm-tutorial/apache-storm-0.9.2-incubating-src/examples/storm-starter/target/storm-starter-0.9.2-incubating-jar-with-dependencies.jar storm.starter.ExclamationTopology production-topology-1
The logs are located in the binary version of storm/logs.
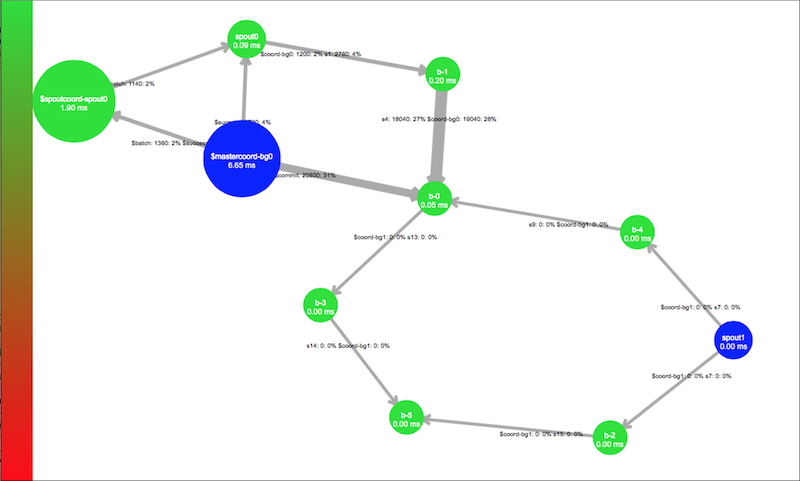
The storm ui is pretty neat, giving you a summary of running topologies and visualization:

If you still have trouble, please read through this excellent documentation on Running Topologies on a Production Cluster.
Conclusion
Congratulations – you went from knowing nothing about Storm to running a Word Count topology! The world is really your oyster!
In our next post, we’ll see how to connect Storm with Kafka!