docx 库
文章结构:
一、docx 基本用,创建 docx 文件并添加数据
二、深入理解文本格式(format),并设置所格式属性(attribute)
三、深入理解样式(styles),以及如何运用样式
四、常用样式(style)示例
一、docx基本用法,创建docx 文件并添加数据
官方文档:https://python-docx.readthedocs.org/en/latest/
docx 可以操作 doxc 格式文件
linux 安装 sudo pip install python_docx (不要安装错了,python_docx 是新版本,如果只是安装 docx 有些 API 会不匹配)
windows 安装 pip install python_docx
基本用法:
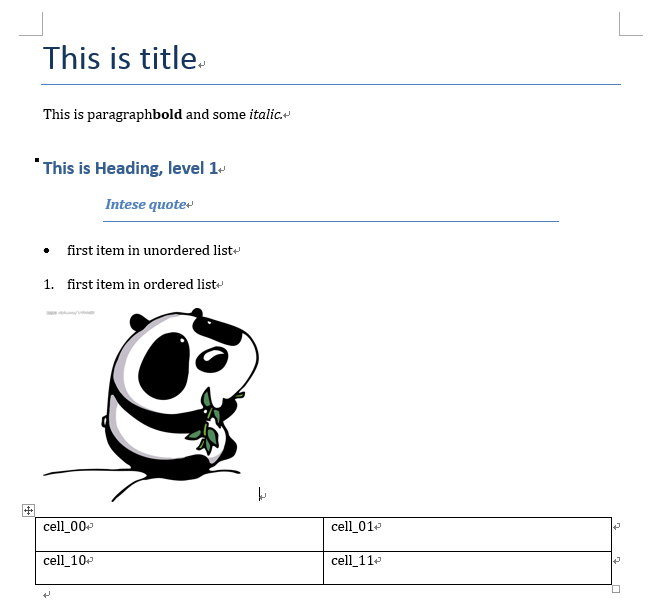
 1 #!/usr/bin/env python
 2 #coding: utf-8
 3
 4 from docx import Document
 5 from docx.shared import Inches
 6
 7 #创建 Document 对象,相当于打开一个 word 文档
 8 document = Document()
 9
10 #向文档中添加一个标题,标题级别设置为0级
11 document.add_heading('This is title', level=0)
12
13 #向文档中添加一个段落,并将段落引用赋给变量 p
14 #使用 add_run 方法追加字段,并设置格式
15 p = document.add_paragraph('This is paragraph')
16 p.add_run('bold').bold = True
17 p.add_run(' and some ')
18 p.add_run('italic.').italic = True
19
20 #添加标题和段落,采用不同的形式
21 document.add_heading('This is Heading, level 1', level=1)
22 document.add_paragraph('Intese quote',style="Intense Quote")
23 document.add_paragraph('first item in unordered list', style='List Bullet')
24 document.add_paragraph('first item in ordered list', style='List Number')
25
26 #添加图片,设置图片大小
27 document.add_picture(r"D:picturea.jpg", width=Inches(2.25))
28
29 #添加表格,填入表格内容
30 table = document.add_table(rows=2, cols=2)
31 table.cell(0,0).text = "cell_00"
32 table.cell(0,1).text = "cell_01"
33 table.cell(1,0).text = "cell_10"
34 table.cell(1,1).text = "cell_11"
35
36 #保存文本
37 document.save('demo.docx')
效果展示:
<-------------------- start -------------------->
<-------------------- end -------------------->
二、深入理解文本格式(format),并设置所格式属性(attribute)
根据官方文档所述,word 中主要有两种用文本格式等级:块等级(block-level)和内联等级(inline-level)
word 中大部分内容都是由这两种等级的对象组成的
(其他的诸如眉页、引脚等,docx 库的作者还在开发中)
块等级(block-level):
段落是 word 文件中的主要块对象(block-level object)
块等级项(block-level item)主要任务是将文本格式从左边界向右边界展示(flows);
对于段落而言,边界就是分段标识,或者是文本的列边界
列表(table)也是块对象(block-level object)
内联等级(inline-level):
内联对象(inline-level object)是块对象(block-level object)的组成部分
块对象的所有内容都包含在内联对象中,一个块对象由一个或多个内联对象组成
run 是常用的内联对象,例如:
         p = document.add_paragraph('This is paragraph')
         p.add_run('bold').bold = True
         p.add_run(' and some ')
         p.add_run('italic.').italic = True
这个例子中一个段落(块对象)包含三个 run(内联对象),每一个 run 都设置有不同属性
块等级,及其属性
块对象一般包括:段落(paragraph)、图片(inline picture)、表(table)、标题(heading)、
有序列表(numbered lists)、无序列表(bullets lists)
块对象的属性指定了块对象所在的位置,例如缩进、段间距离
常用属性:
alignment,水平对齐
from docx.enum.text import WD_ALIGN_PARAGRAPH

paragraph = document.add_paragraph("hello")
paragraph_format = paragraph.paragraph_format

#设置段落水平右对齐
paragraph_format.alignment = WD_ALIGN_PARAGRAPH.CENTER

#WD_ALIGN_PARAGRAPH 存储了多种对齐格式,例如:
#WD_ALIGN_PARAGRAPH.LEFT,左对齐;WD_ALIGN_PARAGRAPH.RIGHT,右对齐
#更多参见https://python-docx.readthedocs.org/en/latest/api/enum/WdAlignParagraph.html#wdparagraphalignment
indent,缩进
from docx.shared import Inches
from docx.shared import Pt

#设置段落从左开始缩进,使用Inches来衡量
paragraph_format.left_indent = Inches(0.5)

#设置段落从右开始缩进,使用Pt来衡量
paragraph_format.right_indent = Pt(20)

#设置段落第一行缩进,可以与上两个缩进叠加
paragraph_format.first_line_indent = Inches(0.5)
space,行间距
from docx.shared import Pt

#设置与上一段间隔 Pt(5)
paragraph.space_after = Pt(5)

#设置与下一段间隔 Pt(10)
paragraph.space_before = Pt(10)
其他熟悉如字间距、页码等属性,参见文档:https://python-docx.readthedocs.org/en/latest/user/text.html
内联等级,及其属性
内联对象一般包括:文字、句子、段落
内联对象的属性指定了字体,例如粗体(bold)、斜体(italic)、大小(size)等等
常用属性:
name and size
document = Document()
paragraph = document.add_paragraph()

run = paragraph.add_run("hellohellohello")
font = run.font

#设置字体样式
font.name = 'Calibri'
#设置字体大小
font.size = Pt(55)
bold 、underline and underline
#设置为斜体
font.italic = True
#不设置下划线
font.underline = False
#设置粗体为继承上一个字体的格式
font.bold = None

#这一类属性,每个有三种状态
#True 为使用属性;False 为不使用属性;None 默认属性继承自上一个字体

#此外,underline 属性还可以设置值,例如
font.underline = WD_UNDERLINE.DOT_DASH
#更多选项参见http://python-docx.readthedocs.org/en/latest/api/enum/WdUnderline.html#wdunderline
color
#以RGB方式设置颜色
from docx.shared import RGBColor
font.color.rgb = RGBColor(0x42, 0x24, 0xE9)

#使用内建主题设置颜色
#详细说明参见https://python-docx.readthedocs.org/en/latest/api/enum/MsoThemeColorIndex.html#msothemecolorindex
from docx.enum.dml import MSO_THEME_COLOR
font.color.theme_color = MSO_THEME_COLOR.ACCENT_1
三、深入理解样式(styles),以及如何运用样式
在 word 中,样式包括:段落样式(paragraph styles)、字符样式(character styles)、表样式(table styles)、列表样式(numbering styles)
样式类似于前端开发的 CSS,一处定义,处处使用
docx 库内的 styles 样式不包含 word 中全部的样式,有一些还在开发中,但是基本够用
Document 的属性 styles,包含了所有 docx 提供的可用样式
选取段落可用样式
#显示所有段落样式
from docx.enum.style import WD_STYLE_TYPE
styles = document.styles

paragraph_styles = [
     s for s in styles if s.type == WD_STYLE_TYPE.PARAGRAPH
 ]

for style in paragraph_styles:
    print(style.name)

#styles 为 Document 的属性,style 为段落的属性
#除了段落(paragraph),还有 run,表(table)有 style 属性
段落设置样式
document = Document()

#从styles中选取样式
paragraph = document.add_paragraph()
paragraph.style = document.styles['Heading 1']

#用样式名称直接赋值
paragraph2 = document.add_paragraph()
paragraph2.style = 'List Bullet'

#在创建段落时赋值
paragraph = document.add_paragraph(style='Body Text')
定义样式(style)中的字符格式(character format)
定义样式中的字符格式后,所有运用此样式的段落都有相应的字符格式
document = Document()

#从样式库中选取 'Normal' 样式,并提取 'Normal' 样式的字符属性
style = document.styles['Normal']
font = style.font

#设置样式中的字符属性 ,操作方法和上面改变内联对象属性方法一致
font.name = "Microsoft YaHei UI"
font.size = Pt(50)

#将设置好字符属性的样式运用到段落中
p = document.add_paragraph("change font attribution", style = 'Normal')
定义样式(style)中的段落格式(paragraph format)
定义样式中的段落格式后,所有运用此样式的段落都有相应的段落格式
document = Document()
styles = document.styles

#选取 style,并设置 style 中的段落格式
style = styles['Heading 2']
para_format = style.paragraph_format
para_format.left_indent = Pt(20)
para_format.widow_control = True

#将设置好段落格式的 style 运用到段落中
p = document.add_paragraph('This is Heading, level 1', style = style)
简单总结
文章第二部分直接设置段落的格式(paragraph.format),字符的格式(run.font)
在这一部分,运用了 style 对象,统一设置了段落格式、字符格式
一旦 style 对象设置好了以后,可以多次反复利用
style 对象是从文件对象中提取(document.styles)的,docx 提供的 Style 类对象
四、常用样式(style)示例
段落样式
from docx.enum.style import WD_STYLE_TYPE
from docx import *

document = Document()
styles = document.styles

#生成所有段落样式
for s in styles:
    if s.type == WD_STYLE_TYPE.PARAGRAPH:
        document.add_paragraph('Paragraph style is : '+ s.name, style = s)

document.save('para_style.docx')
字符样式
from docx.enum.style import WD_STYLE_TYPE
from docx import *

document = Document()
styles = document.styles
para = document.add_paragraph()

#生成所有字符样式
for s in styles:
    if s.type == WD_STYLE_TYPE.CHARACTER:
        run = para.add_run("Character style is:  "+s.name+"
")
        run.style = s

document.save('character_style.docx')
表格样式
from docx.enum.style import WD_STYLE_TYPE
from docx import *

document = Document()
styles = document.styles

#生成所有表样式
for s in styles:
    if s.type == WD_STYLE_TYPE.TABLE:
        document.add_paragraph("Table style is :  "+ s.name)
        document.add_table(3,3, style = s)
        document.add_paragraph("
")

document.save('demo2.docx')