感谢强哥的文档 源文档链接
https://www.qstack.com.cn/archives/68.html
#-------------------------------------------------------------------------------
#
# 安装centos6.9下的oracle
# Author:nod
# Date:18-09-05
# 请确认hostname设置为oracle
# 创建目录/tmp/oracle mkdir -p /tmp/oracle
# 将p10404530_112030_Linux-x86-64_1of7.zip p10404530_112030_Linux-x86-64_2of7.zip
# pdksh-5.2.14-30-mdv2011.0.x86_64.rpm 上传到/tmp/oracle目录
# 硬盘最低要求为50G 内存2G
# 百度云地址:链接:https://pan.baidu.com/s/11rgfBVJ-Vh46JKkIIu73Mg 密码:x34r
#-------------------------------------------------------------------------------
#-------------------------------------------------------------------------------
# 环境准备
#-------------------------------------------------------------------------------
/etc/init.d/iptables stop
chkconfig iptables off
sed -i 's/SELINUX=enforcing/SELINUX=disabled/' /etc/selinux/config
setenforce 0
curl -o /etc/yum.repos.d/CentOS-Base.repo http://mirrors.aliyun.com/repo/Centos-6.repo
wget -O /etc/yum.repos.d/epel.repo http://mirrors.aliyun.com/repo/epel-6.repo
#检查内容
cat /etc/sysconfig/i18n
#LANG="en_US.UTF-8"
#SYSFONT="latarcyrheb-sun16"
echo $LANG
#en_US.UTF-8
yum -y groupinstall "Compatibility libraries" "Base" "Development tools" "debugging Tools"
yum -y install lrzsz
umount /mnt
cd /etc/yum.repos.d/
mkdir test -p
mv *.repo test
echo '[local]
name=local
baseurl=file:///mnt
gpgcheck=0' >local.repo
mount /dev/cdrom /mnt
yum makecache
yum groupinstall desktop -y
yum install -y xorg-x11-utils
echo '*/5 * * * * /usr/sbin/ntpdate ntp1.aliyun.com >/dev/null 2>&1' >/var/spool/cron/root
mkdir -p /tmp/oracle
#-------------------------------------------------------------------------------
# 用户环境
#-------------------------------------------------------------------------------
groupadd oinstall
groupadd dba
useradd -g oinstall -G dba oracle
echo 123456 |passwd --stdin oracle
mkdir -p /u01/app
chown -R oracle:oinstall /u01
chmod -R 755 /u01
#-------------------------------------------------------------------------------
# 用户环境
#-------------------------------------------------------------------------------
#修改host解析
#172.30.2.119本机ip oracle
cat >> /etc/profile << EOF
if [ $USER = "oracle" ];then
if [ $SHELL = "/bin/ksh" ];then
ulimit -p 16384
ulimit -n 65536
else
ulimit -u 16384 -n 65536
fi
fi
EOF
cat >> /home/oracle/.bash_profile <<EOF
HISTTIMEFORMAT='[%F %T]'
ORACLE_BASE=/u01/app
ORACLE_SID=orcl
ORACLE_HOME=$ORACLE_BASE/oracle/product/11.2.0.3/db_1
NLS_LANG=AMERICAN_CHINA.ZHS16GBK
LD_LIBRARY_PATH=$ORACLE_HOME/lib:/lib:/usr/lib
PATH=$ORACLE_HOME/bin:$PATH
export ORACLE_BASE ORACLE_HOME ORACLE_SID NLS_LANG PATH
EOF
cat >> /etc/sysctl.conf <<EOF
kernel.shmmni = 4096
kernel.sem = 250 32000 100 128
fs.file-max = 6815744
net.ipv4.ip_local_port_range = 9000 65500
net.core.rmem_default = 262144
net.core.rmem_max = 4194304
net.core.wmem_default= 262144
net.core.wmem_max = 1048576
fs.aio-max-nr = 1048576
EOF
cat >> /etc/security/limits.conf <<EOF
oracle soft nproc 2047
oracle hard nproc 16384
oracle soft nofile 1024
oracle hard nofile 65536
EOF
cat >> /etc/pam.d/login <<EOF
session required /lib64/security/pam_limits.so
EOF
sysctl -p
cd /tmp/oracle
unzip -q p10404530_112030_Linux-x86-64_1of7.zip
unzip -q p10404530_112030_Linux-x86-64_2of7.zip
#此处是你物理机的ip 需要开启Xmanager - Passive
export DISPLAY=172.30.2.113:0.0
su - oracle
cd /tmp/oracle/database/
./runInstaller
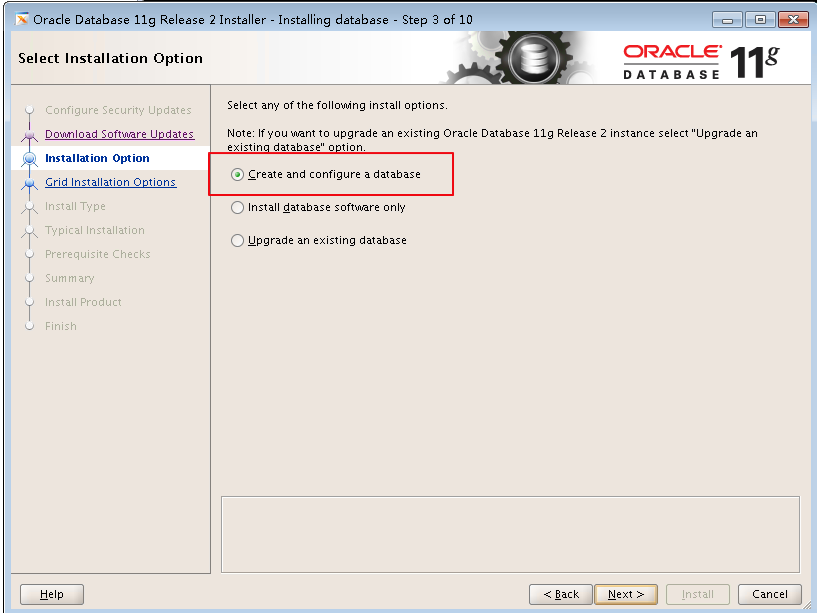
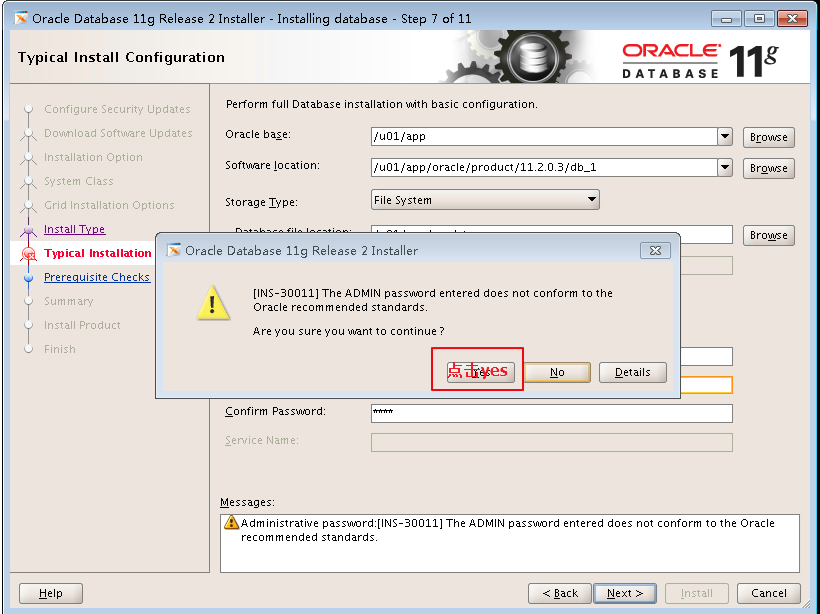
#-------------------------------------------------------------------------------
# 进入图形界面更改 建议设置orcl密码为orcl
#-------------------------------------------------------------------------------
yum install -y libaio-devel
yum install -y elfutils-libelf-devel
cd /tmp/oracle
rpm -ivh pdksh-5.2.14-30-mdv2011.0.x86_64.rpm
sh /u01/oraInventory/orainstRoot.sh
sh /u01/app/oracle/product/11.2.0.3/db_1/root.sh
[root@oracle logs]# sh /u01/oraInventory/orainstRoot.sh
Changing permissions of /u01/oraInventory.
Adding read,write permissions for group.
Removing read,write,execute permissions for world.
Changing groupname of /u01/oraInventory to oinstall.
The execution of the script is complete.
[root@oracle logs]# sh /u01/app/oracle/product/11.2.0.3/db_1/root.sh
Performing root user operation for Oracle 11g
The following environment variables are set as:
ORACLE_OWNER= oracle
ORACLE_HOME= /u01/app/oracle/product/11.2.0.3/db_1
Enter the full pathname of the local bin directory: [/usr/local/bin]:
Copying dbhome to /usr/local/bin ...
Copying oraenv to /usr/local/bin ...
Copying coraenv to /usr/local/bin ...
Creating /etc/oratab file...
Entries will be added to the /etc/oratab file as needed by
Database Configuration Assistant when a database is created
Finished running generic part of root script.
Now product-specific root actions will be performed.
Finished product-specific root actions.
sqlplus / as sysdba