一。负载均衡与Ribbon
- 负载均衡,在集群中是很常见的一个“名词”,顾名思义是根据一定的算法将请求分摊至对应的服务节点上,常见的算法有如下几种:
- 轮询法:所有请求被依次分发到每台应用服务器上,每台服务器需要处理的请求数目都相同,适合所有服务器硬件都相同的场景
- 随机法:请求被随机分配到各个应用服务器,在许多场合下,这种方案都很简单实用。
- 源地址哈希(Hash)法:将请求来源的IP地址进行Hash计算,得到对应的服务器,这样来自同一个IP的请求总在同一个服务器上处理
- 加权法:根据应用服务器配置的情况,按照权重将请求分发到每个服务器,当然高性能的服务器分配的权重更高
- 最小连接数(Least Connections)法:计算每个应用服务器正在处理的连接数,将新的请求分发到最少连接的服务器上,按理说,这是最符合负载均衡定义的算法
2. Ribbon是Netfix公司提供的一个负载均衡的客户端框架,它可以和公司旗下的Eureka feign Hystrix等开源产品很好的集成,Ribbon框架具备以下特点:
-
- 负载均衡
- 容错
- 多协议(HTTP, TCP, UDP)支持异步和反应模型。
- 缓存和批处理
二。Ribbon使用方式
1。首先我们定义服务(在这里就是order-server)注意在服务中的两个配置文件
application.properties


#应用程序名称
spring.application.name=order-server
#指定config-server服务的地址
spring.cloud.config.uri=http://localhost:8888
#spring.profiles.active=local
#取的是当前激活的环境
#spring.cloud.config.profile=${spring.profiles.active}
spring.cloud.config.label=master
#注册中心地址
eureka.client.service-url.defaultZone=http://localhost:8000/eureka
#服务端口号
server.port=8001
#management.endpoint.health.show-details=always
#management.endpoint.hystrix.health.enabled=true
# http://localhost:8888/{spring.application.name}/{spring.cloud.config.profile}/{label}
application-multi.properties
spring.application.name=order-server
eureka.client.service-url.defaultZone=http://localhost:8000/eureka
server.port=8011
management.endpoint.health.show-details=always
management.endpoints.web.base-path=/
management.endpoints.web.exposure.include=health,beans,info
# http://localhost:8888/{spring.application.name}/{spring.cloud.config.profile}/{label}
这里我们关注 spring.application.name配置 ,并设置不同的端口号
2。在idea里设置启动类配置项
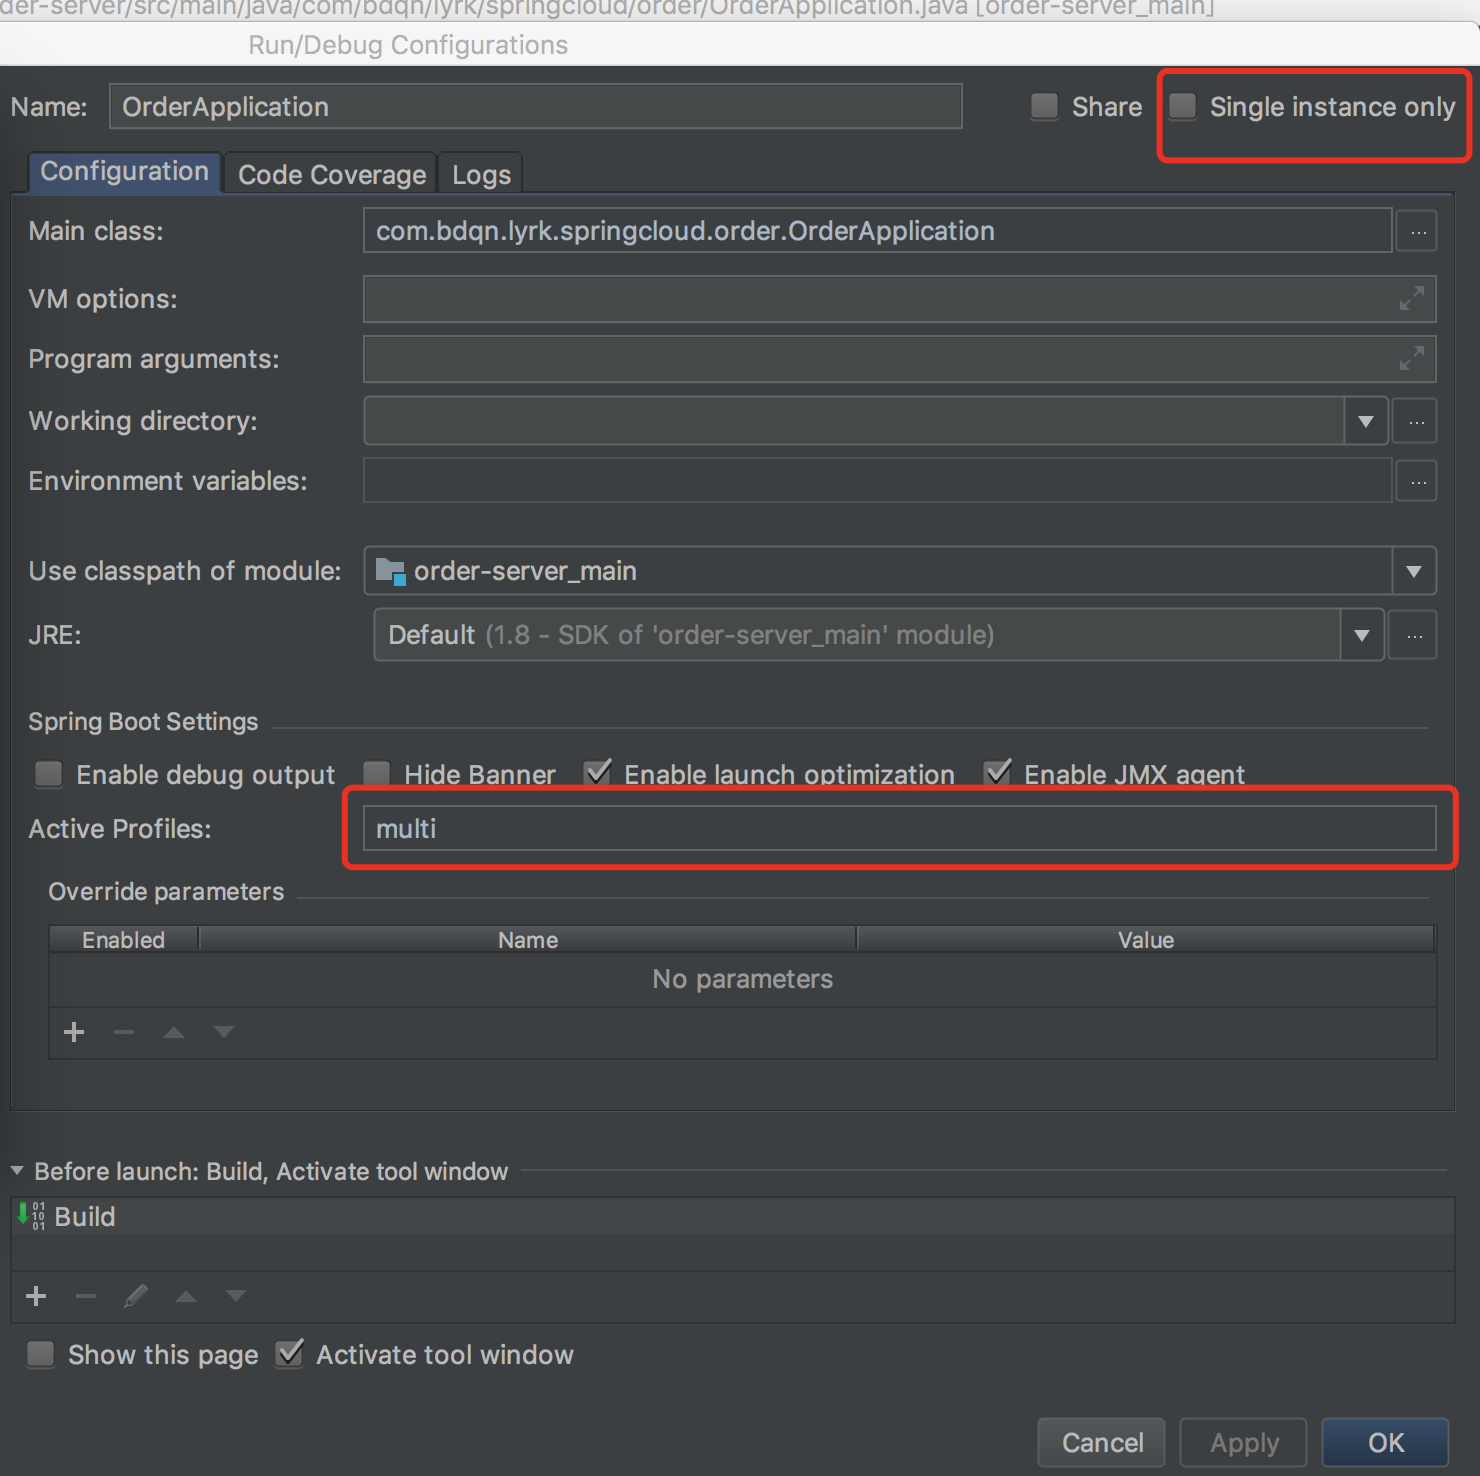
注意single instance only的复选框勾掉 active profiles 是设置当前激活的环境,配置完毕后启动.OrderApplication服务两次
3.新建一个项目ribbon-project并添加依赖
compile('org.springframework.cloud:spring-cloud-starter-netflix-ribbon')
4.在application.properties里添加配置项
order.ribbon.listOfServers=http://localhost:8001,http://localhost:8011
order.ribbon.connectTimeout=3000
order.ribbon.NFLoadBalancerRuleClassName=com.netflix.loadbalancer.RandomRule
注意:
- 这里面的格式定义:<client-name>.<namespace>.<property-value>=<value>,其中client-name代表客户端名称,今后我们会根据这个名字拿到客户端对象。
- namespace默认的为ribbon的命名空间
- property-value我们可以参考:Enum CommonClientConfigKey 。其中listOfServers配置的是我们order-server的服务地址,当然我们也可以不做任何配置,那么此时ribbon会给我们设置默认的配置(可以参考:DefaultConfigClientImpl),如果不指定客户端名称,那么配置适用于所有客户端。
- 我们可以指定负载均衡策略,其格式为:
<clientName>.<clientConfigNameSpace>.NFLoadBalancerRuleClassName=com.netflix.loadbalancer.<className>className值:BestAvailableRule(),RandomRule(随机) , RoundRobbinRule(轮询) , WeightedResponseTimeRule(权重响应时间)
5.编写客户端请求代码
package com.bdqn.lyrk.ribbon.study;

import com.netflix.client.ClientFactory;
import com.netflix.client.http.HttpRequest;
import com.netflix.client.http.HttpResponse;
import com.netflix.config.ConfigurationManager;
import com.netflix.niws.client.http.RestClient;

public class RibbonApplication {

    public static void main(String[] args) throws Exception {
        //加载配置文件
        ConfigurationManager.loadPropertiesFromResources("application.properties");
        RestClient restClient = (RestClient) ClientFactory.getNamedClient("order");
        HttpRequest httpRequest = HttpRequest.newBuilder().uri("/orderId/1").build();
        for (int i = 0; i < 5; i++) {
            HttpResponse response = restClient.executeWithLoadBalancer(httpRequest);
            System.out.println(response.getEntity(String.class));
        }
    }
}
6.服务端请参考:SpringCloud学习之Feign结尾的代码示例
三。SpringCloud中的Ribbon
1) 使用@LoadBlanced注解和FeignClient
在RestTemplate上添加@LoadBlanced注解后,幕后英雄就成为了LoadBalancerClient,此时会创建LoadBalancerInterceptor的拦截器对象加入RestTemplate的拦截器栈中,大家可以自行了解下,具体的代码示例如下:
   @Bean
    @LoadBalanced
    RestTemplate restTemplate(){return new RestTemplate();}
2)使用DiscoveryClient
这个对象是spring给我们提供好的,我们通过@Autowired拿来用就是了。
3) @RibbonClient 与 @LoadBalanced
SpringCloud提供了@RibbonClient注解来创建自己定义的RibbonClient,初次接触很容易与@LoadBalanced注解混淆,那么我在这里简单解释一下:
@LoadBalced主要标记在RestTemplate上,那么此时RestTemplate会使用RibbonLoadBalancerClient 来获取服务
@RibbonClient 主要用于配置RibbonClient客户端的,而且这个注解在我们服务发现中不是必须要配置的,如果我们使用SpringCloud中的服务发现机制,此时SpringCloud会给我们提供默认的Ribbon配置,甚至我们不需要配置@RibbonClient,不过当我们需要定义自己的RibbonClient或者不实用服务发现时,那么我们可以使用@RibbonClient注解
使用例子:
在我们的启动类上添加如下注解
@RibbonClient(name = "myservice")
然后我们在application.properties做如下配置:
myservice.ribbon.eureka.enabled=false
myservice.ribbon.listOfServers=http://localhost:5000, http://localhost:5001