CoreGraphics叫做图形上下文,相当于视图的一块画布,用来处理绘制图形的操作。
绘制图形的方式:1.通过创建一个图形上下文,在创建的上下文内进行绘图;
2.通过自定义的UIView上的drawRect方法,系统会自动准备好一个图形上下文,来实现绘图工作。但是drawRect是系统方法,我们不能调 用,需要重新绘图的时候,可以调用setNeedsDisplay方法来实现重绘。
使用方法:
创建一个图形上下文,在创建的上下文内进行绘图:
1.绘制矩形:
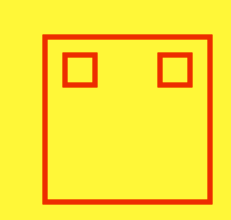
//开始图像绘图
    UIGraphicsBeginImageContext(self.view.bounds.size);
    CGContextRef context = UIGraphicsGetCurrentContext();//获得图形上下文

    //矩形1
    CGContextAddRect(context, CGRectMake(50, 100, 165, 165));
    //矩形2
    CGRect rects[2];
    rects[0] = CGRectMake(70, 118, 30, 30);
    rects[1] = CGRectMake(165, 118, 30, 30);
    CGContextAddRects(context, rects, 2);

 [[UIColor redColor]setStroke];//画笔颜色
    CGContextSetLineWidth(context, 5.0);//画笔大小
    CGContextStrokePath(context);//绘制

    UIImage *image = UIGraphicsGetImageFromCurrentImageContext();//从Context中获取图像,并显示在界面上
    UIGraphicsEndImageContext();//终止绘制画布
    UIImageView *imageView = [[UIImageView alloc]initWithImage:image];//添加到UIImageView
    [self.view addSubview:imageView];
2.绘制圆:
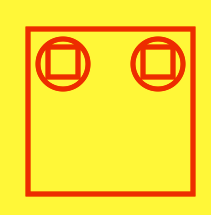
//圆
    CGContextAddEllipseInRect(context, CGRectMake(60, 110, 50, 50));//通过图形上下文绘制圆,左眼
    CGContextAddEllipseInRect(context, CGRectMake(155, 110, 50, 50));//右眼
3.绘制椭圆:
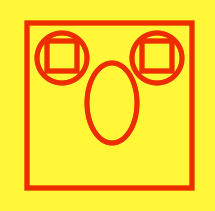
//椭圆
    CGContextAddEllipseInRect(context, CGRectMake(110, 140, 50, 80));
4.绘制直线:

//直线
    CGContextMoveToPoint(context, 90, 230);
    CGContextAddLineToPoint(context, 190, 230);

    //添加折线段
    CGPoint point[4];
    point[0] = CGPointMake(20, 100);
    point[1] = CGPointMake(245, 100);
    point[2] = CGPointMake(135, 60);
    point[3] = CGPointMake(20, 100);
    CGContextAddLines(context, point, 4);
5.绘制圆弧1:

 //圆弧线1
    CGContextMoveToPoint(context, 50, 120);//起始点
    CGContextAddArc(context, 50, 150, 30, M_PI_2, M_PI*3/2, 0);//半圆,第二个喝第三个参数为圆心point,第四个参数为半径,接下来是起始角度,终止角度,是否顺时针
    CGContextMoveToPoint(context, 215, 120);//起始点
    CGContextAddArc(context, 215, 150, 30, M_PI_2, M_PI*3/2, 1);
6.绘制圆弧2:

//弧线
    CGContextMoveToPoint(context, 215, 140);//起始点
    CGContextAddQuadCurveToPoint(context, 245, 150, 215, 160);//第一个参数为切点,第二个参数为终点
    CGContextMoveToPoint(context, 50, 140);
    CGContextAddQuadCurveToPoint(context, 20, 150, 50, 160);
7.绘制弧线3:

 //弧线2
    CGContextMoveToPoint(context, 130, 180);//起始点
    CGContextAddCurveToPoint(context, 110, 200, 150, 200, 150, 180);