上传的方式有两种,第一种是通过 bintray 官方出的插件
第二种是一个国外组织开源的插件
这里讲bintray/gradle-bintray-plugin
1.在项目根目录下的 build.gradle 添加插件依赖
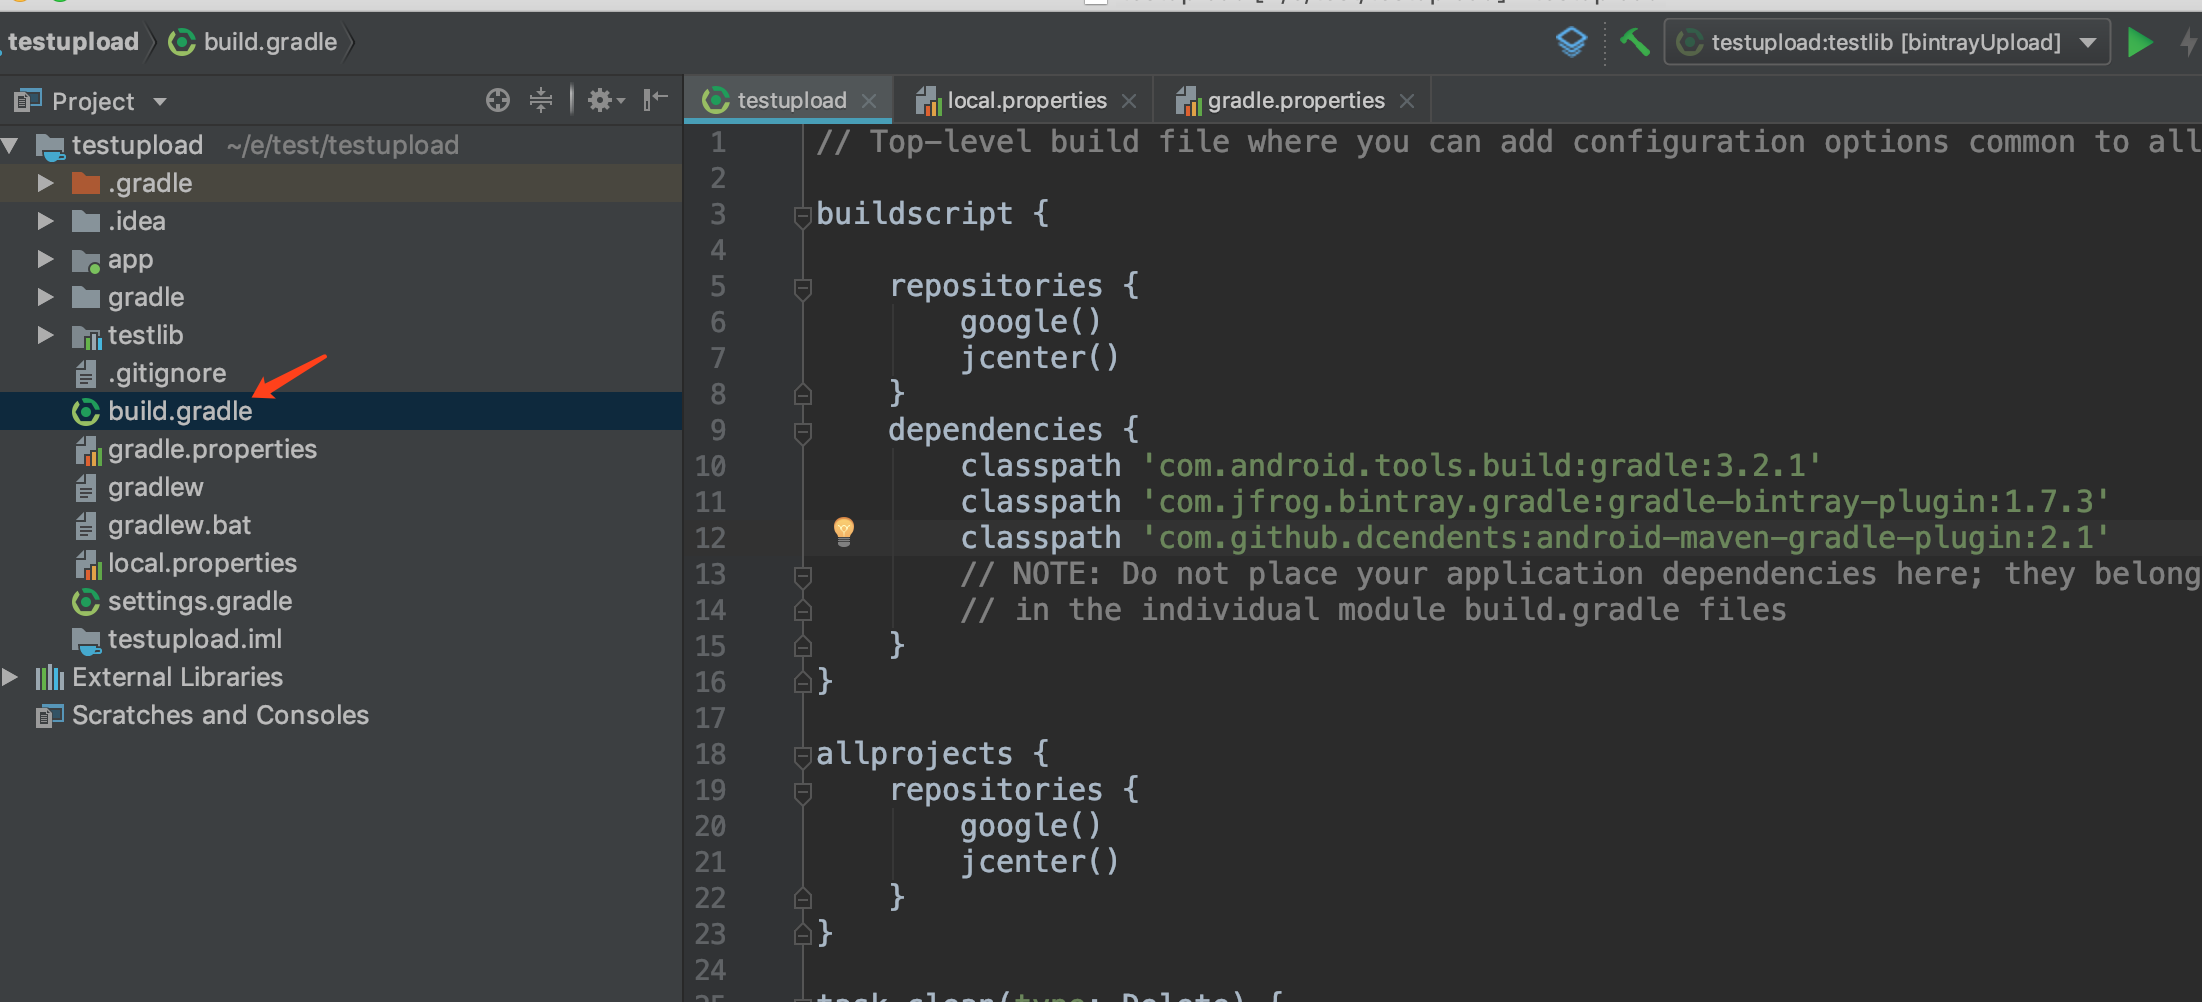
dependencies {
        classpath 'com.android.tools.build:gradle:3.2.1'
        classpath 'com.jfrog.bintray.gradle:gradle-bintray-plugin:1.7.3'
        classpath 'com.github.dcendents:android-maven-gradle-plugin:2.1'
    }
在项目根目录下的 gradle.properties 中配置我们的开源库信息
PROJ_NAME=test-lib
PROJ_GROUP=com.test.lib
PROJ_ARTIFACTID=test-lib
PROJ_VERSION=0.1.1
PROJ_WEBSITEURL=https://github.com/youproject_url
PROJ_ISSUETRACKERURL=https://github.com/youproject_url/issues
PROJ_VCSURL=https://github.com/youproject_url/xxxx.git
PROJ_DESCRIPTION=project description

DEVELOPER_ID=xxx_id
DEVELOPER_NAME=you accout name
DEVELOPER_EMAIL=you email@gmail.com
2.在项目根目录下的 local.properties 中填写我们的 user 和 API key,这里的内容是完全可以放在 gradle.properties 中的,但是通常我们的开源库都会发到 Github 的公共仓库中,如果这样的话那我们的 API key 就会暴露给其他人,那当然是不行的,所以我们就在 git 忽略的 local.properties 中配置我们的 API key。
BINTRAY_USER=werbhelius
BINTRAY_KEY=xxxxxxxxxxxxxxxxxxxxxxxxxxxxxxxxxxx
3.在我们开源库的目录下,新建一个 bintray.gradle 文件,用于上传开源库以及配置发布的文件内容包括源码,文档以及 AAR。
apply plugin: 'com.jfrog.bintray'
apply plugin: 'com.github.dcendents.android-maven'


group = PROJ_GROUP
version = PROJ_VERSION
project.archivesBaseName = PROJ_ARTIFACTID


task sourcesJar(type: Jar) {
    from android.sourceSets.main.java.srcDirs
    classifier = 'sources'
}

task javadoc(type: Javadoc) {
    source = android.sourceSets.main.java.srcDirs
    classpath += configurations.compile
    classpath += project.files(android.getBootClasspath().join(File.pathSeparator))
}

task javadocJar(type: Jar, dependsOn: javadoc) {
    classifier = 'javadoc'
    from javadoc.destinationDir
}

javadoc {
    options{
        encoding "UTF-8"
        charSet 'UTF-8'
        author true
        version true
        links "https://androiddoc.qiniudn.com/reference/"
        title "$PROJ_NAME $PROJ_VERSION"
    }
}

artifacts {
    archives sourcesJar
    archives javadocJar
}

install {
    repositories.mavenInstaller {
        pom.project {
            name PROJ_NAME
            description PROJ_DESCRIPTION //project description
            url PROJ_WEBSITEURL //project weiste url

            packaging 'aar'
            groupId PROJ_GROUP  //group
            artifactId PROJ_ARTIFACTID //artifactId
            version PROJ_VERSION  //version

            licenses {
                license {
                    name 'The Apache Software License, Version 2.0'
                    url 'http://www.apache.org/licenses/LICENSE-2.0.txt'
                    distribution 'repo'
                }
            }
            scm {
                connection PROJ_VCSURL
                url PROJ_WEBSITEURL

            }
            developers {
                developer {
                    id DEVELOPER_ID
                    name DEVELOPER_NAME
                    email DEVELOPER_EMAIL
                }
            }
        }
    }
}

bintray {

    Properties properties = new Properties()
    properties.load(project.rootProject.file('local.properties').newDataInputStream())
    user = properties.getProperty('BINTRAY_USER')
    key = properties.getProperty('BINTRAY_KEY')
    configurations = ['archives']

    dryRun = false
    publish = true

    pkg {
        repo = 'maven'
        name = PROJ_NAME
        licenses = ['Apache-2.0']
        vcsUrl = PROJ_VCSURL
        websiteUrl = PROJ_WEBSITEURL
        issueTrackerUrl = PROJ_ISSUETRACKERURL
        publicDownloadNumbers = true
        version {
            name = PROJ_VERSION
            desc = PROJ_DESCRIPTION
            vcsTag = PROJ_VERSION

            gpg {
                sign = true
            }
        }
    }
}
4.在我们开源库中的 build.gradle 文件中引入 bintary.gradle ,注意引入的命令需要写在最后一行,不然会报错。
apply plugin: 'com.android.library'
android {
    compileSdkVersion 28
    defaultConfig {
        minSdkVersion 16
        targetSdkVersion 28
        versionCode 1
        versionName "1.0"
    }
    buildTypes {
        release {
            minifyEnabled false
            proguardFiles getDefaultProguardFile('proguard-android.txt'), 'proguard-rules.pro'
        }
    }
}
dependencies {
    implementation fileTree(dir: 'libs', include: ['*.jar'])
    implementation 'com.android.support:appcompat-v7:28.0.0'
}
apply from: './bintray.gradle'
5.当上述的配置全部完成之后,我们可以上传我们的开源库了,打开 Terminal,执行 ./gradlew install,执行完成后,打开 build 目录你会发现生成了 aar 包、javadoc 文档、sources 源码以及上传 maven 需要的 pom 配置文件。
生成上述文件后,继续在 Terminal 中执行 ./gradlew bintrayUpload 提示成功之后,我们的开源库就发布成功啦。
也可以直接通过
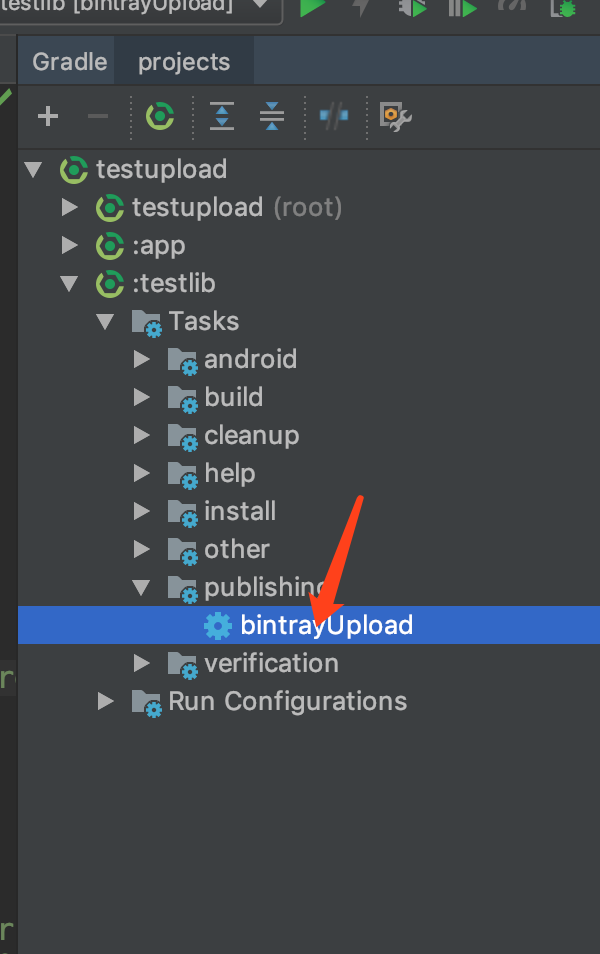
点击之后显示成功

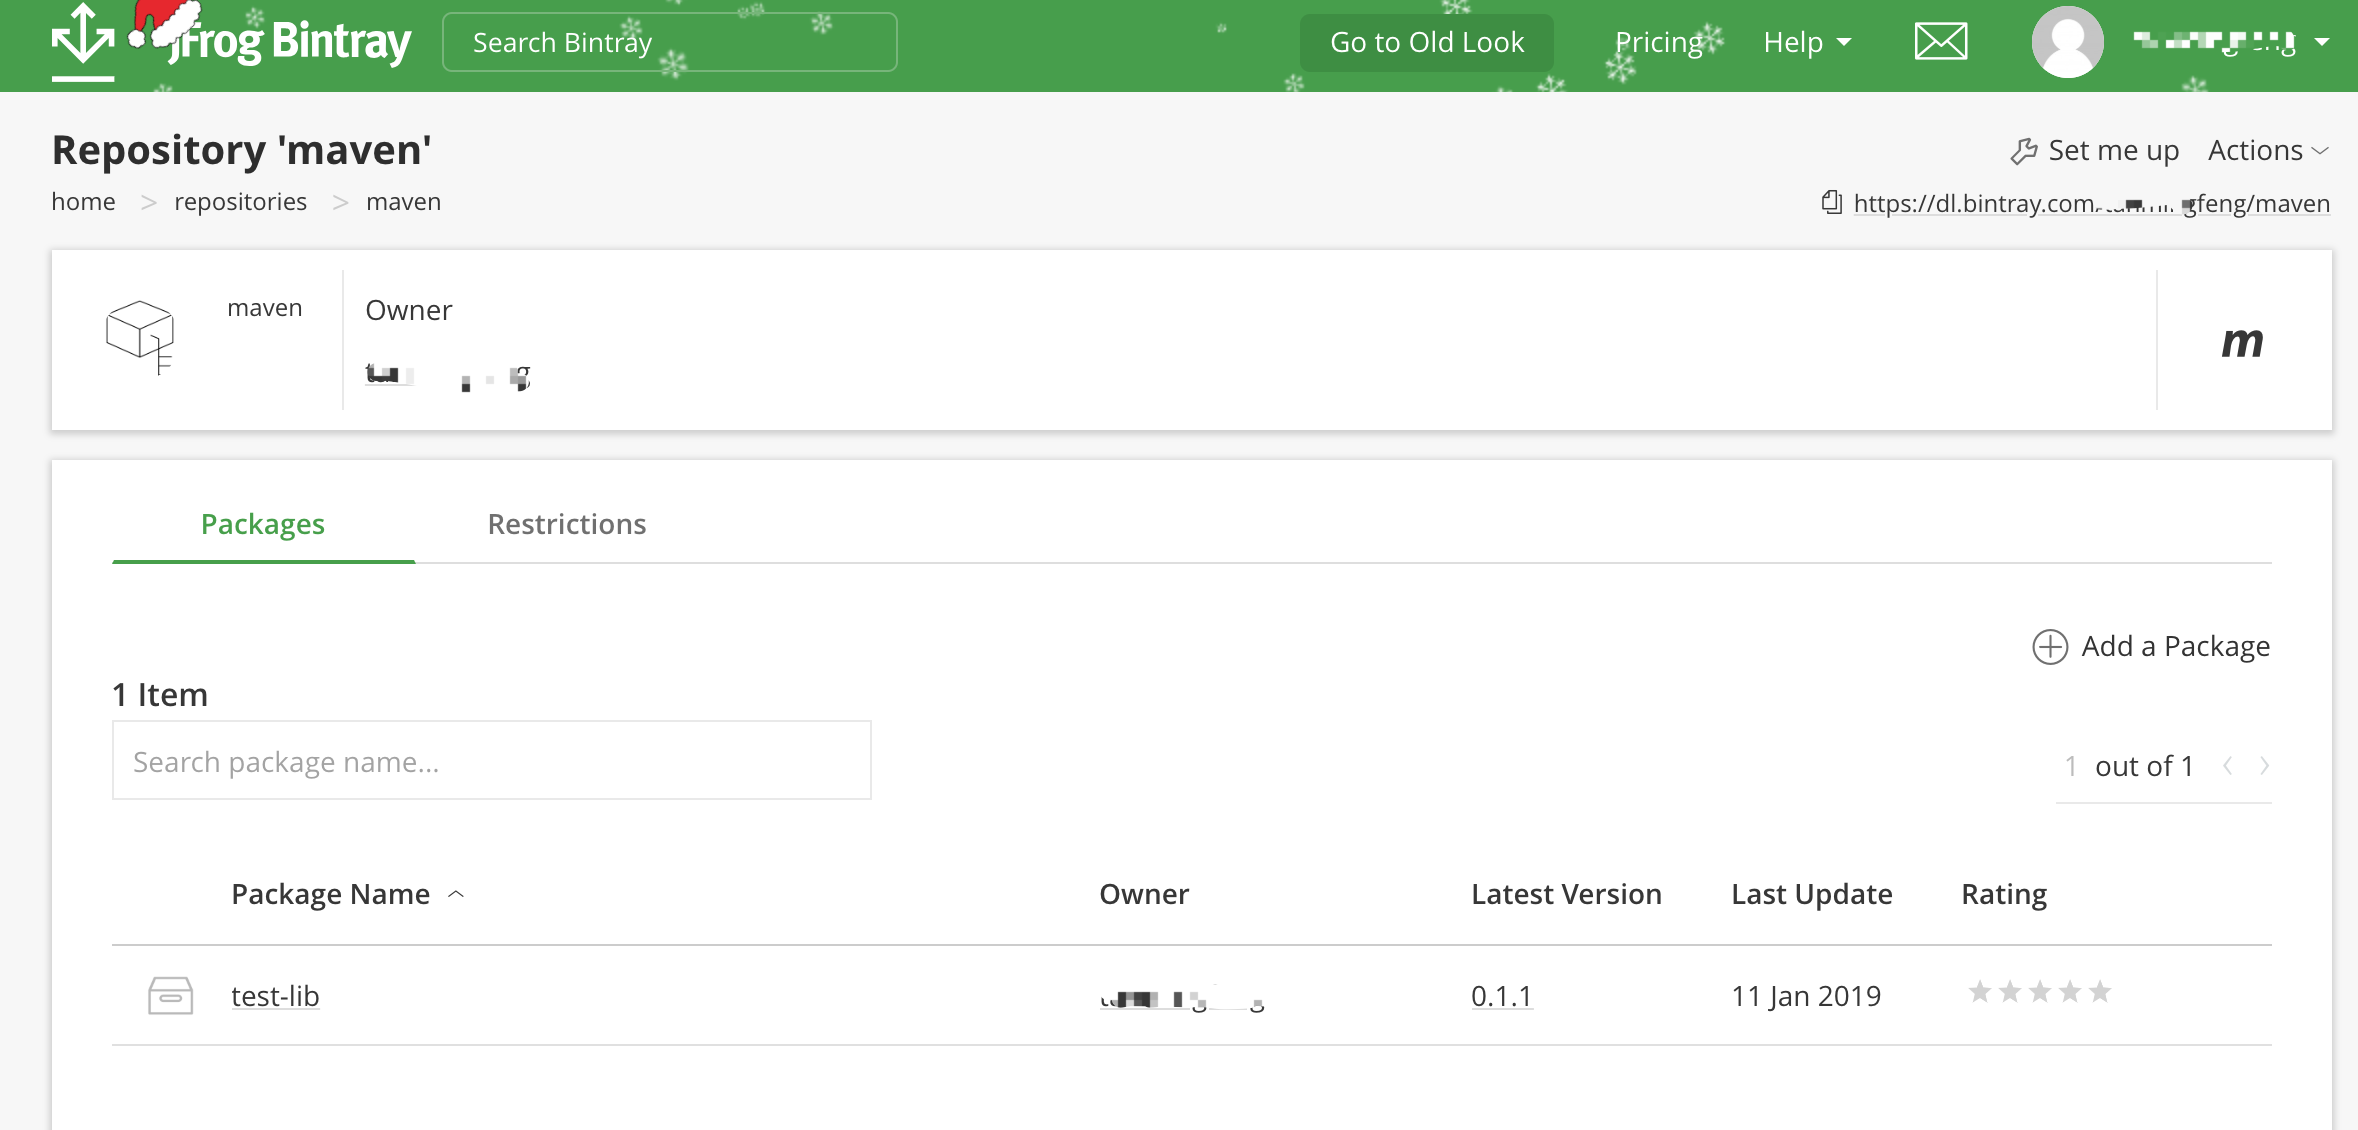
发布成功之后,打开之前 bintray 网页,你会发现在之前我们创建的 maven 仓库中,已经有我们刚刚发布的库了