通过几天的时间研究了下使用jax-ws来开发webservice,看了网上的一些资料总结出jax-ws的开发大概分为两种。
以下项目使用的spring3.0,jar包可以到官网下载
第一种:使用独立的端口(指端口可以在spring中自定义配置)
首先说第一种方式,这种方式不需要添加额外的jar包,他使用的是JDK自带的JWS来实现的。
web.xml文件配置:
<?xml version="1.0" encoding="UTF-8"?>
<web-app xmlns:xsi="http://www.w3.org/2001/XMLSchema-instance"
    xmlns="http://java.sun.com/xml/ns/javaee"
    xsi:schemaLocation="http://java.sun.com/xml/ns/javaee http://java.sun.com/xml/ns/javaee/web-app_2_5.xsd"
    id="WebApp_ID" version="2.5">
    <display-name>JAXWSExample</display-name>

    <!-- applicationContext*.xml文件在src目录下的conf文件夹中-->
    <context-param>
        <param-name>contextConfigLocation</param-name>
        <param-value>classpath:conf/applicationContext*.xml</param-value>
    </context-param>

    <listener>
        <listener-class>org.springframework.web.context.ContextLoaderListener</listener-class>
    </listener>
    <!-- Log4j 日志 -->
    <listener>
        <listener-class>org.springframework.web.util.Log4jConfigListener</listener-class>
    </listener>
    <!-- 防止内存泄露 -->
    <listener>
        <listener-class>org.springframework.web.util.IntrospectorCleanupListener</listener-class>
    </listener>

</web-app>
applicationContext-jaxws.xml
<?xml version="1.0" encoding="UTF-8"?>
<beans xmlns="http://www.springframework.org/schema/beans"
    xmlns:context="http://www.springframework.org/schema/context"
    xmlns:xsi="http://www.w3.org/2001/XMLSchema-instance"
    xsi:schemaLocation="http://www.springframework.org/schema/beans http://www.springframework.org/schema/beans/spring-beans-2.5.xsd
    http://www.springframework.org/schema/context http://www.springframework.org/schema/context/spring-context-2.5.xsd">

    <context:annotation-config />
    <context:component-scan base-package="com.example.ws"></context:component-scan>
  <!-- baseAddress 的value地址以及端口号是自定义的,端口号不要为已使用过的 -->
    <bean class="org.springframework.remoting.jaxws.SimpleJaxWsServiceExporter">
        <property name="baseAddress" value="http://localhost:8088/" />
    </bean>

</beans>
java Code
package com.example.ws;

import javax.jws.WebMethod;
import javax.jws.WebService;
import javax.jws.soap.SOAPBinding;
import javax.jws.soap.SOAPBinding.Style;

import org.springframework.stereotype.Service;

// spring注解使用
@Service("exampleService")
// webservice地址使用
@WebService(serviceName="example")
// 防止jdk版本问题
@SOAPBinding(style=Style.RPC)
public class ExampleService {
    // dependency dao/service
    //@Autowired
    //private IBaseDao baseDao;


    @WebMethod
    public String example1 (String request){
        System.out.println(request);
        String response= request + "hello";
        return response;
    }
}
java代码中方法写的比较简单,也可以将输入参数和输出参数写为对象,这个根据需求来定。
以上就是第一种方法的实现方式,本地访问地址直接是:http://localhost:8088/example?wsdl
第二种方式: 使用servlet方式,该方式使用服务器端口
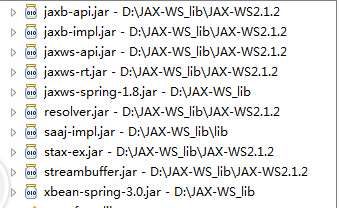
此种方式的话需要依赖于jax-ws 2.2中的jar文件,另外还需要下载额外的jaxws-spring-1.8.jar和xbean-spring-3.0.jar
web.xml
<?xml version="1.0" encoding="UTF-8"?>
<web-app version="2.5" xmlns="http://java.sun.com/xml/ns/javaee"
    xmlns:xsi="http://www.w3.org/2001/XMLSchema-instance"
    xsi:schemaLocation="http://java.sun.com/xml/ns/javaee
    http://java.sun.com/xml/ns/javaee/web-app_2_5.xsd">
    <welcome-file-list>
        <welcome-file>index.jsp</welcome-file>
    </welcome-file-list>

  <!-- 到END处用来配置启动spring容器 -->

    <listener>
        <listener-class>org.springframework.web.context.ContextLoaderListener</listener-class>
    </listener>

    <context-param>
        <param-name>contextConfigLocation</param-name>
        <param-value>classpath:conf/applicationContext*.xml</param-value>
    </context-param>
  <!-- END -->

  <!-- 用于配置地址栏请求路径 -->
    <servlet>
        <servlet-name>JaxWsServlet</servlet-name>
        <servlet-class>com.sun.xml.ws.transport.http.servlet.WSSpringServlet</servlet-class>
    </servlet>
    <servlet-mapping>
        <servlet-name>JaxWsServlet</servlet-name>
        <url-pattern>/services/*</url-pattern>
    </servlet-mapping>

</web-app>
applicationContext-jaxws.xml,与之前不同之处在于,需要xml头需要增加wss的声明
<?xml version="1.0" encoding="UTF-8"?>
<beans xmlns="http://www.springframework.org/schema/beans"
    xmlns:context="http://www.springframework.org/schema/context"
    xmlns:xsi="http://www.w3.org/2001/XMLSchema-instance" xmlns:ws="http://jax-ws.dev.java.net/spring/core"
    xmlns:wss="http://jax-ws.dev.java.net/spring/servlet"
    xsi:schemaLocation="http://www.springframework.org/schema/beans http://www.springframework.org/schema/beans/spring-beans-2.5.xsd
    http://www.springframework.org/schema/context http://www.springframework.org/schema/context/spring-context-2.5.xsd
    http://jax-ws.dev.java.net/spring/core
    http://jax-ws.dev.java.net/spring/core.xsd
    http://jax-ws.dev.java.net/spring/servlet
    http://jax-ws.dev.java.net/spring/servlet.xsd">

  <!-- 扫描spring注解 -->
    <context:annotation-config />
    <context:component-scan base-package="com.example.ws">
    </context:component-scan>

  <!-- 绑定webservice地址,需要与web.xml的地址对应 -->
    <wss:binding url="/services/add">
        <wss:service>
            <ws:service bean="#exampleService" />
        </wss:service>

    </wss:binding>

</beans>
java Code
package com.example.ws;

import javax.jws.WebMethod;
import javax.jws.WebService;
import javax.jws.soap.SOAPBinding;
import javax.jws.soap.SOAPBinding.Style;

import org.springframework.stereotype.Service;


@Service("exampleService")
// 只有此处与方法一不同
@WebService
@SOAPBinding(style=Style.RPC)
public class ExampleService {

    @WebMethod
    public String example1(String request){
        System.out.println(request);
        String response = request+ "hello";
        return response;
    }
}
此种方式的本地请求地址为:http://localhost:8080/JAXWsExample2/services/add?wsdl
http://ip地址:服务器端口号/ 项目应用名/servlet定义地址?wsdl
以上两种方式本人在本地使用Tomcat服务都可以测试通过
在WebSphere服务器上目前测试只有第二种可用