一、dubbo 服务化最佳实践
1. 分包
建议将服务接口、服务模型、服务异常等均放在公共包中
2. 粒度
服务接口尽可能大粒度,每个服务方法应代表一个功能,而不是某功能的一个步骤,否则将面临分布式事务问题,Dubbo 暂未提供分布式事务支持
服务接口建议以业务场景为单位划分,并对相近业务做抽象,防止接口数量爆炸
不建议使用过于抽象的通用接口,如:Map query(Map),这样的接口没有明确语义,会给后期维护带来不便
3. 版本
每个接口都应定义版本号,为后续不兼容升级提供可能,如: <dubbo:service interface="com.xxx.XxxService" version="1.0" />。
建议使用两位版本号,要变更服务版本。先升级一半提供者为新版本,再将消费者全部升为新版本,然后将剩下的一半提供者升为新版本
二、改造 dubbo 项目
抽象分散在多个项目中的公共接口,实体类,异常,工具类到一个项目中(比如:link-interface)
在其他项目如服务提供者,消费者共用公共的资源
三、link-interface
link-interface是一个maven Java工程
dubbo官方推荐使用的一个模式,将实体bean和业务接口存放到接口工程中
1. pom.xml
这只是一个java工程,这里不用改变
<?xml version="1.0" encoding="UTF-8"?>
<project xmlns="http://maven.apache.org/POM/4.0.0"
         xmlns:xsi="http://www.w3.org/2001/XMLSchema-instance"
         xsi:schemaLocation="http://maven.apache.org/POM/4.0.0 http://maven.apache.org/xsd/maven-4.0.0.xsd">
    <modelVersion>4.0.0</modelVersion>

    <groupId>com.md.dubbo</groupId>
    <artifactId>03-link-interface</artifactId>
    <version>1.0.0</version>


</project>
2. 实体类
package com.md.dubbo.model;

import java.io.Serializable;

/**
 * @author MD
 * @create 2020-08-19 10:40
 */
// 对于分布式开发,对象要进行序列化操作
public class User implements Serializable {
    private Integer id;

    private String username;

    public Integer getId() {
        return id;
    }

    public void setId(Integer id) {
        this.id = id;
    }

    public String getUsername() {
        return username;
    }

    public void setUsername(String username) {
        this.username = username;
    }
}
3. 公共接口
package com.md.dubbo.service;

import com.md.dubbo.model.User;

/**
 * @author MD
 * @create 2020-08-19 10:41
 */
public interface UserService {

    /**
     * 通过用户id获取用户信息
     * @param id
     * @return
     */
    User queryUserById(Integer id);


    /**
     * 获取用户总人数
     * @return
     */
    Integer queryAllUserCount();
}
四、提供者
建立maven web工程
1. pom.xml
注意引入接口工程的依赖
<?xml version="1.0" encoding="UTF-8"?>

<project xmlns="http://maven.apache.org/POM/4.0.0" xmlns:xsi="http://www.w3.org/2001/XMLSchema-instance"
  xsi:schemaLocation="http://maven.apache.org/POM/4.0.0 http://maven.apache.org/xsd/maven-4.0.0.xsd">
  <modelVersion>4.0.0</modelVersion>

  <groupId>com.md.dubbo</groupId>
  <artifactId>04-link-userservice-provider</artifactId>
  <version>1.0.0</version>
  <packaging>war</packaging>


  <properties>
    <project.build.sourceEncoding>UTF-8</project.build.sourceEncoding>
    <maven.compiler.source>1.8</maven.compiler.source>
    <maven.compiler.target>1.8</maven.compiler.target>
  </properties>

  <dependencies>
    <dependency>
      <groupId>junit</groupId>
      <artifactId>junit</artifactId>
      <version>4.11</version>
      <scope>test</scope>
    </dependency>

    <!--spring依赖-->
    <dependency>
      <groupId>org.springframework</groupId>
      <artifactId>spring-context</artifactId>
      <version>4.3.16.RELEASE</version>
    </dependency>

    <dependency>
      <groupId>org.springframework</groupId>
      <artifactId>spring-webmvc</artifactId>
      <version>4.3.16.RELEASE</version>
    </dependency>


    <!--dubbo依赖-->
    <dependency>
      <groupId>com.alibaba</groupId>
      <artifactId>dubbo</artifactId>
      <version>2.6.2</version>
    </dependency>


    <!--引入接口工程-->
    <dependency>
      <groupId>com.md.dubbo</groupId>
      <artifactId>03-link-interface</artifactId>
      <version>1.0.0</version>
    </dependency>


  </dependencies>

  <build>

  </build>
</project>
2. 接口实现
这里只是一个简单的模拟
package com.md.dubbo.service.impl;

import com.md.dubbo.model.User;
import com.md.dubbo.service.UserService;

/**
 * @author MD
 * @create 2020-08-19 10:48
 */
public class UserServiceImpl implements UserService {
    @Override
    public User queryUserById(Integer id) {

        User user = new User();
        user.setId(id);
        user.setUsername("山丘!");

        return user;
    }

    @Override
    public Integer queryAllUserCount() {
        return 9;
    }
}
3. 服务提供者的核心配置文件
在resources目录下建立dubbo-userservice-provider.xml文件
<?xml version="1.0" encoding="UTF-8"?>
<beans xmlns="http://www.springframework.org/schema/beans"
       xmlns:xsi="http://www.w3.org/2001/XMLSchema-instance" xmlns:dubbo="http://dubbo.apache.org/schema/dubbo"
       xsi:schemaLocation="http://www.springframework.org/schema/beans http://www.springframework.org/schema/beans/spring-beans.xsd http://dubbo.apache.org/schema/dubbo http://dubbo.apache.org/schema/dubbo/dubbo.xsd">

    <!--声明dubbo服务提供者名称:保证唯一性,通常用model名就可以-->
    <dubbo:application name="04-link-userservice-provider"/>


    <!--设置dubbo使用的协议和端口号-->
    <dubbo:protocol name="dubbo" port="20880"/>

    <!--暴露服务接口-->
    <dubbo:service interface="com.md.dubbo.service.UserService" ref="userService" registry="N/A"/>


    <!--加载业务接口的实现类到spring容器中-->
    <bean id="userService" class="com.md.dubbo.service.impl.UserServiceImpl"/>

</beans>
4. 添加监听器
在web.xml中
<?xml version="1.0" encoding="UTF-8"?>
<web-app xmlns="http://xmlns.jcp.org/xml/ns/javaee"
         xmlns:xsi="http://www.w3.org/2001/XMLSchema-instance"
         xsi:schemaLocation="http://xmlns.jcp.org/xml/ns/javaee http://xmlns.jcp.org/xml/ns/javaee/web-app_4_0.xsd"
         version="4.0">

<!--默认的版本低的话换成这个版本的,直接复制即可-->

  <context-param>
    <param-name>contextConfigLocation</param-name>
    <param-value>classpath:dubbo-userservice-provider.xml</param-value>
  </context-param>

  <listener>
    <listener-class>org.springframework.web.context.ContextLoaderListener</listener-class>
  </listener>

</web-app>
5. 配置Tomcat
端口号注意修改一下:避免冲突
HTTP port :8081
JMX port:1098
五、消费者
1. pom.xml
还是maven web项目
注意:添加了接口的依赖
<?xml version="1.0" encoding="UTF-8"?>

<project xmlns="http://maven.apache.org/POM/4.0.0" xmlns:xsi="http://www.w3.org/2001/XMLSchema-instance"
  xsi:schemaLocation="http://maven.apache.org/POM/4.0.0 http://maven.apache.org/xsd/maven-4.0.0.xsd">
  <modelVersion>4.0.0</modelVersion>

  <groupId>com.md.dubbo</groupId>
  <artifactId>05-link-consumer</artifactId>
  <version>1.0.0</version>
  <packaging>war</packaging>


  <properties>
    <project.build.sourceEncoding>UTF-8</project.build.sourceEncoding>
    <maven.compiler.source>1.8</maven.compiler.source>
    <maven.compiler.target>1.8</maven.compiler.target>
  </properties>

  <dependencies>
    <dependency>
      <groupId>junit</groupId>
      <artifactId>junit</artifactId>
      <version>4.11</version>
      <scope>test</scope>
    </dependency>
    <!--spring依赖-->
    <dependency>
      <groupId>org.springframework</groupId>
      <artifactId>spring-context</artifactId>
      <version>4.3.16.RELEASE</version>
    </dependency>

    <dependency>
      <groupId>org.springframework</groupId>
      <artifactId>spring-webmvc</artifactId>
      <version>4.3.16.RELEASE</version>
    </dependency>

    <!--dubbo依赖-->
    <dependency>
      <groupId>com.alibaba</groupId>
      <artifactId>dubbo</artifactId>
      <version>2.6.2</version>
    </dependency>


    <!--接口工程-->
    <!--此时不像之前的还得打jar包,这里不用,03是普通的java工程,只提供接口-->
    <dependency>
      <groupId>com.md.dubbo</groupId>
      <artifactId>03-link-interface</artifactId>
      <version>1.0.0</version>
    </dependency>


  </dependencies>

  <build>

  </build>
</project>
2. 服务消费者的核心配置文件
在resources目录下建立dubbo-consumer.xml文件
<?xml version="1.0" encoding="UTF-8"?>
<beans xmlns="http://www.springframework.org/schema/beans"
       xmlns:xsi="http://www.w3.org/2001/XMLSchema-instance" xmlns:dubbo="http://dubbo.apache.org/schema/dubbo"
       xsi:schemaLocation="http://www.springframework.org/schema/beans http://www.springframework.org/schema/beans/spring-beans.xsd http://dubbo.apache.org/schema/dubbo http://dubbo.apache.org/schema/dubbo/dubbo.xsd">

    <!--声明服务消费着名称:唯一-->
    <dubbo:application name="05-link-consumer"/>

    <!--引用远程接口服务-->
    <dubbo:reference id="userService" interface="com.md.dubbo.service.UserService"
                     url="dubbo://localhost:20880"
                     registry="N/A"/>

</beans>
3. controller
package com.md.dubbo.web;

import com.md.dubbo.model.User;
import com.md.dubbo.service.UserService;
import org.springframework.beans.factory.annotation.Autowired;
import org.springframework.stereotype.Controller;
import org.springframework.ui.Model;
import org.springframework.web.bind.annotation.RequestMapping;

/**
 * @author MD
 * @create 2020-08-19 11:11
 */
@Controller
public class UserController {

    @Autowired
    private UserService userService;

    @RequestMapping(value = "/userDetail")
    public String userDetail(Model model , Integer id){

        // 根据id获取用户信息
        User user = userService.queryUserById(id);

        // 获取用户总人数
        Integer allUserCount = userService.queryAllUserCount();

        model.addAttribute("user",user);
        model.addAttribute("allUserCount",allUserCount);

        return "userDetail";
    }


}
4. applicationContext.xml
在resources目录下创建spring配置文件
<?xml version="1.0" encoding="UTF-8"?>
<beans xmlns="http://www.springframework.org/schema/beans"
       xmlns:xsi="http://www.w3.org/2001/XMLSchema-instance"
       xmlns:context="http://www.springframework.org/schema/context"
       xmlns:mvc="http://www.springframework.org/schema/mvc"
       xsi:schemaLocation="http://www.springframework.org/schema/beans http://www.springframework.org/schema/beans/spring-beans.xsd http://www.springframework.org/schema/context http://www.springframework.org/schema/context/spring-context.xsd http://www.springframework.org/schema/mvc http://www.springframework.org/schema/mvc/spring-mvc.xsd">

    <!--扫描组件-->
    <context:component-scan base-package="com.md.dubbo.web"/>

    <!--配置注解驱动-->
    <mvc:annotation-driven/>

    <bean class="org.springframework.web.servlet.view.InternalResourceViewResolver">
        <property name="prefix" value="/"/>
        <property name="suffix" value=".jsp"/>

    </bean>

</beans>
5. 配置中央调度器
在web.xml中
<?xml version="1.0" encoding="UTF-8"?>
<web-app xmlns="http://xmlns.jcp.org/xml/ns/javaee"
         xmlns:xsi="http://www.w3.org/2001/XMLSchema-instance"
         xsi:schemaLocation="http://xmlns.jcp.org/xml/ns/javaee http://xmlns.jcp.org/xml/ns/javaee/web-app_4_0.xsd"
         version="4.0">


  <!--中央调度器-->

  <servlet>
    <servlet-name>dispatcherServlet</servlet-name>
    <servlet-class>org.springframework.web.servlet.DispatcherServlet</servlet-class>

    <init-param>
      <param-name>contextConfigLocation</param-name>
      <param-value>classpath:applicationContext.xml,classpath:dubbo-consumer.xml</param-value>
    </init-param>

  </servlet>


  <servlet-mapping>
    <servlet-name>dispatcherServlet</servlet-name>
    <url-pattern>/</url-pattern>
  </servlet-mapping>


</web-app>
6. 配置Tomcat
此时使用默认的就可以了
7. 配置测试页面
在webapp下 建立userDetail.jsp
<%--
  Created by IntelliJ IDEA.
  User: MD
  Date: 2020/8/19
  Time: 11:16
  To change this template use File | Settings | File Templates.
--%>
<%@ page contentType="text/html;charset=UTF-8" language="java" %>
<html>
<head>
    <title>Title</title>
</head>
<body>
<h1>hello Dubbo</h1>

<h2>用户id:${user.id}</h2>
<h2>用户姓名:${user.username}</h2>
<h2>用户总数:${allUserCount}</h2>
</body>
</html>
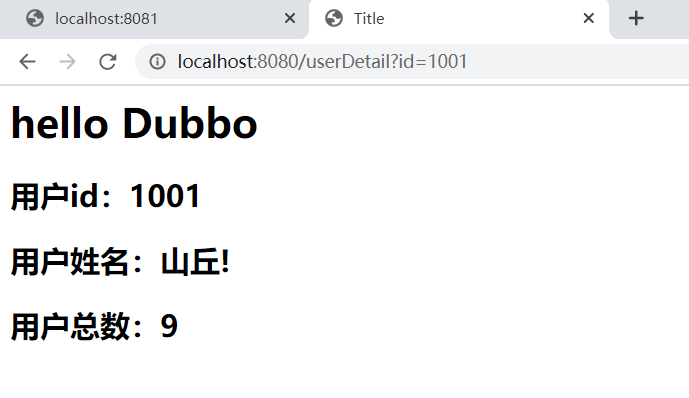
8. 测试
- 首先开服务提供者的Tomcat
- 然后开服务消费者的Tomcat
- 然后在地址栏输入,就可以看到了