先贴spring的开发文档,有助于大家学习http://shouce.jb51.net/spring/beans.html#beans-factory-class
一直想研究一下spring bean的控制反转的实现,废话不多说。
1、先建了一个WEB工程,导入相关spring的jar包,装载到tomcat上,成功访问,有不懂的童鞋可以移步http://www.cnblogs.com/mei0619/p/6560332.html。
2.为了方便研究,我将对象的调用直接写在controller里,输出相应的日志,如果可以输出,证明bean是创建成功的,代码如下:
package com.controller;

import javax.annotation.Resource;

import org.springframework.beans.factory.annotation.Autowired;
import org.springframework.stereotype.Controller;
import org.springframework.ui.Model;
import org.springframework.web.bind.annotation.ModelAttribute;
import org.springframework.web.bind.annotation.RequestMapping;
import org.springframework.web.servlet.ModelAndView;

import com.entity.User;
import com.entity.World;

@Controller
public class SpringServlet {

    /**
     * @Autowired 自动装载world对象 自动按type装载,也就是bean的class属性
     * 或者@Resource(name="world") 按name装载,也就是bean的id
     */
    @Resource(name="world")    //这里的@Resource(name="world")和@Autowired是一模一样的,
    public World world;

    @RequestMapping("/index")
    public String index(Model model){
        world.worldTest();
        return "index";
    }

    @RequestMapping("/save")
    public String Save(@ModelAttribute("form") User user, Model model) { // user:视图层传给控制层的表单对象;model:控制层返回给视图层的对象
        System.out.println(model.toString());
        model.addAttribute("user", user);
        return "detail";
    }
}
3、然后还写了两个类,代码如下:
package com.entity;

import java.io.Serializable;
import java.util.Date;

import org.springframework.stereotype.Repository;

@Repository
public class User implements Serializable{

     private static final long serialVersionUID = 1L;
        private Integer id; // id
        private String name; // name
        private String pwd; // pwd
        private Integer age; // age
//        private Date creatTime; // creatTime

        public Integer getId() {
            return id;
        }

        public void setId(Integer id) {
            this.id = id;
        }

        public String getName() {
            return name;
        }

        public void setName(String name) {
            this.name = name;
        }

        public String getPwd() {
            return pwd;
        }

        public void setPwd(String pwd) {
            this.pwd = pwd;
        }

        public Integer getAge() {
            return age;
        }

        public void setAge(Integer age) {
            this.age = age;
        }

//        public Date getCreatTime() {
//            return creatTime;
//        }
//
//        public void setCreatTime(Date creatTime) {
//            this.creatTime = creatTime;
//        }
        public String toString(){
            return name+"333"+age;
        }
        public void test(){
            System.out.println("22222");
        }
}
package com.entity;

import java.io.Serializable;

import javax.annotation.Resource;

import org.springframework.beans.factory.annotation.Autowired;

public class World implements Serializable{

    private static final long serialVersionUID = 1L;

//  @Resource(name="user")   //这里的@Resource(name="user")和@Autowired是一模一样的,
    private User user;

    private String type;

    public String getType() {
        return type;
    }

    public void setType(String type) {
        this.type = type;
    }

    public void setUser(User user) {
        this.user = user;
    }

    public void worldTest(){
        user.test();
        System.out.println("worldTest------" + type+"------"+user.getName());
    }
}
在上述代码中,SpringServlet里的world是IOC容器通过标签@Resource从配置文件中根据name装载的,而World类里同样有一个User类,这个类没有加标签,他是通过setUser()的方法装载的user bean类,配置文件里配置一下bean类,代码如下:
<bean id="world" class="com.entity.World">
        <property name="user" ref="user" />
        <property name="type" value="stringWorld"></property>
    </bean>
    <bean id="user" class="com.entity.User"/>
这样,SpringServlet里的world就通过控制反转的方式生成对象,然后调用world的worldTest()方法,就可以成功输出,如果world对象没有成功生成,调用他的方法的时候会报 java.lang.NullPointerException,
后台日志打印:
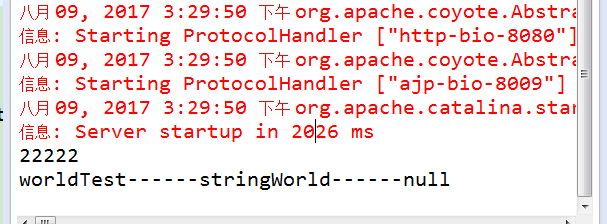
证明对象已经成功创建,如果想给对象添加属性,可以直接在配置文件里添加,如下形式:
<bean id="user" class="com.entity.User">
        <property name="id" value="1"></property>
        <property name="name" value="guan"></property>
        <property name="pwd" value="111111"></property>
        <property name="age" value="12"></property>
    </bean>
最后,我想让代码更精简,不想写那么多配置文件,可以采用注解的形式,为World.java的User属性添加@Autowired或者@Resource(name="user")标签,然后改一下配置文件,只需要写两行,如下:
<bean id="world" class="com.entity.World" />
<bean id="user" class="com.entity.User"/>
是不是代码精简了好多,也装逼了好多,程序可以成功运行,同时日志台输出: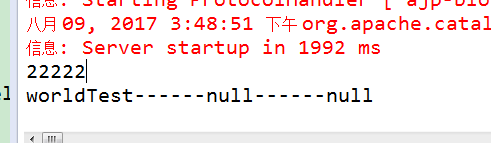
然后就结束了,很多东西还有待学习,,,有很多不明白,最后贴一下配置文件springSerblet-config.xml代码:
<?xml version="1.0" encoding="UTF-8"?>
<beans xmlns="http://www.springframework.org/schema/beans"
    xmlns:xsi="http://www.w3.org/2001/XMLSchema-instance" xmlns:p="http://www.springframework.org/schema/p"
    xmlns:context="http://www.springframework.org/schema/context"
    xmlns:task="http://www.springframework.org/schema/task"
    xmlns:util="http://www.springframework.org/schema/util" xmlns:mvc="http://www.springframework.org/schema/mvc"
    xsi:schemaLocation="
      http://www.springframework.org/schema/beans
      http://www.springframework.org/schema/beans/spring-beans-4.2.xsd
      http://www.springframework.org/schema/util
      http://www.springframework.org/schema/util/spring-util-4.2.xsd
      http://www.springframework.org/schema/context
      http://www.springframework.org/schema/context/spring-context-4.2.xsd
      http://www.springframework.org/schema/mvc
      http://www.springframework.org/schema/mvc/spring-mvc-4.2.xsd
      http://www.springframework.org/schema/task
      http://www.springframework.org/schema/task/spring-task.xsd ">

    <!-- 使用默认的注解映射 -->
    <mvc:annotation-driven />
    <!-- <mvc:resources location="/" mapping="/index.html" />
      <context:annotation-config></context:annotation-config>-->
    <!-- world bean类 -->
    <bean id="world" class="com.entity.World" />
        <!-- <property name="user" ref="user" />
        <property name="type" value="stringWorld"></property>
    </bean> -->
    <bean id="user" class="com.entity.User"/>
    <!-- user bean类 -->
    <!-- <bean id="user" class="com.entity.User">
        <property name="id" value="1"></property>
        <property name="name" value="guan"></property>
        <property name="pwd" value="111111"></property>
        <property name="age" value="12"></property>
    </bean> -->
    <!-- <bean id="world" class="com.entity.World">
        <property name="user">
            <idref bean="user"/>
        </property>
        <property name="type" value="stringWorld"></property>
    </bean> -->
    <!-- 自动扫描controller包中的控制器 -->
    <context:component-scan base-package="com.controller" />
    <bean class="org.springframework.web.servlet.view.InternalResourceViewResolver" >
        <property name="prefix" value="/WEB-INF/jsp/" />
        <property name="suffix" value=".jsp" />
    </bean>

    <!-- <bean id="urlMapping" class="org.springframework.web.servlet.handler.SimpleUrlHandlerMapping">
        <property name="mappings">
            <props>
                <prop key="/index.do">controllerDoem</prop>
            </props>
        </property>
    </bean>

     <bean id="controllerDoem" class="com.controller">
        <property name="view">
            <value>index</value>
        </property>
    </bean>-->

</beans>
applicationContext.xml和web.xml里的是一些web工程基本配置,不要动它,整体结构是这样的: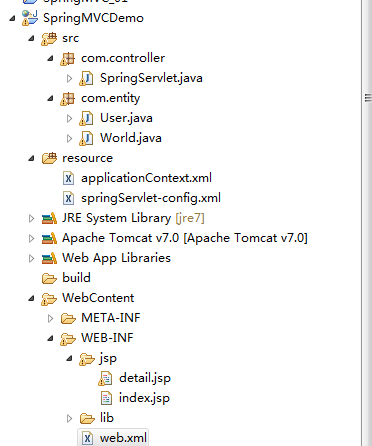
最后,欢迎各位大神指导,指出错误和不足。。。。 正在努力学习中。。。