• React中componentWillReceiveProps的替代升级方案


    因为最近在做一个逻辑较为复杂的需求,在封装组件时经常遇到父组件props更新来触发子组件的state这种情景。在使用componentWillReceiveProps时,发现React官网已经把componentWillReceiveProps重名为UNSAFE_componentWillReceiveProps,但是我发现了getDerivedStateFromProps可以替代,却又被一篇博客告知这个也尽量别使用。因为组件一旦使用派生状态,很有可能因为没有明确的数据来源导致出现一些bug和不一致性。既然提倡避免使用,肯定也会有相应的解决方案。

    本文会介绍以上两种生命周期的使用方法、误区和替代升级方案。

    componentWillReceiveProps

    1.介绍

    componentWillReceiveProps是React生命周期函数之一,在初始props不会被调用,它会在组件接受到新的props时调用。一般用于父组件更新状态时子组件的重新渲染。在react16.3之前,componentWillReceiveProps是在不进行额外render的前提下,响应props中的改变并更新state的唯一方式。

    2.使用方法

      componentWillReceiveProps(nextProps) {
     //通过this.props来获取旧的外部状态,初始 props 不会被调用
     //通过对比新旧状态,来判断是否执行如this.setState及其他方法
     }


    主要在以下两种情景使用:

    • 从上传的props无条件的更新state
    • 当props和state不匹配时候更新state

    3.常见误区
    无条件的更新state

    class EmailInput extends Component {
      state = { email: this.props.email };
    
      componentWillReceiveProps(nextProps) {
     // 这样会覆盖内部 email的更新!
     this.setState({ email: nextProps.email });
     }
    
      handleChange = event => {
     this.setState({ email: event.target.value });
     };
    
      render() {
     return <input onChange={this.handleChange} value={this.state.email} />;
     }
    }


    从上述例子可以发现子组件的更新会被父组件的更新覆盖。并且大家在使用过程没有必要这样无条件更新,完全可以写成一个完全受控组件。

    <input onChange={this.props.onChange} value={this.props.email} />


    也可以对比新旧props状态:

      componentWillReceiveProps(nextProps) {
     if (nextProps.email !== this.props.email) {
     this.setState({ email: nextProps.email });
     }
     }


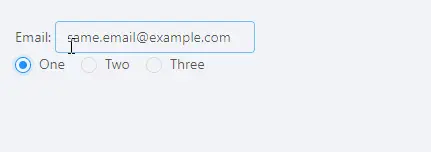
    现在该组件只会在props改变时候覆盖之前的修改了,但是仍然存在一个小问题。例如一个密码管理网站使用了如上的输入组件。当切换两个不同的账号的时候,如果这两个账号的邮箱相同,那么我们的重置就会失效。因为对于这两个账户传入的email属性是一样的,即数据源相同。效果如下:


    // 父组件:
    import React, { Component, Fragment } from 'react';
    import { Radio } from 'antd';
    import UncontrolledInput from './UncontrolledInput';
    const accounts = [
     {
        id: 1,
        name: 'One',
        email: 'same.email@example.com',
     },
     {
        id: 2,
        name: 'Two',
        email: 'same.email@example.com',
     },
     {
        id: 3,
        name: 'Three',
        email: 'other.fake.email@example.com',
     }
    ];
    export default class AccountList extends Component {
      state = {
        selectedIndex: 0
     };
    
      render() {
     const { selectedIndex } = this.state;
     return (
     <Fragment>
     <UncontrolledInput email={accounts[selectedIndex].email} />
     <Radio.Group onChange={(e) => this.setState({ selectedIndex: e.target.value })} value={selectedIndex}>
     {accounts.map((account, index) => (
     <Radio value={index}>
     {account.name}
     </Radio>
     ))}
     </Radio.Group>
     </Fragment>
     );
     }
    }
    //子组件
    import React, { Component } from 'react';
    import { Input } from 'antd';
    export default class UncontrolledInput extends Component {
      state = {
        email: this.props.email
     };
    
      componentWillReceiveProps(nextProps) {
     if (nextProps.email !== this.props.email) {
     this.setState({ email: nextProps.email });
     }
     }
    
      handleChange = event => {
     this.setState({ email: event.target.value });
     };
    
      render() {
     return (
     <div>
     Email: <Input onChange={this.handleChange} value={this.state.email} />
     </div>
     );
     }
    }


    从id为1的账户切换到id为2的账户,因为传入的email相同(nextProps.email === this.props.email),输入框无法重置。从id为2的账户切换到id为3的账户,因为传入的email不同,进行了输入框的重置。大家可能想到,既然需要切换账户就重置,那就把id或者selectedIndex选中项作为判断重置条件。

    //父组件引入子组件方式
    <UncontrolledInput email={accounts[selectedIndex].email} selectedIndex={selectedIndex} />
    //子组件
      componentWillReceiveProps(nextProps) {
     if (nextProps.selectedIndex !== this.props.selectedIndex) {
     this.setState({ email: nextProps.email });
     }
     }


    其实当使用唯一标识符来判来保证子组件有一个明确的数据来源时,我们使用key是获取是最合适的方法。并且不需要使用componentWillReceiveProps,只需要保证每次我们每次需要重置输入框时候可以有不同的key值。

    //父组件
    <UncontrolledInput email={accounts[selectedIndex].email} key={selectedIndex} />


    每当key发生变化,会引起子组件的重新构建而不是更新。当我们切换账户,不再是子组件而是重新构建,同样的达到了重置的效果。但是还有一个小问题,当我们在一个账户做了更改之后,切换到其他账户并切换回来,发现我们的之前的更改不会缓存。这里我们可以将输入框设计为一个完全可控组件,将更改的状态存在父组件中。

    //父组件
    export default class Release extends Component {
      state = {
        selectedIndex: 0,
        valueList: [...accounts]
     };
      onChange = (event) => {
     const { valueList, selectedIndex } = this.state;
        valueList[selectedIndex].email = event.target.value;
     this.setState({ valueList: [...valueList] });
     }
      render() {
     const { selectedIndex, valueList } = this.state;
     return (
     <Fragment>
     <UncontrolledInput email={valueList[selectedIndex].email} onChange={this.onChange} />
     <Radio.Group onChange={(e) => this.setState({ selectedIndex: e.target.value })} value={selectedIndex}>
     {valueList.map((account, index) => (
     <Radio value={index}>
     {account.name}
     </Radio>
     ))}
     </Radio.Group>
     </Fragment>
     );
     }
    }
    //子组件
    export default class UncontrolledInput extends Component {
      state = {
        email: this.props.email
     };
    
      render() {
     return (
     <div>
     Email: <Input onChange={this.props.onChange} value={this.props.email} />
     </div>
     );
     }
    }


    替换方案:getDerivedStateFromProps

    1.介绍

    React在版本16.3之后,引入了新的生命周期函数getDerivedStateFromProps 需要注意的一点,在React 16.4^ 版本中getDerivedStateFromProps 比 16.3 版本中多了setState forceUpdate 两种触发方法。


    详情请看官方给出的生命周期图。

    2.使用

    static getDerivedStateFromProps(nextProps,prevState){
     //该方法内禁止访问this
     if(nextProps.email !== prevState.email){
     //通过对比nextProps和prevState,返回一个用于更新状态的对象
     return {
                value:nextProps.email
     }
     }
     //不需要更新状态,返回null
     return null
    }


    如果大家仍需要通过this.props来做一些事,可以使用componentDidUpdate

    componentDidUpdate(prevProps, prevState, snapshot){
     if(this.props.email){
     // 做一些需要this.props的事
     }
    }


    通过以上使用方法,React相当于把componentWillReceiveProps拆分成getDerivedStateFromProps和componentDidUpdate。拆分后,使得派生状态更加容易预测。

    3.常见误区

    当我们在子组件内使用该方法来判断新props和state时,可能会引起内部更新无效。

    //子组件
    export default class UncontrolledInput extends Component {
      state = {
        email: this.props.email
     };
    
     static getDerivedStateFromProps(props, state) {
     if (props.email !== state.email) {
     return {
            email: props.email
     };
     }
     return null;
     }
    
      handleChange = event => {
     this.setState({ email: this.props.email });
     };
    
      render() {
     return (
     <div>
     Email: <Input onChange={this.handleChange} value={this.state.email} style={style} />
     </div>
     );
     }
    }


    这是因为在 React 16.4^ 的版本中,setState 和 forceUpdate 也会触发getDerivedStateFromProps方法。当我们尝试改变输入框值,触发setState方法,进而触发该方法,并把 state 值更新为传入的 props。虽然在getDerivedStateFromProps中,不能访问this.props,但是我们可以新加个字段来间接访问this.props进而判断新旧props。

    export default class UncontrolledInput extends Component {
      state = {
        email: this.props.email,
        prevPropEmail: ''
     };
    
     static getDerivedStateFromProps(props, state) {
     if (props.email !== state.prevPropEmail) {
     return {
            email: props.email,
            prevPropEmail: props.email,
     };
     }
     return null;
     }
    
      handleChange = event => {
     this.setState({ email: this.props.email });
     };
    
      render() {
     return (
     <div>
     Email: <Input onChange={this.handleChange} value={this.state.email} style={style} />
     </div>
     );
     }
    }


    通过上一个props.email来判断是否更新,而不是通过state的状态。虽然解决了内部更新问题,但是并不能解决componentWillReceiveProps中提到的多个账户切换无法重置等问题。并且这样写的派生状态代码冗余,并使组件难以维护。

    升级方案

    我们在开发过程中很难保证每个数据都有明确的数据来源,尽量避免使用这两个生命周期函数。结合以上例子以及官网提供的方法,我们有以下升级方案: 1.完全受控组件(推荐) 2.key标识的完全不可控组件(推荐) 使用React的key属性。通过传入不同的key来重新构建组件。在极少情况,你可能需要在没有合适的ID作为key的情况下重置state,可以将需要重置的组件的key重新赋值为当前时间戳。虽然重新创建组件听上去会很慢,但其实对性能的影响微乎其微。并且如果组件具有很多更新上的逻辑,使用key甚至可以更快,因为该子树的diff得以被绕过。 3.通过唯一属性值重置非受控组件。 因为使用key值我们会重置子组件所有状态,当我们需要仅重置某些字段时或者子组件初始化代价很大时,可以通过判断唯一属性是否更改来保证重置组件内部状态的灵活性。 4.使用实例方法重置非受控组件。 当我们没有合适的特殊属性去匹配的时候,可以通过实例方法强制重置内部状态

     //父组件
      handleChange = index => {
     this.setState({ selectedIndex: index }, () => {
     const selectedAccount = accounts[index];
     this.inputRef.current.resetEmailForNewUser(selectedAccount.email);
     });
     };
     //子组件
        resetEmailForNewUser(defaultEmail) {
     this.setState({ email: defaultEmail });
     }


    总结

    升级方案不仅仅以上几种,例如当我们仅仅需要当props更改进行数据提取或者动画时,可以使用componentDidUpdate。还可以参考官网提供的memoization(缓存记忆)。但是主要推荐的方案是完全受控组件和key值的完全不受控组件。当无法满足需求的特殊情况,再使用其他方法。总之,componentWillReceiveProps/getDerivedStateFromProps是一个拥有一定复杂度的高级特性,我们应该谨慎地使用。

  • 相关阅读:
    Mysql数据库(三)Mysql表结构管理
    Mysql数据库(二)Mysql数据库管理
    Mysql数据库(一)数据库设计概述
    设计模式(二十三)Interpreter模式
    设计模式(二十二)Command模式
    设计模式(二十一)Proxy模式
    设计模式(二十)Flyweight模式
    python 全局变量
    python 装饰器
    python 文件读写
  • 原文地址:https://www.cnblogs.com/makai/p/14463098.html
Copyright © 2020-2023  润新知