一、通过端口创建虚拟主机
案例:通过端口访问两个不同的页面
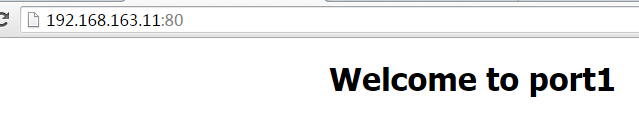
将/usr/local/tengine-2.1.0/html/index.html内的内容改为 Welcom to port1
然后在/opt/sxt/html/index.html 中内容改为Welcom to port2
更改tengine的配置文件

vim /usr/local/tengine-2.1.0/conf/nginx.conf
   # 添加两个Server,一个Server的端口指向80
   server {
        listen       80;
        server_name  192.168.163.11;

        location / {
            root   html;
            index  index.html index.htm;
        }
    }

    #另一个的端口指向8080
    server {
        listen       8080;
        server_name  192.168.163.11;

        location / {
            root   /opt/sxt/html;
            index  index.html index.htm;
        }
    }
#然后重启Nginx
service nginx restart
我们访问两个不同的端口可以看到内容不相同

二、通过IP实现虚拟主机
通过不同IP同样的端口访问不同的页面,还是将两个index.html页面内容改为IP1和IP2
通过命令虚拟出来一个IP
ifconfig eth0:1 192.168.163.100(虚拟IP,但一定要和真实IP在同一个网段) netmask 255.255.255.0
ifconfig   #查看新虚拟出来的IP

   #两个Server监听两个不同的IP
    server {
        listen       80;
        server_name  192.168.163.11;

        location / {
            root   html;
            index  index.html index.htm;
        }
    }


    server {
        listen       80;
        server_name  192.168.163.100;

        location / {
            root   /opt/sxt/html;
            index  index.html index.htm;
        }
    }
重启Nginx : service nginx restart


三、通过实现虚拟主机
通过域名访问不同的两个index.html 将两个index.html的内容改为 nginx1.com 和 nginx2.com
#将两个域名指向同一个端口,访问结果是什么
server {
        listen       80;
        server_name  www.nginx1.com;

        location / {
            root   html;
            index  index.html index.htm;
        }
    }


    server {
        listen       80;
        server_name  www.nginx2.com;

        location / {
            root   /opt/sxt/html;
            index  index.html index.htm;
        }
    }
重启Nginx,然后在本地Winodw的Hosts内将两个域名指向同一个IP(因为我们的域名是没有注册的,所以需要手动解析一下):
C:WindowsSystem32driversetchosts
192.168.163.11 www.nginx1.com
192.168.163.11 www.nginx2.com
结果:


至此我们根据IP、端口、域名实现了虚拟化主机