此项目源码下载地址:https://github.com/lizhiqiang0204/Tile
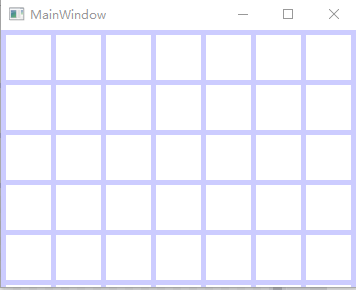
方格效果:

前端代码如下:
<Window x:Class="WpfApp1.MainWindow"
        xmlns="http://schemas.microsoft.com/winfx/2006/xaml/presentation"
        xmlns:x="http://schemas.microsoft.com/winfx/2006/xaml"
        xmlns:d="http://schemas.microsoft.com/expression/blend/2008"
        xmlns:mc="http://schemas.openxmlformats.org/markup-compatibility/2006"
        xmlns:local="clr-namespace:WpfApp1"
        mc:Ignorable="d"
        Title="MainWindow" Height="200" Width="300">
    <Window.Resources>
        <!--自定义格式的背景的具体定义-->
        <!--Viewport="0,0,50,50" 起点坐标为0,0 长为50宽为50像素的矩形-->
        <DrawingBrush x:Key="MyGridBrushResource"  Viewport="0,0,50,50" ViewportUnits ="Absolute" TileMode="Tile">
            <DrawingBrush.Drawing>
                <DrawingGroup>
                    <DrawingGroup.Children>
                        <!--画横线-->
                        <GeometryDrawing Geometry="M0,0 L1,0 1,0.1, 0,0.1Z" Brush="#CCCCFF" />
                        <!--画竖线-->
                        <GeometryDrawing Geometry="M0,0 L0,1 0.1,1, 0.1,0Z" Brush="#CCCCFF" />
                    </DrawingGroup.Children>
                </DrawingGroup>
            </DrawingBrush.Drawing>
        </DrawingBrush>


        <Style x:Key="MyCanvasStyle">
            <!--自定义格式的背景为 MyGridBrushResource-->
            <Setter Property="Canvas.Background" Value="{StaticResource  MyGridBrushResource}"/>
        </Style>
    </Window.Resources>

    <Grid>
        <!--放置一个画布 Canvas  格式为自定义格式MyCanvasStyle -->
        <Canvas Name="_myCanvas"  Style="{StaticResource  MyCanvasStyle}"  />
    </Grid>
</Window>
Geometry="M0,0 L1,0 1,0.1, 0,0.1Z" 此语法中M是移动命令,L是直线命令,Z是结束命令,详细资料参考官网https://docs.microsoft.com/zh-cn/dotnet/framework/wpf/graphics-multimedia/path-markup-syntax#the-close-command
 M0,0 L1,0 1,0.1, 0,0.1Z此语法中的数值都是比例的意思,(0,0)->(1,0)->(1,0.1)->(0,0.1)画了一个矩形,横坐标的1是1*50 = 50,0是0*50 = 0,0.1就是0.1*50 = 5纵坐标以此类推。(矩形 Viewport="0,0,50,50")
<!--画横矩形-->
<GeometryDrawing Geometry="M0,0 L1,0 1,0.1, 0,0.1Z" Brush="#CCCCFF" />
<!--画竖矩形-->
<GeometryDrawing Geometry="M0,0 L0,1 0.1,1, 0.1,0Z" Brush="#CCCCFF" />
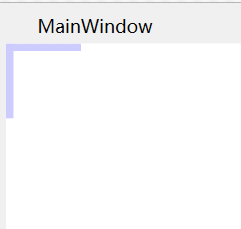
效果图

TileMode="Tile" Tile是瓦片的意思,把TileMode设为None就是上图效果,设为Tile瓦片模式,就会横向纵向像瓦片一样展开,就是第一张图的效果。
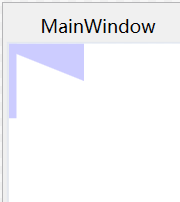
我们把第三个点(0,0)->(1,0)->(1,0.1)->(0,0.1)纵坐标的0.1改成0.5比例的话(0,0)->(1,0)->(1,0.5)->(0,0.1)单个效果如下:

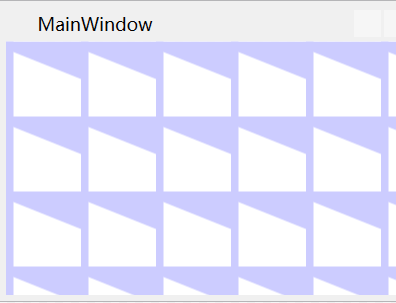
TileMode="Tile"瓦片模式效果

以上纯属个人理解,如有错误,望请更正!