IdentityServer4默认提供了的登录地址是Account/Index 同意页面是Consent/Index
这里我们可以通过IdentittyServer4的用户交互自定义配置设置
在ConfigureServices服务中添加services.AddIdentityServer() 在参数中提供了UserInteraction设置


services.AddIdentityServer(options =>
            {
                options.UserInteraction = new IdentityServer4.Configuration.UserInteractionOptions
                {

                    LoginUrl = "/Account/Login",//【必备】登录地址
                    LogoutUrl = "/Account/Logout",//【必备】退出地址
                    ConsentUrl = "/Account/Consent",//【必备】允许授权同意页面地址
                    ErrorUrl = "/Account/Error", //【必备】错误页面地址
                    LoginReturnUrlParameter = "ReturnUrl",//【必备】设置传递给登录页面的返回URL参数的名称。默认为returnUrl
                    LogoutIdParameter = "logoutId", //【必备】设置传递给注销页面的注销消息ID参数的名称。缺省为logoutId
                    ConsentReturnUrlParameter = "ReturnUrl", //【必备】设置传递给同意页面的返回URL参数的名称。默认为returnUrl
                    ErrorIdParameter = "errorId", //【必备】设置传递给错误页面的错误消息ID参数的名称。缺省为errorId
                    CustomRedirectReturnUrlParameter = "ReturnUrl", //【必备】设置从授权端点传递给自定义重定向的返回URL参数的名称。默认为returnUrl

                    CookieMessageThreshold = 5 //【必备】由于浏览器对Cookie的大小有限制,设置Cookies数量的限制,有效的保证了浏览器打开多个选项卡,一旦超出了Cookies限制就会清除以前的Cookies值
                };


            })
                .AddDeveloperSigningCredential()
                .AddInMemoryIdentityResources(MemoryClients.GetIdentityResources())
                .AddInMemoryApiResources(MemoryClients.GetApiResources())
                .AddInMemoryClients(MemoryClients.GetClients());
这里我指定的都是在我的AccountController中,指定好了页面,我们来开始做我们的登录界面
登录一般需要用户名、密码、记住密码字段,但是在IdentityServer4中还提供了一个ReturnUrl,在Client端OIDC授权访问的时候会转接到IdenttityServer4服务端进行验证并且构建好相关的ReturnUrl地址
ReturnUrl是一个非常重要的参数,它在整个授权过程中充当了重要的作用
想到登录界面,分析好了模型,接下来就是构建模型 首先构建 界面视图模型:LoginViewModel
public class LoginViewModel
    {
         /// <summary>
         /// 用户名
         /// </summary>
        [Required]
        public string username { get; set; }
        /// <summary>
        /// 密码
        /// </summary>
        [Required]
        public string password { get; set; }
        /// <summary>
        /// 界面上的选择框  选择是否记住登录
        /// </summary>
        public bool RememberLogin { get; set; }
        /// <summary>
        /// 回调授权验证地址 这个地址与Redirect地址不一样
        /// 登录成功后会转到 ReturnUrl  然后验证授权登录后 获取到客户端的信息 然后根据Client配置中的RedirectUrl转到对应的系统
        /// </summary>
        public string ReturnUrl { get; set; }
    }
登记界面会涉及到IdentityServer4相关交互,比如客户端名称ClientName 、ClientUrl等等
所以在登记界面我们在构建一个与IdentityServer4相关的模型类去继承LoginViewModel,因为他们是在同一个界面展现:Idr4LoginViewModel
public class Idr4LoginViewModel : LoginViewModel
    {
        public bool AllowRememberLogin { get; set; }
        public bool EnableLocalLogin { get; set; }

        public IEnumerable<ExternalProvider> ExternalProviders { get; set; }
        //public IEnumerable<ExternalProvider> VisibleExternalProviders => ExternalProviders.Where(x => !String.IsNullOrWhiteSpace(x.DisplayName));

        public bool IsExternalLoginOnly => EnableLocalLogin == false && ExternalProviders?.Count() == 1;
        public string ExternalLoginScheme => ExternalProviders?.SingleOrDefault()?.AuthenticationScheme;


        public string ClientName { get; set; }
        public string ClientUrl { get; set; }
        public string ClientLogoUrl { get; set; }

    }
接下来就是构建登录页面的html,这里我构建的比较简单没有什么样式 测试下就行了
@using SSOServer.Models;
@{
    ViewData["Title"] = "Index";
}
@model Idr4LoginViewModel
<h2>用户登录</h2>
<form asp-action="Login">

    @if (Model.EnableLocalLogin)
    {
        <div><img src="@Model.ClientLogoUrl" width="100" height="100" /></div>
        <div>@Model.ClientName</div>
        <div>@Model.ClientUrl</div>

    }
    <div>用户名:<input type="text" asp-for="username" /></div>
    <div>密码:<input type="text" asp-for="password" /></div>
    <input type="hidden" asp-for="ReturnUrl" />
    <button type="submit">登录</button>
    <div asp-validation-summary="All"> </div>
</form>
这里也可以获取Client的信息,都可以自定义按需求处理
在前面的UserInteraction中做了登录界面的设置并且指定了参数ReturnUrl,所以到连接转到视图页面时候,需要Get请求接受一个ReturnUrl的参数
 [HttpGet]
        public async Task<IActionResult> Login(string ReturnUrl)
        {
            //创建视图模型
            var vm = await CreateIdr4LoginViewModelAsync(ReturnUrl);
            //判断来之其他客户端的登录
            if (vm.IsExternalLoginOnly)
            {
                return await ExternalLogin(vm.ExternalLoginScheme, ReturnUrl);
            }
            return View(vm);
        }
那么登录界面怎么来做来,这里就需要介绍IdentityServer4中的几个接口类了:
IIdentityServerInteractionService:用户交互相关接口
IResourceStore:获取资源接口:这里包括2中资源 一种是IdentityResource 和 ApiResource
IClientStore:获取客户端相关接口
IEventService:事件服务
UserStoreServices:自定义的用户服务,这里我没有用IdentityServer4的TestUserStore是为了方面自定义处理
转到登录视图页面,首先要做的就是构建视图模型,页面上要展示什么数据,包括用户名,密码,Idr4相关
这个时候就是ReturnUrl发挥其重要性的时候了:
DotNetCore自带的有DependencyInjection这样的依赖注入,可以不用Autofac之类也非常方便
在AccountController中注入相关接口
 private readonly IIdentityServerInteractionService _identityServerInteractionService;
        private readonly IHttpContextAccessor _httpContextAccessor;
        private readonly IAuthenticationSchemeProvider _schemeProvider;
        private readonly IResourceStore _resourceStore;
        private readonly IClientStore _clientStore;
        private readonly IEventService _events;
        private readonly UserStoreServices _testUserStore;

        //private readonly TestUserStore _testUserStore;
        public AccountController(IIdentityServerInteractionService identityServerInteractionService, UserStoreServices testUserStore, IEventService events, IHttpContextAccessor httpContextAccessor, IAuthenticationSchemeProvider schemeProvider, IClientStore clientStore, IResourceStore resourceStore)
        {
            _identityServerInteractionService = identityServerInteractionService;
            _testUserStore = testUserStore;
            _events = events;
            _httpContextAccessor = httpContextAccessor;
            _schemeProvider = schemeProvider;
            _clientStore = clientStore;
            _resourceStore = resourceStore;


        }
这里调用用户交互接口以及客户端接口构建如下
/// <summary>
        /// 构造下Idr4登陆界面显示视图模型
        /// </summary>
        /// <param name="ReturnUrl"></param>
        /// <returns></returns>
        private async Task<Idr4LoginViewModel> CreateIdr4LoginViewModelAsync(string ReturnUrl)
        {
            Idr4LoginViewModel vm = new Idr4LoginViewModel();
            var context = await _identityServerInteractionService.GetAuthorizationContextAsync(ReturnUrl);
            if (context != null)
            {
                if (context?.IdP != null)
                {
                    // 扩展外部扩展登录模型处理
                    vm.EnableLocalLogin = false;
                    vm.ReturnUrl = ReturnUrl;
                    vm.username = context?.LoginHint;
                    vm.ExternalProviders = new ExternalProvider[] { new ExternalProvider { AuthenticationScheme = context.IdP } };

                }

            }
            //外部登陆 获取所有授权信息 并查找当前可用的授权信息
            var schemes = await _schemeProvider.GetAllSchemesAsync();

            var providers = schemes
                .Where(x => x.DisplayName != null)
                .Select(x => new ExternalProvider
                {
                    DisplayName = x.DisplayName,
                    AuthenticationScheme = x.Name
                }).ToList();

            var allowLocal = true;

            if (context?.ClientId != null)
            {
                var client = await _clientStore.FindEnabledClientByIdAsync(context.ClientId);
                if (client != null)
                {
                    allowLocal = client.EnableLocalLogin;
                    vm.ClientName = client.ClientName;
                    vm.ClientUrl = client.ClientUri;
                    vm.ClientLogoUrl = client.LogoUri;
                    if (client.IdentityProviderRestrictions != null && client.IdentityProviderRestrictions.Any())
                    {
                        providers = providers.Where(provider => client.IdentityProviderRestrictions.Contains(provider.AuthenticationScheme)).ToList();
                    }
                }
            }
            vm.AllowRememberLogin = AccountOptions.AllowRememberLogin;
            vm.EnableLocalLogin = allowLocal && AccountOptions.AllowLocalLogin;
            vm.ReturnUrl = ReturnUrl;
            vm.username = context?.LoginHint;
            vm.ExternalProviders = providers.ToArray();

            return vm;
        }
IIdentityServerInteractionService 用户交互下提供了很多接口方法,可以详细了解下
对应代码中的扩展登录可以注释掉 目前不做那块相关
到了这里基本可以展示代码了,下面运行下代码看下:

本生的客户端系统我寄宿到5001端口,IdentityServer4寄宿到5000端口,访问5000中授权限制访问页面,会转到Idr4 服务端
这里我们可以看到ReturnUrl,分析下这个地址:
http://localhost:5000/Account/Login?ReturnUrl=%2Fconnect%2Fauthorize%2Fcallback%3Fclient_id%3Dliyouming%26redirect_uri%3Dhttp%253A%252F%252Flocalhost%253A5001%252Fsignin-oidc%26response_type%3Dcode%2520id_token%26scope%3Dopenid%2520profile%26response_mode%3Dform_post%26nonce%3D636592109017726544.MGI1MDJkNDYtMmUwOS00YmUxLWJmODgtODY0NWZlYzQyZGEyMjY1MGExMTItNjc3Yi00M2ExLWJhNmItZWM0OWRlYTEwOWQx%26state%3DCfDJ8GJf-n3goONOsPJOurEXDE-aBinqSDzf_TJntjbg5FIJpAFEeJm36TR7MxDhYJB_K3yzkedqbCi1P2V_F4dJ5wrOEbvhkVBJr447GQCdJKoFV1Ms2POKRn-_kB03Xp4ydGttsBUDJflnaLYcC3BnN7UTAcHV55ALZBTgGTNTGPnzIhotUonX9IM6SgOTaNZTmlwrIRz6s-XksqJQ5-gsnLXh_MRqcKAxzC3-HLIc34re2H6cTnJT1CNab0B7MxJGUpeOZ09_x7U7gw9DnF0aMvAae9-_dTPDgo2xEbMw9y5hLaFwIPfMbrftrHJoFI87tF-TmHHKm9NvJfLfueWZ02o%26x-client-SKU%3DID_NET%26x-client-ver%3D2.1.4.0
这里面有授权回调地址,就是登录成功后会Post到 授权callback地址进行认证,成功后会转到redirect_uri,这里面还指定了 请求的scope ,repsonsetype等等,可以看下oauth2相关资料
当登录的时候我们需要一个Post的登录Action,这里注意的是 这个ReturnUrl 会贯穿这个登录流程,所以在登录视图界面会有一个隐藏域把这个存起来,在post请求的时候要带过来
 [HttpPost]
        [ValidateAntiForgeryToken]
        public async Task<IActionResult> Login(Idr4LoginViewModel model)
        {

            #region  Idr4验证处理 这里主要对ReturnUrl处理

            var context = await _identityServerInteractionService.GetAuthorizationContextAsync(model.ReturnUrl);
            if (context == null)
            {
                //不存在客户端信息
                Redirect("~/");

            }
            #endregion
            #region 基础验证
            if (string.IsNullOrEmpty(model.username))
            {
                ModelState.AddModelError("", "请输入用户名");
            }
            if (string.IsNullOrEmpty(model.password))
            {
                ModelState.AddModelError("", "请输入密码");
            }
            #endregion
            if (ModelState.IsValid)
            {
                if (_testUserStore.ValidatorUser(model.username, model.password))
                {

                    //查询用户信息
                    var user = await _testUserStore.GetByUserNameAsync(); //得到信息
                    await _events.RaiseAsync(new UserLoginSuccessEvent(user.username, user.guid.ToString(), user.username));
                    //记住登录
                    AuthenticationProperties authenticationProperties = null;
                    if (AccountOptions.AllowRememberLogin && model.RememberLogin)
                    {
                        authenticationProperties = new AuthenticationProperties
                        {
                            IsPersistent = true,
                            ExpiresUtc = DateTimeOffset.UtcNow.Add(AccountOptions.RememberMeLoginDuration)
                        };
                    }
                    //SignIn
                    await HttpContext.SignInAsync(user.guid.ToString(), user.username, authenticationProperties);

                    if (_identityServerInteractionService.IsValidReturnUrl(model.ReturnUrl) || Url.IsLocalUrl(model.ReturnUrl))
                    {
                        return Redirect(model.ReturnUrl);
                    }

                    return Redirect("~/");

                }
                else
                {

                    await _events.RaiseAsync(new UserLoginFailureEvent(model.username, "登录失败"));
                    ModelState.AddModelError("", AccountOptions.InvalidCredentialsErrorMessage);
                }
            }
            //防止验证失败后返回视图后 界面模型参数不存在 所以这里需要构建一次模型
            var vm = await CreateIdr4LoginViewModelAsync(model.ReturnUrl);
            return View(vm);
        }
post里面就可以做一些处理就行了比如验证之类,验证失败或者处理失败都要回到登录页面上,所以最后还是需要构建一次视图模型返回到View上
到这里登录基本就结束了
在扩充一点内存配置
public class MemoryClients
    {


        public static List<IdentityResource> GetIdentityResources()
        {
            return new List<IdentityResource>
            {
                new IdentityResource{
                    Name="openid",
                     Enabled=true,
                      Emphasize=true,
                       Required=true,
                       DisplayName="用户授权认证信息",
                       Description="获取你的授权认证"
        },
                new IdentityResource{
                    Name="profile",
                     Enabled=true,
                      Emphasize=false,
                       Required=true,
                        DisplayName="用户个人信息",
                         Description="获取你的个人基本资料信息,如:姓名、性别、年龄等"
                }

};

        }
        public static List<ApiResource> GetApiResources()
        {
            return new List<ApiResource>
            {
               //普通的通过构造函数限制 指定scope以及displayname 就行了
             //  new ApiResource("liyouming","打印云服务接口")

               //做一些更加严格的限制要求
               new  ApiResource(){
                    Enabled=true,
                    Name="liyouming",
                    DisplayName="打印云服务接口",
                    Description="选择允许即同意获取你的个人打印服务权限",
                    Scopes={
                                new Scope()
                                {

                                    Emphasize=false,
                                    Required=false,
                                    Name="liyouming",
                                    DisplayName="打印云服务接口",
                                    Description="选择允许即同意获取你的个人打印服务权限"
                                }
                            }

               }
            };
        }

        public static List<Client> GetClients()
        {
            return new List<Client> {
                new Client(){

                    ClientId="liyouming",
                    ClientName="ChinaNetCore",
                    ClientUri="http://www.chinanetcore.com",
                    LogoUri="http://img05.tooopen.com/images/20160109/tooopen_sy_153858412946.jpg",
                    ClientSecrets={new Secret("liyouming".Sha256()) },
                    AllowedGrantTypes= GrantTypes.Hybrid,
                    AccessTokenType= AccessTokenType.Jwt,
                    RequireConsent=true,
                    RedirectUris={ "http://localhost:5001/signin-oidc" },
                    PostLogoutRedirectUris={"http://localhost:5001/signout-callback-oidc" },
                    AllowedScopes={
                       "openid",
                       "profile",
                       "liyouming",

                    },
                    BackChannelLogoutUri="http://localhost:5001/Default/LogoutByElse",
                    BackChannelLogoutSessionRequired=true


                }
            };
        }


    }
其他站点请求授权可OIDC配置,在DotNetCore中自带了OpenIdConnect
    services.AddAuthentication(option =>
            {
                option.DefaultScheme = "Cookies";
                option.DefaultChallengeScheme = "oidc";
            })
            .AddCookie("Cookies")
            .AddOpenIdConnect("oidc", options =>
            {
                options.SignInScheme = "Cookies";
                options.Authority = "http://localhost:5000";
                options.RequireHttpsMetadata = false;
                options.ResponseType = OpenIdConnectResponseType.CodeIdToken;
                options.ClientId = "liyouming";
                options.ClientSecret = "liyouming";
                options.SignedOutRedirectUri = "http://localhost:5001/signout-callback-oidc";
                options.SaveTokens = false;

                options.Events = new Microsoft.AspNetCore.Authentication.OpenIdConnect.OpenIdConnectEvents {
                    OnRedirectToIdentityProviderForSignOut= OnRedirectToIdentityProviderForSignOut

                };

            });
这里配置好并添加好相关Controller的授权访问后即可
登录失败后提示

登录成功后

这里来到了Conset授权同意页面,这里我在后面继续讲解
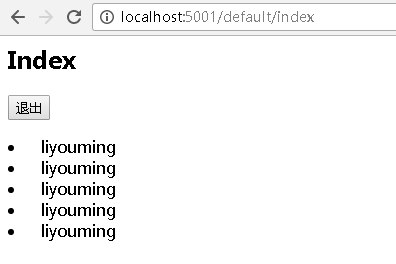
同意后进入授权访问页面
登录到这里就结束了,后面会继续介绍 Consent 及 Logout等操作和其他一些DotNetCore相关实战运用