Spring Boot的核心
(1)Spring Boot的项目一般都会有*Application的入口类,入口类中会有main方法,这是一个标准的Java应用程序的入口方法。
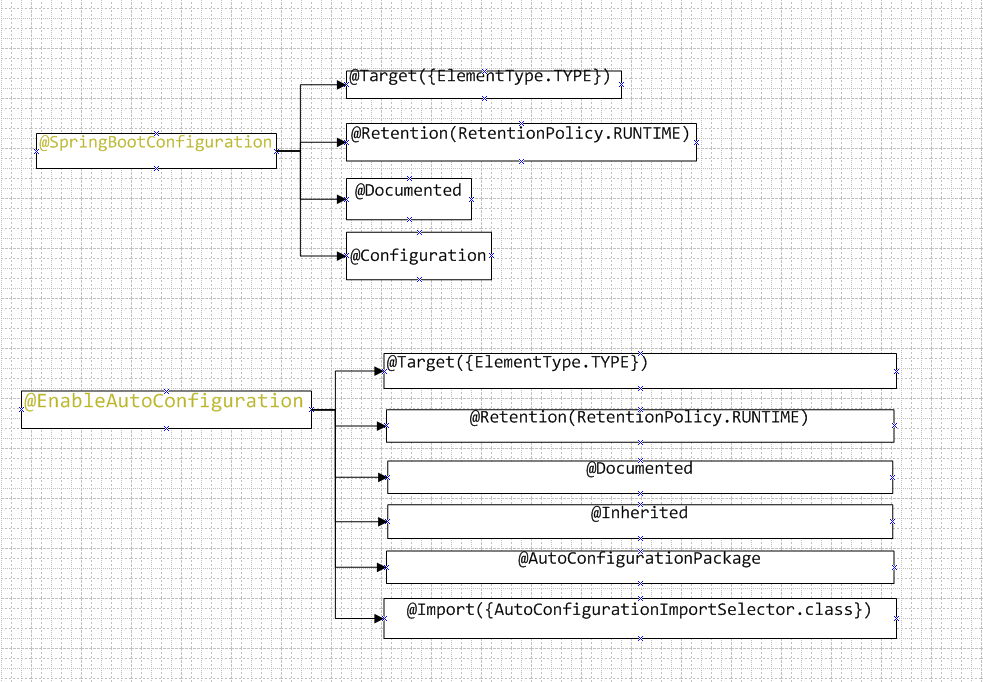
(2)@SpringBootApplication注解是Spring Boot的核心注解,它其实是一个组合注解:
因为@SpringBootApplication注解包含了@Configuration注解的内容,所以
在Spring Boot项目中推荐使用@ SpringBootConfiguration替代@Configuration
@ComponentScan:默认扫描@SpringBootApplication所在类的同级目录以及它的子目录。
@ComponentScan:默认扫描@SpringBootApplication所在类的同级目录以及它的子目录。
(3)@EnableAutoConfiguration:启用自动配置,该注解会使Spring Boot根据项目中依赖的jar包自动配置项目的配置项
(4)因继承省略的注解

实战例子:
Pom.需要注释

1 <dependency>
2             <groupId>org.springframework.boot</groupId>
3             <artifactId>spring-boot-starter-tomcat</artifactId>
4             <!--<scope>provided</scope>-->
5         </dependency>
Pom完整版

 1 <?xml version="1.0" encoding="UTF-8"?>
 2 <project xmlns="http://maven.apache.org/POM/4.0.0" xmlns:xsi="http://www.w3.org/2001/XMLSchema-instance"
 3     xsi:schemaLocation="http://maven.apache.org/POM/4.0.0 http://maven.apache.org/xsd/maven-4.0.0.xsd">
 4     <modelVersion>4.0.0</modelVersion>
 5
 6     <groupId>com.example</groupId>
 7     <artifactId>20180401</artifactId>
 8     <version>0.0.1-SNAPSHOT</version>
 9     <packaging>war</packaging>
10
11     <name>20180401three</name>
12     <description>Demo project for Spring Boot</description>
13
14     <parent>
15         <groupId>org.springframework.boot</groupId>
16         <artifactId>spring-boot-starter-parent</artifactId>
17         <version>2.0.0.RELEASE</version>
18         <relativePath/> <!-- lookup parent from repository -->
19     </parent>
20
21     <properties>
22         <project.build.sourceEncoding>UTF-8</project.build.sourceEncoding>
23         <project.reporting.outputEncoding>UTF-8</project.reporting.outputEncoding>
24         <java.version>1.8</java.version>
25     </properties>
26
27     <dependencies>
28         <dependency>
29             <groupId>org.springframework.boot</groupId>
30             <artifactId>spring-boot-starter-web</artifactId>
31         </dependency>
32
33         <dependency>
34             <groupId>org.springframework.boot</groupId>
35             <artifactId>spring-boot-starter-tomcat</artifactId>
36             <!--<scope>provided</scope>-->
37         </dependency>
38         <dependency>
39             <groupId>org.springframework.boot</groupId>
40             <artifactId>spring-boot-starter-test</artifactId>
41             <scope>test</scope>
42         </dependency>
43     </dependencies>
44
45     <build>
46         <plugins>
47             <plugin>
48                 <groupId>org.springframework.boot</groupId>
49                 <artifactId>spring-boot-maven-plugin</artifactId>
50             </plugin>
51         </plugins>
52     </build>
53
54
55 </project>
Application

 1 package com.example.demo;
 2
 3 import org.springframework.boot.SpringApplication;
 4 import org.springframework.boot.SpringBootConfiguration;
 5 import org.springframework.boot.autoconfigure.EnableAutoConfiguration;
 6 import org.springframework.boot.autoconfigure.SpringBootApplication;
 7 import org.springframework.context.annotation.ComponentScan;
 8 import org.springframework.stereotype.Controller;
 9 import org.springframework.web.bind.annotation.RequestMapping;
10 import org.springframework.web.bind.annotation.ResponseBody;
11
12
13 @Controller
14 @SpringBootApplication
15 @SpringBootConfiguration
16 @EnableAutoConfiguration
17 @ComponentScan
18 public class Application {
19
20     @RequestMapping("hello")
21     @ResponseBody
22     public String hello(){
23         return "hello world!";
24     }
25
26     public static void main(String[] args) {
27         SpringApplication.run(Application.class, args);
28     }
29 }
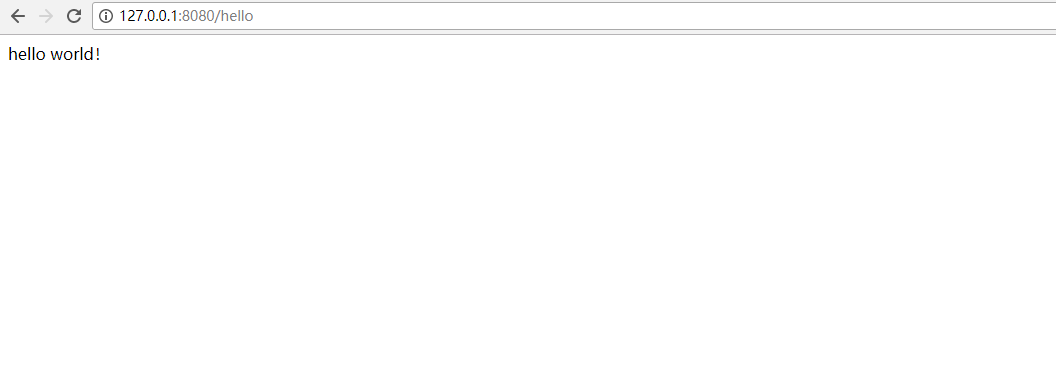
访问测试:

