前言
Nginx的负载均衡一般采用upstream来实现,但是,还有另一种文件拓展的方式,同样可以实现负载均衡.
一、一般的负载均衡


1 upstream my_server {
2     server localhost:18080;
3     server localhost:19080;
4   }
这里通过upstream标签实现负载均衡,重要的是,这个upstream标签要写在http标签内,同时,要在server标签之外,才能有限,而不报错。下面是它的完整版。
 1 user  nginx;
 2 worker_processes  1;
 3
 4 #指定错误日志的位置,可以自定义
 5 error_log  /var/log/nginx/error.log warn;
 6 #指定pid标识符位置
 7 pid        /var/run/nginx.pid;
 8
 9
10 events {
11     worker_connections  1024;
12 }
13
14
15 http {
16     #指定数据类型
17     include       /etc/nginx/mime.types;
18     default_type  application/octet-stream;
19
20     log_format  main  '$remote_addr - $remote_user [$time_local] "$request" '
21                       '$status $body_bytes_sent "$http_referer" '
22                       '"$http_user_agent" "$http_x_forwarded_for"';
23
24     #一般的日志
25     access_log  /var/log/nginx/access.log  main;
26
27     sendfile        on;
28
29     keepalive_timeout  65;
30
31     client_max_body_size 100m;
32
33     #负载均衡配置
34     charset  utf-8;
35
36   upstream my_server {
37     server 127.0.0.1:18080;
38     server 127.0.0.1:19080;
39   }
40
41   server
42   {
43    #监听的端口
44    listen *:80 default;
45
46    #访问的服务器
47    server_name  localhost;
48
49     #前端代码存放目录
50     root   /usr/share/nginx/html;
51     index  index.html index.htm;
52
53     location / {
54         proxy_set_header Host  $host;
55         proxy_set_header X-Forwarded-For  $remote_addr;
56         proxy_pass http://my_server ;
57     }
58
59 }
60
61
二、扩展式负载均衡
就是把文件写成一个主文件和两个分文件的方式

主配置文档
 1 user  nginx;
 2 worker_processes  1;
 3
 4 error_log  /var/log/nginx/error.log warn;
 5 pid        /var/run/nginx.pid;
 6
 7
 8 events {
 9     worker_connections  1024;
10 }
11
12
13 http {
14     include       /etc/nginx/mime.types;
15     default_type  application/octet-stream;
16
17     log_format  main  '$remote_addr - $remote_user [$time_local] "$request" '
18                       '$status $body_bytes_sent "$http_referer" '
19                       '"$http_user_agent" "$http_x_forwarded_for"';
20
21     access_log  /var/log/nginx/access.log  main;
22
23     sendfile        on;
24     #tcp_nopush     on;
25
26     keepalive_timeout  65;
27
28     client_max_body_size 100m;
29
30     #gzip  on;
31
32     include /etc/nginx/conf.d/*.conf;
33 }
默认配置文档default
 1 server {
 2     listen       80;
 3     server_name  localhost;
 4
 5     location / {
 6         root   /usr/share/nginx/html;
 7         index  index.html index.htm;
 8     }
 9
10     error_page   500 502 503 504  /50x.html;
11     location = /50x.html {
12         root   /usr/share/nginx/html;
13     }
14 }
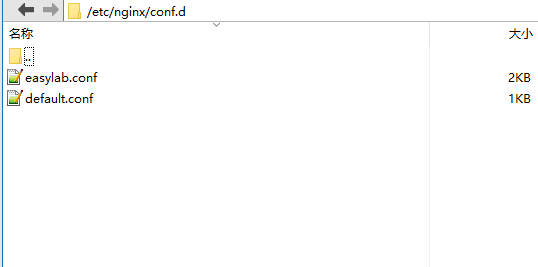
实际配置文档位置
 1 server {
 2     listen 80 default;
 3     return 403;
 4 }
 5
 6 server {
 7     listen 443;
 8     server_name test.com;
 9     ssl                 on;
10     ssl_certificate     /etc/nginx/server.crt;
11     ssl_certificate_key /etc/nginx/server.key;
12     ssl_session_cache shared:SSL:50m;
13     ssl_session_timeout 5m;
14     add_header Strict-Transport-Security "max-age=31536000; includeSubdomains;";
15
16     location / {
17         proxy_set_header Host  $host;
18         proxy_set_header X-Forwarded-For  $remote_addr;
19         proxy_pass http://192.168.1.1:9082;
20     }
21 }
22
23
24 server {
25     listen 80;
26     server_name test.com;
27
28     location / {
29         proxy_set_header Host  $host;
30         proxy_set_header X-Forwarded-For  $remote_addr;
31         proxy_pass http://192.168.1.1:9082;
32     }
33 }
34
35 server {
36     listen 443;
37     server_name mytest.com;
38     ssl                 on;
39     ssl_certificate     /etc/nginx/server.crt;
40     ssl_certificate_key /etc/nginx/server.key;
41     ssl_session_cache shared:SSL:50m;
42     ssl_session_timeout 5m;
43     add_header Strict-Transport-Security "max-age=31536000; includeSubdomains;";
44
45     location / {
46         proxy_set_header Host  $host;
47         proxy_set_header X-Forwarded-For  $remote_addr;
48         proxy_pass http://192.168.1.1:9083;
49     }
50 }
51
52 server {
53     listen 80;
54     server_name mytest.com;
55
56     location / {
57         proxy_set_header Host  $host;
58         proxy_set_header X-Forwarded-For  $remote_addr;
59         proxy_pass http://192.168.1.1:9083;
60     }
61 }
其中server_name 可以任意取,最好是有自己的域名,放在这里