(接上篇《架构设计:系统间通信(13)——RPC实例Apache Thrift 下篇(1)》)
3、正式开始编码
我已经在CSDN的资源区上传了这个示例工程的所有代码(http://download.csdn.net/detail/yinwenjie/9289999)。读者可以直接到资源下载站进行下载(不收积分哦~~^_^)。这篇文章将紧接上文,主要介绍这个工程几个主要的类代码。
3-1、编写服务端主程序
服务端主程序的类名:processor.MainProcessor,它负责在服务端启动Apache Thrift并且在服务监听启动成功后,连接到zookeeper,注册这个服务的基本信息。
这里要注意一下,Apache Thrift的服务监听是阻塞式的,所以processor.MainProcessor的Apache Thrift操作应该另起线程进行(processor.MainProcessor.StartServerThread),并且通过线程间的锁定操作,保证zookeeper的连接一定是在Apache Thrift成功启动后才进行。
package processor;

import java.io.IOException;
import java.util.Set;
import java.util.concurrent.Executors;

import net.sf.json.JSONObject;

import org.apache.commons.logging.Log;
import org.apache.commons.logging.LogFactory;
import org.apache.log4j.BasicConfigurator;
import org.apache.thrift.TProcessor;
import org.apache.thrift.protocol.TBinaryProtocol;
import org.apache.thrift.protocol.TProtocol;
import org.apache.thrift.server.ServerContext;
import org.apache.thrift.server.TServerEventHandler;
import org.apache.thrift.server.TThreadPoolServer;
import org.apache.thrift.server.TThreadPoolServer.Args;
import org.apache.thrift.transport.TServerSocket;
import org.apache.thrift.transport.TTransport;
import org.apache.thrift.transport.TTransportException;
import org.apache.zookeeper.CreateMode;
import org.apache.zookeeper.KeeperException;
import org.apache.zookeeper.WatchedEvent;
import org.apache.zookeeper.Watcher;
import org.apache.zookeeper.ZooKeeper;
import org.apache.zookeeper.ZooDefs.Ids;
import org.apache.zookeeper.data.Stat;

import business.BusinessServicesMapping;
import thrift.iface.DIYFrameworkService;
import thrift.iface.DIYFrameworkService.Iface;

public class MainProcessor {
    static {
        BasicConfigurator.configure();
    }

    /**
     * 日志
     */
    private static final Log LOGGER = LogFactory.getLog(MainProcessor.class);

    private static final Integer SERVER_PORT = 8090;

    /**
     * 专门用于锁定以保证这个主线程不退出的一个object对象
     */
    private static final Object WAIT_OBJECT = new Object();

    /**
     * 标记apache thrift是否启动成功了
     * 只有apache thrift启动成功了,才需要连接到zk
     */
    private boolean isthriftStart = false;

    public static void main(String[] args) {
        /*
         * 主程序要做的事情:
         *
         * 1、启动thrift服务。并且服务调用者的请求
         * 2、连接到zk,并向zk注册自己提供的服务名称,告知zk真实的访问地址、访问端口
         * (向zk注册的服务,存储在BusinessServicesMapping这个类的K-V常量中)
         * */

        //1、========启动thrift服务
        MainProcessor mainProcessor = new MainProcessor();
        mainProcessor.startServer();

        // 一直等待,apache thrift启动完成
        synchronized (mainProcessor) {
            try {
                while(!mainProcessor.isthriftStart) {
                    mainProcessor.wait();
                }
            } catch (InterruptedException e) {
                MainProcessor.LOGGER.error(e);
                System.exit(-1);
            }
        }

        //2、========连接到zk
        try {
            mainProcessor.connectZk();
        } catch (IOException | KeeperException | InterruptedException e) {
            MainProcessor.LOGGER.error(e);
            System.exit(-1);
        }

        // 这个wait在业务层面,没有任何意义。只是为了保证这个守护线程不会退出
        synchronized (MainProcessor.WAIT_OBJECT) {
            try {
                MainProcessor.WAIT_OBJECT.wait();
            } catch (InterruptedException e) {
                MainProcessor.LOGGER.error(e);
                System.exit(-1);
            }
        }
    }

    /**
     * 这个私有方法用于连接到zk上,并且注册相关服务
     * @throws IOException
     * @throws InterruptedException
     * @throws KeeperException
     */
    private void connectZk() throws IOException, KeeperException, InterruptedException {
        // 读取这个服务提供者,需要在zk上注册的服务
        Set<String> serviceNames = BusinessServicesMapping.SERVICES_MAPPING.keySet();
        // 如果没有任何服务需要注册到zk,那么这个服务提供者就没有继续注册的必要了
        if(serviceNames == null || serviceNames.isEmpty()) {
            return;
        }

        // 默认的监听器
        MyDefaultWatcher defaultWatcher = new MyDefaultWatcher();
        // 连接到zk服务器集群,添加默认的watcher监听
        ZooKeeper zk = new ZooKeeper("192.168.61.128:2181", 120000, defaultWatcher);

        //创建一个父级节点Service
        Stat pathStat = null;
        try {
            pathStat = zk.exists("/Service", defaultWatcher);
            //如果条件成立,说明节点不存在(只需要判断一个节点的存在性即可)
            //创建的这个节点是一个“永久状态”的节点
            if(pathStat == null) {
                zk.create("/Service", "".getBytes(), Ids.OPEN_ACL_UNSAFE, CreateMode.PERSISTENT);
            }
        } catch(Exception e) {
            System.exit(-1);
        }

        // 开始添加子级节点,每一个子级节点都表示一个这个服务提供者提供的业务服务
        for (String serviceName : serviceNames) {
            JSONObject nodeData = new JSONObject();
            nodeData.put("ip", "127.0.0.1");
            nodeData.put("port", MainProcessor.SERVER_PORT);
            zk.create("/Service/" + serviceName, nodeData.toString().getBytes(), Ids.OPEN_ACL_UNSAFE, CreateMode.EPHEMERAL);
        }

        //执行到这里,说明所有的service都启动完成了
        MainProcessor.LOGGER.info("===================所有service都启动完成了,主线程开始启动===================");
    }

    /**
     * 这个私有方法用于开启Apache thrift服务端,并进行持续监听
     * @throws TTransportException
     */
    private void startServer() {
        Thread startServerThread = new Thread(new StartServerThread());
        startServerThread.start();
    }

    private class StartServerThread implements Runnable {
        @Override
        public void run() {
            MainProcessor.LOGGER.info("看到这句就说明thrift服务端准备工作 ....");

            // 服务执行控制器(只要是调度服务的具体实现该如何运行)
            TProcessor tprocessor = new DIYFrameworkService.Processor<Iface>(new DIYFrameworkServiceImpl());

            // 基于阻塞式同步IO模型的Thrift服务,正式生产环境不建议用这个
            TServerSocket serverTransport = null;
            try {
                serverTransport = new TServerSocket(MainProcessor.SERVER_PORT);
            } catch (TTransportException e) {
                MainProcessor.LOGGER.error(e);
                System.exit(-1);
            }

            // 为这个服务器设置对应的IO网络模型、设置使用的消息格式封装、设置线程池参数
            Args tArgs = new Args(serverTransport);
            tArgs.processor(tprocessor);
            tArgs.protocolFactory(new TBinaryProtocol.Factory());
            tArgs.executorService(Executors.newFixedThreadPool(100));

            // 启动这个thrift服务
            TThreadPoolServer server = new TThreadPoolServer(tArgs);
            server.setServerEventHandler(new StartServerEventHandler());
            server.serve();
        }
    }

    /**
     * 为这个TThreadPoolServer对象,设置是一个事件处理器。
     * 以便在TThreadPoolServer正式开始监听服务请求前,通知mainProcessor:
     * “Apache Thrift已经成功启动了”
     * @author yinwenjie
     *
     */
    private class StartServerEventHandler implements TServerEventHandler {
        @Override
        public void preServe() {
            /*
             * 需要实现这个方法,以便在服务启动成功后,
             * 通知mainProcessor: “Apache Thrift已经成功启动了”
             * */
            MainProcessor.this.isthriftStart = true;
            synchronized (MainProcessor.this) {
                MainProcessor.this.notify();
            }
        }

        /* (non-Javadoc)
         * @see org.apache.thrift.server.TServerEventHandler#createContext(org.apache.thrift.protocol.TProtocol, org.apache.thrift.protocol.TProtocol)
         */
        @Override
        public ServerContext createContext(TProtocol input, TProtocol output) {
            /*
             * 无需实现
             * */
            return null;
        }

        @Override
        public void deleteContext(ServerContext serverContext, TProtocol input, TProtocol output) {
            /*
             * 无需实现
             * */
        }

        @Override
        public void processContext(ServerContext serverContext, TTransport inputTransport, TTransport outputTransport) {
            /*
             * 无需实现
             * */
        }
    }

    /**
     * 这是默认的watcher,什么也没有,也不需要有什么<br>
     * 因为按照功能需求,服务器端并不需要监控zk上的任何目录变化事件
     * @author yinwenjie
     */
    private class MyDefaultWatcher implements Watcher {
        public void process(WatchedEvent event) {

        }
    }
}
3-2、编写服务具体实现
服务端具体实现的代码很简单,就是在IDL脚本生成了java代码后,对DIYFrameworkService接口进行的实现。
package processor;

import java.nio.ByteBuffer;

import net.sf.json.JSONObject;

import org.apache.commons.lang.StringUtils;
import org.apache.commons.logging.Log;
import org.apache.commons.logging.LogFactory;
import org.apache.thrift.TException;

import business.BusinessService;
import business.BusinessServicesMapping;
import business.exception.BizException;
import business.exception.ResponseCode;
import business.pojo.AbstractPojo;
import business.pojo.BusinessResponsePojo;
import business.pojo.DescPojo;
import thrift.iface.DIYFrameworkService.Iface;
import thrift.iface.EXCCODE;
import thrift.iface.RESCODE;
import thrift.iface.Reponse;
import thrift.iface.Request;
import thrift.iface.ServiceException;
import utils.JSONUtils;

/**
 * IDL文件中,我们定义的唯一服务接口DIYFrameworkService.Iface的唯一实现
 * @author yinwenjie
 *
 */
public class DIYFrameworkServiceImpl implements Iface {

    /**
     * 日志
     */
    public static final Log LOGGER = LogFactory.getLog(DIYFrameworkServiceImpl.class);

    /* (non-Javadoc)
     * @see thrift.iface.DIYFrameworkService.Iface#send(thrift.iface.Request)
     */
    @SuppressWarnings("unchecked")
    @Override
    public Reponse send(Request request) throws ServiceException, TException {
        /*
         * 由于MainProcessor中,在Apache Thrift 服务端启动时已经加入了线程池,所以这里就不需要再使用线程池了
         * 这个服务方法的实现,需要做以下事情:
         *
         * 1、根据request中,描述的具体服务名称,在配置信息中查找具体的服务类
         * 2、使用java的反射机制,调用具体的服务类(BusinessService接口的实现类)。
         * 3、根据具体的业务处理结构,构造Reponse对象,并进行返回
         * */

        //1、===================
        String serviceName = request.getServiceName();
        String className = BusinessServicesMapping.SERVICES_MAPPING.get(serviceName);
        //未发现服务
        if(StringUtils.isEmpty(className)) {
            return this.buildErrorReponse("无效的服务" , null);
        }

        //2、===================
        // 首先得到以json为描述格式的请求参数信息
        JSONObject paramJSON = null;
        try {
            byte [] paramJSON_bytes = request.getParamJSON();
            if(paramJSON_bytes != null && paramJSON_bytes.length > 0) {
                String paramJSON_string = new String(paramJSON_bytes);
                paramJSON = JSONObject.fromObject(paramJSON_string);
            }
        } catch(Exception e) {
            DIYFrameworkServiceImpl.LOGGER.error(e);
            // 向调用者抛出异常
            throw new ServiceException(EXCCODE.PARAMNOTFOUND, e.getMessage());
        }

        // 试图进行反射
        BusinessService<AbstractPojo> businessServiceInstance = null;
        try {
            businessServiceInstance = (BusinessService<AbstractPojo>)Class.forName(className).newInstance();
        } catch (Exception e) {
            DIYFrameworkServiceImpl.LOGGER.error(e);
            // 向调用者抛出异常
            throw new ServiceException(EXCCODE.SERVICENOTFOUND, e.getMessage());
        }

        // 进行调用
        AbstractPojo returnPojo = null;
        try {
            returnPojo = businessServiceInstance.handle(paramJSON);
        } catch (BizException e) {
            DIYFrameworkServiceImpl.LOGGER.error(e);
            return this.buildErrorReponse(e.getMessage() , e.getResponseCode());
        }

        // 构造处理成功情况下的返回信息
        BusinessResponsePojo responsePojo = new BusinessResponsePojo();
        responsePojo.setData(returnPojo);
        DescPojo descPojo = new DescPojo("", ResponseCode._200);
        responsePojo.setDesc(descPojo);

        // 生成json
        String returnString = JSONUtils.toString(responsePojo);
        byte[] returnBytes = returnString.getBytes();
        ByteBuffer returnByteBuffer = ByteBuffer.allocate(returnBytes.length);
        returnByteBuffer.put(returnBytes);
        returnByteBuffer.flip();

        // 构造response
        Reponse reponse = new Reponse(RESCODE._200, returnByteBuffer);
        return reponse;
    }

    /**
     * 这个私有方法,用于构造“Thrift中错误的返回信息”
     * @param erroe_mess
     * @return
     */
    private Reponse buildErrorReponse(String erroe_mess , ResponseCode responseCode) {
        // 构造返回信息
        BusinessResponsePojo responsePojo = new BusinessResponsePojo();
        responsePojo.setData(null);
        DescPojo descPojo = new DescPojo(erroe_mess, responseCode == null?ResponseCode._504:responseCode);
        responsePojo.setDesc(descPojo);

        // 存储byteBuffer;
        String responseJSON = JSONUtils.toString(responsePojo);
        byte[] responseJSON_bytes = responseJSON.getBytes();
        ByteBuffer byteBuffer = ByteBuffer.allocate(responseJSON_bytes.length);
        byteBuffer.put(byteBuffer);
        byteBuffer.flip();

        Reponse reponse = new Reponse(RESCODE._500, byteBuffer);
        return reponse;
    }
}
3-3、编写客户端实现
在上文中已经介绍过了,客户端有两件事情需要做:连接到zookeeper查询注册的服务该如何访问;然后向真实的服务提供者发起请求。代码如下:
package client;

import java.nio.ByteBuffer;
import java.util.List;

import net.sf.json.JSONObject;

import org.apache.commons.lang.StringUtils;
import org.apache.commons.logging.Log;
import org.apache.commons.logging.LogFactory;
import org.apache.log4j.BasicConfigurator;
import org.apache.thrift.protocol.TBinaryProtocol;
import org.apache.thrift.protocol.TProtocol;
import org.apache.thrift.transport.TSocket;
import org.apache.zookeeper.CreateMode;
import org.apache.zookeeper.WatchedEvent;
import org.apache.zookeeper.Watcher;
import org.apache.zookeeper.ZooKeeper;
import org.apache.zookeeper.ZooDefs.Ids;
import org.apache.zookeeper.data.Stat;

import thrift.iface.DIYFrameworkService.Client;
import thrift.iface.Reponse;
import thrift.iface.Request;
import utils.JSONUtils;

public class ThriftClient {
    /**
     * 日志
     */
    private static final Log LOGGER = LogFactory.getLog(ThriftClient.class);

    private static final String SERVCENAME = "queryUserDetailService";

    static {
        BasicConfigurator.configure();
    }

    public static final void main(String[] main) throws Exception {
        /*
         * 服务治理框架的客户端示例,要做以下事情:
         *
         * 1、连接到zk,查询当前zk下提供的服务列表中是否有自己需要的服务名称(queryUserDetailService)
         * 2、如果没有找到需要的服务名称,则客户端终止工作
         * 3、如果找到了服务,则通过服务给出的ip,port,基于Thrift进行正式请求
         * (这时,和zookeeper是否断开,关系就不大了)
         * */
        // 1、===========================
        // 默认的监听器
        ClientDefaultWatcher defaultWatcher = new ClientDefaultWatcher();
        // 连接到zk服务器集群,添加默认的watcher监听
        ZooKeeper zk = new ZooKeeper("192.168.61.128:2181", 120000, defaultWatcher);

        /*
         * 为什么客户端连接上来以后,也可能创建一个Service根目录呢?
         * 因为正式的环境下,不能保证客户端一点就在服务器端全部准备好的情况下,再来做调用请求
         * */
        Stat pathStat = null;
        try {
            pathStat = zk.exists("/Service", defaultWatcher);
            //如果条件成立,说明节点不存在(只需要判断一个节点的存在性即可)
            //创建的这个节点是一个“永久状态”的节点
            if(pathStat == null) {
                zk.create("/Service", "".getBytes(), Ids.OPEN_ACL_UNSAFE, CreateMode.PERSISTENT);
            }
        } catch(Exception e) {
            System.exit(-1);
        }

        // 2、===========================
        //获取服务列表(不需要做任何的事件监听,所以第二个参数可以为false)
        List<String> serviceList = zk.getChildren("/Service", false);
        if(serviceList == null || serviceList.isEmpty()) {
            ThriftClient.LOGGER.info("未发现相关服务,客户端退出");
            return;
        }

        //然后查看要找寻的服务是否在存在
        boolean isFound = false;
        byte[] data;
        for (String serviceName : serviceList) {
            if(StringUtils.equals(serviceName, ThriftClient.SERVCENAME)) {
                isFound = true;
                break;
            }
        }
        if(!isFound) {
            ThriftClient.LOGGER.info("未发现相关服务,客户端退出");
            return;
        } else {
            data = zk.getData("/Service/" + ThriftClient.SERVCENAME, false, null);
        }

        /*
         * 执行到这里,zk的工作就完成了,接下来zk是否断开,就不重要了
         * */
        zk.close();
        if(data == null || data.length == 0) {
            ThriftClient.LOGGER.info("未发现有效的服务端地址,客户端退出");
            return;
        }
        // 得到服务器地值说明
        JSONObject serverTargetJSON = null;
        String serverIp;
        String serverPort;
        try {
            serverTargetJSON = JSONObject.fromObject(new String(data));
            serverIp = serverTargetJSON.getString("ip");
            serverPort = serverTargetJSON.getString("port");
        } catch(Exception e) {
            ThriftClient.LOGGER.error(e);
            return;
        }

        //3、===========================
        TSocket transport = new TSocket(serverIp, Integer.parseInt(serverPort));
        TProtocol protocol = new TBinaryProtocol(transport);
        // 准备调用参数
        JSONObject jsonParam = new JSONObject();
        jsonParam.put("username", "yinwenjie");
        byte[] params = jsonParam.toString().getBytes();
        ByteBuffer buffer = ByteBuffer.allocate(params.length);
        buffer.put(params);
        buffer.flip();
        Request request = new Request(buffer, ThriftClient.SERVCENAME);

        // 开始调用
        Client client = new Client(protocol);
        // 准备传输
        transport.open();
        // 正式调用接口
        Reponse reponse = client.send(request);
        byte[] responseBytes = reponse.getResponseJSON();
        // 一定要记住关闭
        transport.close();

        // 将返回信息显示出来
        ThriftClient.LOGGER.info("respinse value = " + new String(responseBytes));
    }
}

/**
 * 这是默认的watcher,什么也没有,也不需要有什么<br>
 * 因为按照功能需求,客户端并不需要监控zk上的任何目录变化事件
 * @author yinwenjie
 */
class ClientDefaultWatcher implements Watcher {
    public void process(WatchedEvent event) {

    }
}
3-4、工程结构说明
以上代码是服务器端、客户端的主要代码。整个工程还有其他的辅助代码,为了让各位读者能够看得清楚直接,我们将整个工程结构进行一下说明,下载后导入的工程结构如下图所示:
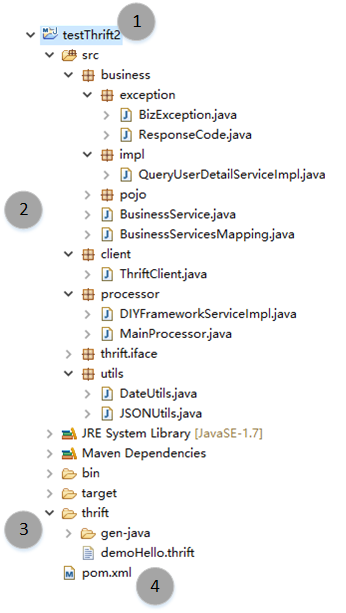
这是一个典型的JAVA工程。请使用 JDK 1.6+ 版本。我们将讲解整个工程结构。首先来看看这个工程中主要的package和它们的作用。
business:具体的业务层逻辑都在这个包里面,其中exception包含了一个业务层异常的定义BizException,还有错误代码ResponseCode;impl包中放置具体的业务层实现,它们都必须实现BusinessService接口;Pojo是业务层对象模型。client:为了简单起见,我将服务端的实现和客户端的实现放置在一个工程中,client这个包就是客户端的实现代码了;utils包放置了两个工具类,用来进行日期格式化的DataUtils和用来进行json转换的JSONUtils。
定义的apache thrift IDL文件放置在thrift文件夹下面,名字叫做:demoHello.thrift;您可以使用它生成各种语言的代码;
工程需要maven的支持。
2016年08月08日,由网友OneZhous发现了一个程序的bug,这是由于Apache Thrift内部并不会在进行org.apache.thrift.TBaseHelper.copyBinary执行时,将java.nio.ByteBuffer自动进行flip()。所以在完成request和response对象设置后,需要开发人员自行进行flip()。感谢OneZhous对文章中的问题进行纠正,但是CSDN由于无法修改已上传的资源,所以还请各位读者在下载运行时注意这个问题:
......
ByteBuffer buffer = ByteBuffer.allocate(params.length);
buffer.put(params);
buffer.flip();

// 以及位置
ByteBuffer byteBuffer = ByteBuffer.allocate(responseJSON_bytes.length);
byteBuffer.put(byteBuffer);
byteBuffer.flip();
......