今天以一个表单的自动提交,来进一步学习selenium的用法
练习目标
0)运用selenium启动firefox并载入指定页面(这部分可查看本人文章 http://www.cnblogs.com/liu2008hz/p/6958126.html)
1)页面元素查找(多种查找方式:find_element_*)
2)内容填充(send_keys)
3)iframe与父页面切换(switch_to_frame是切换到iframe,switch_to_default_content是切换到主页面)
4)浏览器交互处理:window.alert, window.confirm, window.prompt
与上面的三个浏览器交互内容,需要用到switch_to_alert,有几个用法需要注意:
a)accept():发送确定指令,相当于点击“确定”按钮
b)dismiss():取消操作,相当于点击“取消”按钮或点击右上角“关闭”
c)send_keys:填充prompt框需要填写的内容
准备工作
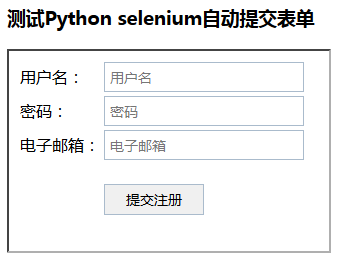
html页面(注册页,内嵌一个注册表单;之所以这样举例,是为了介绍练习selenium的switch_to_frame的用法)
1)注册页面(路径D:RegisterDEMOindex.htm)
<!DOCTYPE>
<html>
<head>
	<title>用户注册</title>
	<meta charset="utf-8" />
</head>
<body>
	<h3>测试Python selenium自动提交表单</h3>
	<iframe id="register_iframe" width="320" height="200" border="0" src="register.htm" />
</body>
</html>
2)注册表单(路径D:RegisterDEMO egister.htm)
<!DOCTYPE>
<html>
<head>
	<title>这是内嵌表单</title>
	<meta charset="utf-8" />
	<style type="text/css">
		input[type='text']{border:1px solid #abc; font-size:14px; padding:5px; 200px;}
		input[type='password']{border:1px solid #abc; font-size:14px; padding:5px; 200px;}
		input[type='submit']{border:1px solid #abc; font-size:14px; padding:5px 10px; 100px; cursor:pointer; margin-top:20px;}
		input[type='submit']:hover{background-color:#aaaaff;}
	</style>
</head>
<body>
	<form action="/register/regaction" method="POST">
		<table>
			<tr>
				<td>用户名:</td>
				<td><input id="txt_account" type="text" value="" placeholder="用户名" /></td>
			</tr>
			<tr>
				<td>密码:</td>
				<td><input id="txt_password" type="password" value="" placeholder="密码" /></td>
			</tr>
			<tr>
				<td>电子邮箱:</td>
				<td><input id="txt_email" type="text" value="" placeholder="电子邮箱" /></td>
			</tr>
			<tr>
				<td> </td>
				<td><input id="btn_register" type="submit" value="提交注册" onclick="return confirm('是否确认提交注册');" /></td>
			</tr>
		</table>
	</form>
</body>
</html>
运行步骤
我们通过Python IDLE一步步来运行,这有助于理解,一步一个操作,惊喜不断
1)引入selenium模块
from selenium import webdriver
2)启动firefox并载入注册页面
bs = webdriver.Firefox()
bs.get('file:///D:/RegisterDEMO/index.htm')
3)查找输入框(用户名、密码、电子邮件)和按钮(提交注册),并填充指定内容
# 由于表单内容是嵌在iframe里的,所以需要查找指向至iframe
# 如果又想跳出iframe,回到父页面,可以使用 bs.switch_to_default_content()
bs.switch_to_frame('register-iframe')

# 由于所有的元素都命名了id,可以使用find_element_by_id,还有很多的其它find_element_*大家可以练习
# 查找用户名框,并填充“hertz.liu"
account = bs.find_element_by_id('txt_account')
account.send_keys('hertz.liu')

# 查找密码框,并填充"pwd123"
pwd = bs.find_element_by_id('txt_password')
pwd.send_keys('pwd123')

# 查找电子邮箱框,并填充”hertz.liu@mail.com"
email = bs.find_element_by_id('txt_email')
email.send_keys('hertz.liu@mail.com')

# 查找提交按钮,并模拟点击提交
btn_reg = bs.find_element_by_id('btn_register')
btn_reg.click()
4)非常顺利的,完成了表单的填充和提交。一般的表单,由于涉及到数据的操作,开发人员都会设置一些二次确认以防止误操作。此处就是用了简单的confirm来进行二次确认,下面是如何让selenium来识别出confirm框,并点击“确定”按钮
# 将查找对象转移至confirm
confirm = bs.switch_to_alert()

# 点击确定按钮
confirm.accept()
# 如果要取消,使用confirm.dismiss()
# 如果是prompt,则可以使用send_keys()先填充内容,再调用accept()或dismiss()
5)关闭浏览器
bs.close()