写在前面:同样这篇教程也是参考官方文档EdgeX Foundry Hands On Tutorial实现的。
这篇教程是紧接上篇,没看过的链接在这里:如何编写代码实现数据通过edgexfoundry上传mqtt云服务器
一、构建和运行容器
1.1 在运行edgex的电脑上,下载测试应用程序
git clone https://github.com/jonas-werner/colorChanger.git
1.2 进入目录
docker build -t colorchanger .
1.3 运行容器
docker run -d -p 5000:5000 --name colorchanger colorchanger:latest
运行之后终端会显示

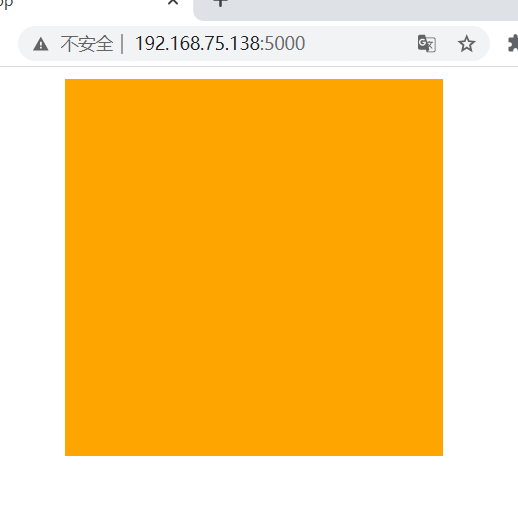
1.4 验证 在浏览器中输入 http://<edgex ip>:5000
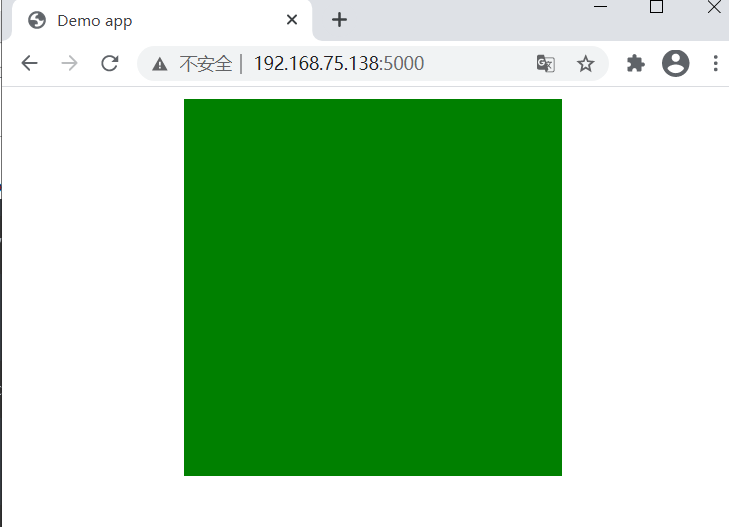
默认是绿色
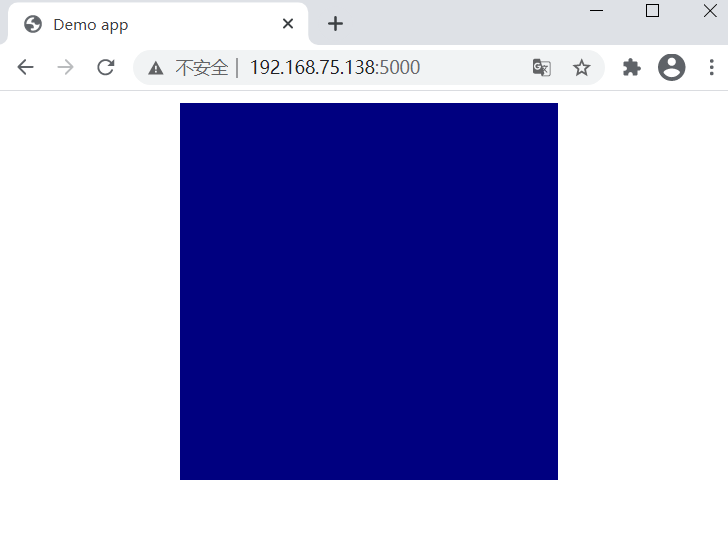
1.4、使用postman测试命令
postman 模式选择PUT
http://<edgex ip>:5000/api/v1/device/edgexTutorial/changeColor
将Body设置为“raw”和“JSON”
{
"color": "navy"
}
二、git教程源码(如果你之前下载过就不用了)
2.1 下载
git clone https://github.com/jonas-werner/EdgeX_Tutorial.git
&&&
cd EdgeX_Tutorial/deviceCreation
2.2 安装python虚拟环境并进入
sudo apt install python3-venv -y
python3 -m venv venv
. ./venv/bin/activate
2.3 安装依赖包
pip install requests
&&&
 pip install requests_toolbelt
2.4 运行程序
python ./createRESTDevice.py -ip <edgex ip> -devip <edgex ip>
ps:
-
“-ip”条目指的是EdgeX Foundry主机ip。
-
“-devip”条目是指运行测试应用程序的主机的IP。
-
在本例中,假设测试应用程序与EdgeX Foundry在同一主机上运行。因此,以下两种方式使用相同的IP
终端中显示一堆200 则代表成功
三、通过edgex发出命令
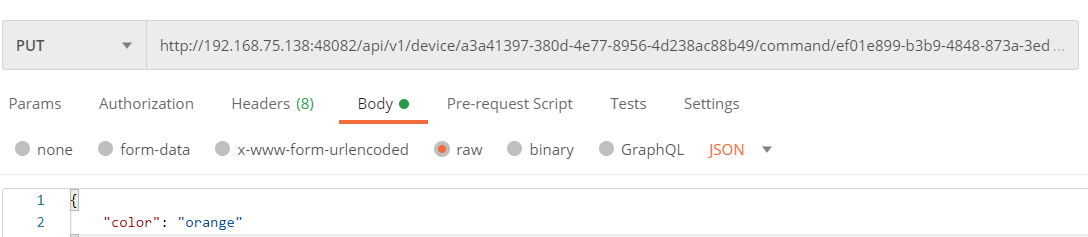
3.1 使用postman 查看TestApp设备的详细信息
postman 模式选择GET
http://<edgex ip>:48082/api/v1/device
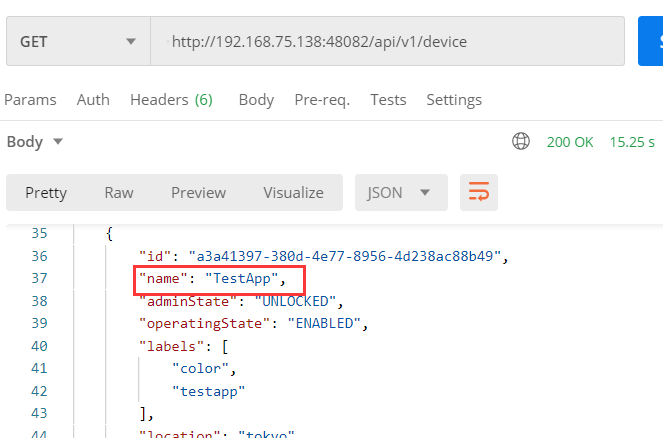
在“put”下找到“url”
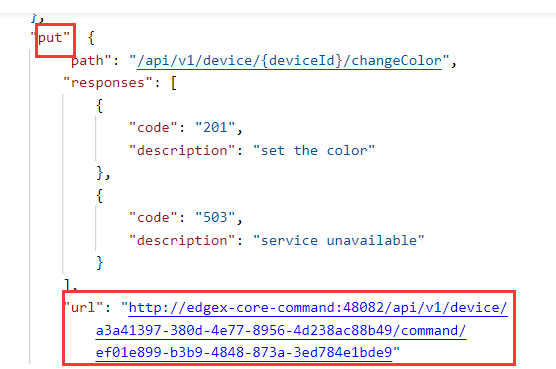
测试一下,双击url,模式选择put
浏览器变为
四、创建自动执行规则的命令
4.1 创建一个新的kuiper数据流
postman 选择 post
http://<edgex ip>:48075/streams
将Body设置为“raw”和“JSON”
{
    "sql": "create stream number_threshold() WITH (FORMAT="JSON", TYPE="edgex")"
}
4.2 创建规则
postman 选择 post
http://<edgex ip>:48075/rules
将Body设置为“raw”和“JSON”
{
"id": "temp_rule",
"sql": "SELECT temperature FROM temp_threshold WHERE
temperature > 70",
"actions": [
{
"rest": {
"url": "<unique command for put>",
"method": "put",
"retryInterval": -1,
"dataTemplate": "{"color":"red"}",
"sendSingle": true
}
},
{
"log":{}
}
]
}
sql是设置规则,我设置的规则是通过edgex上传的数字,如果大于80的话,浏览器颜色就变为红色。
url换为上一步中put里的链接

4.3 记得运行上一篇中python模拟上传数字的程序以及edgex

4.4 会发现当上传的数字大于80时 浏览器会自动变为红色

写在最后:下午去找老师给他讲一下这个东西,估计接下来的任务不轻,毕竟只是实现了一个小功能,距离自己的功能还差得远呢,革命尚未成功,同志仍需努力!