db2 v9 infocenter
http://publib.boulder.ibm.com/infocenter/db2luw/v9r7/index.jsp?topic=/com.ibm.db2.luw.qb.server.doc/doc/r0025127.html
db2 v9 setup / install
http://ishare.iask.sina.com.cn/f/13994822.html
http://publib.boulder.ibm.com/infocenter/db2luw/v9r7/index.jsp?topic=%2Fcom.ibm.db2.luw.common.doc%2Fdoc%2Ft0008271.html
http://dl.iteye.com/topics/download/f3b7ea0b-5d72-359e-b6d4-046b371fbc7a
- 创建用于 DB2 安装的组和用户标识
- 创建 DB2 管理服务器 (DAS)
- 使用 db2icrt 创建实例
- 为 DB2 文件创建链接 (可选)
-为 DB2 实例配置 TCP/IP 通信
-使用许可证中心注册许可证密钥
db2 v9.1 jdk
C:\Documents and Settings\Lindows>java -version
java version "1.5.0"
Java(TM) 2 Runtime Environment, Standard Edition (build pwi32devifx-20070706 (SR
5 + IZ00983))
IBM J9 VM (build 2.3, J2RE 1.5.0 IBM J9 2.3 Windows XP x86-32 j9vmwi3223-2007042
6 (JIT enabled)
J9VM - 20070420_12448_lHdSMR
JIT - 20070419_1806_r8
GC - 200704_19)
JCL - 20070706
苏飞作品:DB2视频教程!
http://www.rootman.cn/forum/redirect.php?tid=1128&goto=lastpost
| 本集是第一讲,介绍DB2 for Windows 9.5的安装 |
Windows查看DB2版本
set db2clp=%1
prompt DB2CLP $p$g
cls
%2 %3 %4 %5 %6 %7 %8 %9
@db2clpsetcp
@cls
@if /i "%COMSPEC%" == "%WINDIR%\system32\cmd.exe" goto WINNT
:WIN95
@%1 %2 %3 %4 %5 %6 %7 %8 %9
@goto END
:WINNT
@%*
:END
@echo off
rem -----------------------------------------------------------------------
rem (C) COPYRIGHT International Business Machines Corp. 2002
rem All Rights Reserved
rem
rem US Government Users Restricted Rights - Use, duplication or
rem disclosure restricted by GSA ADP Schedule Contract with IBM Corp.
rem
rem NAME: db2cw
rem
rem FUNCTION: Launch the Command Window
rem
rem -----------------------------------------------------------------------
db2cmd db2setcp "%1 %2 %3 %4 %5 %6 %7 %8 %9"
"D:\Program Files\IBM\SQLLIB\BIN\db2ce.bat"
@echo off
rem -----------------------------------------------------------------------
rem (C) COPYRIGHT International Business Machines Corp. 2002
rem All Rights Reserved
rem
rem US Government Users Restricted Rights - Use, duplication or
rem disclosure restricted by GSA ADP Schedule Contract with IBM Corp.
rem
rem NAME: db2ce
rem
rem FUNCTION: Run the DB2 UDB Command Editor.
rem
rem -----------------------------------------------------------------------

rem -Xquickstart -Xgcpolicy:optavgpause are options to make sure the JVM will be
rem optimized for client applications.  Note that these options exist only in
rem the IBM jdk.  Other jdks will refuse to start with these options.
set RUNTIME_FLAGS=-Xmx128m -Xms8m -Xquickstart -Xgcpolicy:optavgpause

IF "%1" == "wait" GOTO WAIT
   db2javit -j:com.ibm.db2.tools.ce.ui.NewEditorAction -s:     -i: -l: -o:"%RUNTIME_FLAGS%" -a:"-ce %1 %2 %3 %4 %5 %6 %7 %8"
   GOTO END

:WAIT
   db2javit -j:com.ibm.db2.tools.ce.ui.NewEditorAction -s: -w: -i: -l: -o:"%RUNTIME_FLAGS%" -a:"-ce %2 %3 %4 %5 %6 %7 %8 %9"
   GOTO END

:end
--开机启动 DB2 桌面 右下角图标
【注册表】 DB2 9.1.0.356
----开始----运行----regedit----我的电脑
----HKEY_LOCAL_MACHINE----SOFTWARE----Microsoft----Windows----CurrentVersion----Run
----数值名称
DB2COPY1 - db2systray.exe DB2
----数值数据
E:\Program_Files\IBM\SQLLIB\BIN\db2systray.exe DB2
--查看db2版本详细信息和补丁级别
http://blog.chinaunix.net/u1/43842/showart_344622.html
C:\Documents and Settings\Lindows>db2level
DB21085I 实例 "DB2" 使用 "32" 位和 DB2 代码发行版 "SQL09050",级别标识为
"03010107"。
参考标记为 "DB2 v9.5.0.808"、"s071001" 和 "NT3295",修订包为 "0"。
产品使用 DB2 副本名 "DB2COPY1" 安装在 "D:\PROGRA~1\IBM\SQLLIB" 中。
--查看db2基本版本号
C:\Documents and Settings\Lindows>db2licm -v
9.5
Red Hat Enterprise Linux Server release 6.2 (Santiago)
Kernel \r on an \m
WARNING:
The 32 bit library file libstdc++.so.6 is not found on the system.
32-bit applications may be affected.
libstdc++.so: /usr/lib64/libstdc++.so.6
[root@localhost ~]# ls /media/RHEL_6.2\ x86_64\ Disc\ 1/Packages/*c++*
/media/RHEL_6.2 x86_64 Disc 1/Packages/compat-gcc-34-c++-3.4.6-19.el6.x86_64.rpm
/media/RHEL_6.2 x86_64 Disc 1/Packages/compat-libstdc++-296-2.96-144.el6.i686.rpm
/media/RHEL_6.2 x86_64 Disc 1/Packages/compat-libstdc++-33-3.2.3-69.el6.i686.rpm
/media/RHEL_6.2 x86_64 Disc 1/Packages/compat-libstdc++-33-3.2.3-69.el6.x86_64.rpm
/media/RHEL_6.2 x86_64 Disc 1/Packages/dbus-c++-0.5.0-0.10.20090203git13281b3.1.el6.x86_64.rpm
/media/RHEL_6.2 x86_64 Disc 1/Packages/gcc-c++-4.4.6-3.el6.x86_64.rpm
/media/RHEL_6.2 x86_64 Disc 1/Packages/gcc-objc++-4.4.6-3.el6.x86_64.rpm
/media/RHEL_6.2 x86_64 Disc 1/Packages/ImageMagick-c++-6.5.4.7-5.el6.x86_64.rpm
/media/RHEL_6.2 x86_64 Disc 1/Packages/libsigc++20-2.2.4.2-1.el6.x86_64.rpm
/media/RHEL_6.2 x86_64 Disc 1/Packages/libstdc++-4.4.6-3.el6.i686.rpm
/media/RHEL_6.2 x86_64 Disc 1/Packages/libstdc++-4.4.6-3.el6.x86_64.rpm
/media/RHEL_6.2 x86_64 Disc 1/Packages/libstdc++-devel-4.4.6-3.el6.i686.rpm
/media/RHEL_6.2 x86_64 Disc 1/Packages/libstdc++-devel-4.4.6-3.el6.x86_64.rpm
/media/RHEL_6.2 x86_64 Disc 1/Packages/libstdc++-docs-4.4.6-3.el6.x86_64.rpm
[root@localhost ~]# rpm -ivh /media/RHEL_6.2 x86_64 Disc 1/Packages/ libstdc++-4.4.6-3.el6.i686.rpm --nodeps
[root@localhost ~]# rpm -qa | grep libstdc++
libstdc++-docs-4.4.6-3.el6.x86_64
libstdc++-4.4.6-3.el6.x86_64
libstdc++-4.4.6-3.el6.i686
[root@localhost ~]# ll /usr/lib/libstdc*
lrwxrwxrwx. 1 root root 19 Mar 29 08:38 /usr/lib/libstdc++.so.6 -> libstdc++.so.6.0.13
-rwxr-xr-x. 1 root root 930192 Aug 24 2011 /usr/lib/libstdc++.so.6.0.13
[root@localhost ~]# ll /usr/lib64/libstdc*
lrwxrwxrwx. 1 root root 18 Mar 29 08:43 /usr/lib64/libstdc++.so.5 -> libstdc++.so.5.0.7
-rwxr-xr-x. 1 root root 825480 Jun 28 2010 /usr/lib64/libstdc++.so.5.0.7
lrwxrwxrwx. 1 root root 19 Mar 26 13:57 /usr/lib64/libstdc++.so.6 -> libstdc++.so.6.0.13
-rwxr-xr-x. 1 root root 989840 Aug 24 2011 /usr/lib64/libstdc++.so.6.0.13
CentOS x64位Linux安装db2 v9.7的问题
http://blog.csdn.net/airmy/article/details/6910320
由于公司有一部分项目是用db2,所以我也在实验环境中要架设db2环境..这里只提db2安装时候遇到的问题..
平台:centos6.0 数据库版本:db2 v.97
db2_install安装时候遇到如下错误:
db2安装最后报:
A minor error occurred while installing "DB2 Enterprise Server Edition" on this computer. Some features may not function correctly.
查看db2的安装日志显示如下
Installing or updating SA MP :.......Failure
Executing control tasks :.......Success
Updating global registry :.......Success
The installation of IBM Tivoli Monitoring for Databases has completed. The log
file can be found at /opt/ibm/db2/V9.7/itma/logs/itm_install.log.
Starting DB2 Fault Monitor :.......Success
Updating the db2ls link :.......Success
Registering DB2 licenses :.......Success
Setting default global profile registry variables :.......Success
Initializing instance list :.......Success
Registering DB2 Update Service :.......Success
Updating global profile registry :.......Success
WARNING: A minor error occurred while installing "DB2 Enterprise Server Edition
" on this computer. Some features may not function correctly.
这个warning错误可以忽略了..不影响正常使用
DB2 V9.7 在RedHat 5.4下安装(转载)
http://chenjialin2000.iteye.com/blog/784392
Linux(RedHat Enterprise Linux 5.4)下的DB2安装__使用图形界面
可以使用图形界面,也可以使用手工安装的方式。我们先介绍最简单的安装方法。
1.从IBM网站下载DB2 9.7 express C版本:文件名db2exc_971_LNX_x86.tar.gz,。
2.在LINUX下解压缩及解包
#gzip -d db2exc_971_LNX_x86.tar.gz
#tar -xvf db2exc_971_LNX_x86.tar
3.进入相关目录,运行安装文件
#xhost +
#cd expc
#./db2setup
先允许所有用户使用xwindows界面。
在当前目录中要找到db2setup文件,然后执行它。
如果权限不够,先运行chmod +x db2setup
4.根据图形界面安装
可以选择安装位置或内容等。
过程中需要对其中的三个DB2用户的名字和密码进行设置,并记录下来。注意DB2没有自己独立的用户管理系统,因此这几个用户实际就是LINUX的用户。
最后完成安装。
5.验证安装成功。
[root@bogon expc]# su - db2inst1
[db2inst1@bogon ~]$ db2 create database test
DB20000I The CREATE DATABASE command completed successfully.
[db2inst1@bogon ~]$
其中db2inst1为安装过程中创建的三个用户之一,为实例的管理者用户。
创建数据库成功表明安装成功。
更多的初始配置见DB2手工安装。
########################################################
DB2 for linux手动安装步骤
第一步下载db2数据包
当前最新版本为9.7,从IBM网站下载免费的Express C版本。
db2exc_971_LNX_x86.tar.gz及语言包db2exc_nlpack_971_LNX_x86.tar.gz(后者可选)。
第二步上传安装文件
把下载下来的包ftp上传到待安装的LINUX机器上
第三步解包db2exc_971_LNX_x86.tar.gz
# gzip -d db2exc_971_LNX_x86.tar.gz
# tar -xvf db2exc_971_LNX_x86.tar
第四步安装
解包以后会有目录名为expc,进入找到db2_install和db2setup文件,前者为手动安装,后者为图形界面安装。
#cd expc
#./db2_install
设定安装目录等以后,耐心等待安装任务完成。
默认安装路径是/opt/ibm/db2/V9.7,可检查之。
第五步注册license
本安装无须这一步。
对于企业版等版本,需要注册license才能使用。
对于V8.1 ESE版,注册license的文件一般是:/opt/DB2_V81_PE_LNX_32_NLV/db2/license/db2ese.lic,否则需要自己找一下db2ese.lic,
根据实际情况执行
#/opt/IBM/db2/V8.1/adm/db2licm -a /opt/334_ESE_LNX26_32_NLV/db2/license/db2ese.lic
若提示:
DBI1402I License added successfully.
DBI1426I This product is now licensed for use as specified in
the License Acceptance and License Information
documents pertaining to the licensed copy of this
product. USE OF THE PRODUCT CONSTITUTES ACCEPTANCE OF
THE TERMS OF THE IBM LICENSE ACCEPTANCE AND LICENSE
INFORMATION DOCUMENTS, LOCATED IN THE FOLLOWING
DIRECTORY: /opt/IBM/db2/V8.1/license/zh_CN.utf8
表明注册成功
第六步 创建DB2运行所需要的用户组和用户
注意DB2并没有独立的用户管理系统,必须借用OS用户来提供安全性认证,所以这里需要创建LINUX用户和组。
# groupadd -g 901 db2grp
# groupadd -g 902 db2fgrp
# groupadd -g 903 db2agrp# useradd -g db2grp -u 801 -d /home/db2inst1 -m -s /bin/sh db2inst1
# useradd -g db2fgrp -u 802 -d /home/db2fenc -m -s /bin/sh db2fenc
# useradd -g db2agrp -u 803 -d /home/db2das -m -s /bin/sh db2das
这里的默认用户名是:
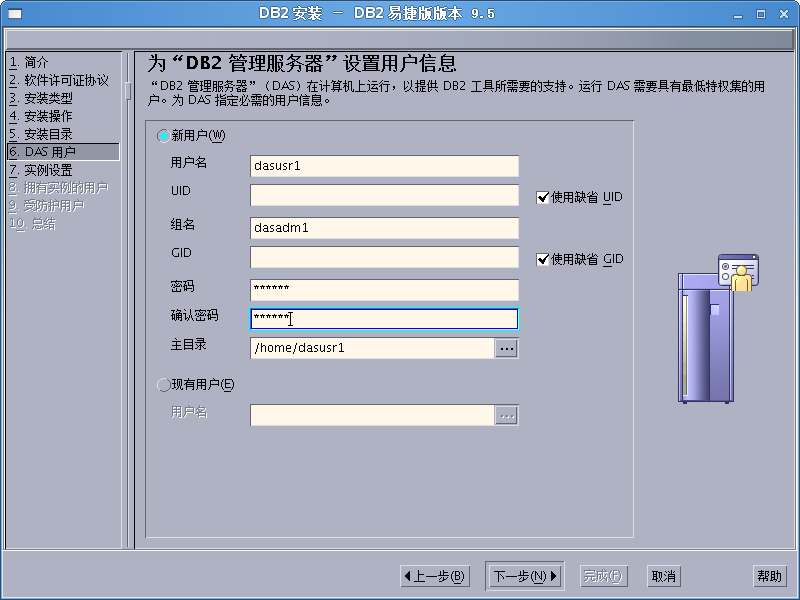
DAS用户 dasusr1 组名: dasadm1
管理实例的用户 db2inst1 组名:db2iadm1
受防护用户 db2fenc1 组名: db2fadm1
但是DB2用户可以任意起名。
第七步添加密码
# passwd db2inst1
Changing password for db2inst1.
New password:[输入新密码]
Re-enter new password:[再次输入新密码]
Password changed
创建完成后,执行如下命令,检查用户组和用户是否创建成功。
# more /etc/group |grep db2
# more /etc/passwd |grep db2
如果结果中包含那三个用户和组,则创建成功。正确的结果应该是:
# more /etc/group |grep db2
dialout:x:16:db2inst1,db2fenc,db2das
video:x:33:db2inst1,db2fenc,db2das
db2grp:!:901:
db2fgrp:!:902:
db2agrp:!:903:
# more /etc/passwd |grep db2
db2inst1:x:801:901::/home/db2inst1:/bin/sh
db2fenc:x:802:902::/home/db2fenc:/bin/sh
db2das:x:803:903::/home/db2das:/bin/sh
第八步创建实例。
b1. 进入/opt/ibm/db2/V9.7/instance目录
# cd /opt/ibm/db2/V9.7/instance
2. 执行以下命令
# ./dascrt -u db2das
# ./db2icrt -u db2inst1 db2inst1
这里dascrt创建的是DB2 adminstration server,每台服务器只有一个这种server,为进行DB2管理(比如运行控制中心)所必须,同时指定其管理用户是db2das。
db2icrt创建的是实例,其名字一般和管理用户名一样,这里均为db2inst1。
3 启动DB2
切换到db2das用户,执行db2admin启动DB2管理服务器。
$ db2admin start
切换到db2inst1用户,执行db2start启动数据库实例。
$ db2start
第九步 配置DB2
1 设置DB2自启动。
使用root用户执行以下命令:
# cd /opt/ibm/db2/V9.7/instance
# ./db2iauto -on db2inst1
设置对db2inst1在LINUX启动时自动启动。
2 配置网络
切换到db2inst1用户。
# su - db2inst1
修改DB2的服务端口为50000,这里默认端口就是50000。
$ db2 update dbm cfg using SVCENAME 50000
DB20000I The UPDATE DATABASE MANAGER CONFIGURATION command completed
successfully.
修改DB2连接方式为TCPIP,然后可通过JDBC、ODBC等访问本DB2服务器上的数据库,安装了DB2客户端的其它机器也可访问数据库。
$ db2set DB2COMM=TCPIP
至此,安装过程结束。
第十步 创建和访问数据库,安装验证
1 启动与关闭数据库实例
做任何事情之前,首先要启动数据库实例
切换到db2inst1用户,执行db2start启动数据库实例。
$ db2start
SQL1063N DB2START processing was successful.
若需要,可运行下面的命令来关闭数据库实例
首先在db2inst1用户下强制关闭实例上的所有应用程序。
$ db2 force applications all
关闭数据库实例。
$ db2stop
SQL1064N DB2STOP processing was successful.
2 创建数据库
$ su - db2ins1
$ db2 create database test1
DB20000I The CREATE DATABASE command completed successfully.
数据库创建成功了。
3 远程访问数据库
笔者是在VMWARE虚拟机上安装RHEL5.4和DB2的,在主机上也安装了DB2 ESE for windows V9.7,经实验这样配置后主机可以访问到虚拟机上的DB2数据库。方法是在主机上运行db2cmd,然后运行:
C:\Documents and Settings\Administrator>db2 catalog tcpip node bogon remote 192.
168.211.132 server 50000
DB20000I CATALOG TCPIP NODE 命令成功完成。
DB21056W 直到刷新目录高速缓存之后,目录更改才生效。
C:\Documents and Settings\Administrator>db2 catalog database test1 as test_1 at
node bogon
DB20000I CATALOG DATABASE 命令成功完成。
DB21056W 直到刷新目录高速缓存之后,目录更改才生效。
C:\Documents and Settings\Administrator>db2
? Copyright IBM Corporation 1993,2007
DB2 客户机 9.7.0 的命令行处理器
可从命令提示符处发出数据库管理器命令和 SQL 语句。例如:
db2 => connect to sample
db2 => bind sample.bnd
要获得一般帮助,输入:?。
要获得命令帮助,输入:? command,其中 command 可以是
数据库管理器命令的前几个关键字。例如:
? CATALOG DATABASE 用于关于 CATALOG DATABASE 命令的帮助
? CATALOG 用于关于所有 CATALOG 命令的帮助。
要退出 db2 交互方式,在命令提示符处输入
QUIT。在非交互方式下,所有命令都必须以“db2”作前缀。
要列出当前命令选项设置,输入 LIST COMMAND OPTIONS。
要获取更详细的帮助,请参阅 Online Reference Manual。
db2 => !db2set
DB2INSTOWNER=WWW-A448048D8D7
DB2PORTRANGE=60000:60003
DB2INSTPROF=C:\DOCUMENTS AND SETTINGS\ALL USERS\APPLICATION DATA\IBM\DB2\DB2COPY
1
DB2COMM=TCPIP
db2 => connect to test_1 user db2inst1
输入 db2inst1 的当前密码:
数据库连接信息
数据库服务器 = DB2/LINUX 9.7.1
SQL 授权标识 = DB2INST1
本地数据库别名 = TEST_1
db2 =>
#####################################################
DB2 for linux卸载
由于某种原因,要卸载DB2再重新安装,一定要完全卸载DB2,否则不能重新安装或安装后的DB2不可用。
因为卸载步骤比较复杂,我建议在虚拟机上安装该软件的朋友,应该先做一个快照,然后方可进行,出错就恢复快照,重新来过。在主机上卸载则最好先做一个备份,以防万一。
为了操作方便,可以同时打开几个Shell,分别属于不同用户,配合完成下面的操作。
1、在linux上卸载DB2的一般过程:
a.删除所有数据库。可以使用“控制中心”或drop database命令删除数据库。笔者卸载而未删除数据库,结果是重新安装后无法建立同名数据库。
b.停止DB2管理服务器。
c.停止DB2实例。
d.除去DB2管理服务器。
e.除去DB2实例。
f.除去DB2产品。
2、停止DB2管理服务器:
必须要停止DB2管理服务器才能在linux上卸载DB2。
a.作为DB2管理服务器所有者登陆。
b.用db2admin stop命令停止DB2管理服务器。
3、停止DB2实例:
必须要停止DB2实例才能在linux上卸载DB2。
a.作为具有root用户权限的用户登陆。
b.输入/opt/ibm/db2/V9.7/bin/db2ilist命令,获取系统上的所有DB2实例的名称。
c.注销。
d.作为想要停止的实例的所有者登陆。
e.进入该用户的主目录下,运行脚本:. sqllib/db2profile
d.输入db2 force application all命令来停止所有数据库应用程序。
e.输入db2stop命令来停止DB2数据库管理器。
f.输入db2 terminate来确认DB2数据库管理器已停止。
g.对每一个要删除的实例重复以上步骤。
4、删除DB2管理服务器:
必须删除DB2管理服务器才能卸载DB2。
a.作为DB2管理服务器所有者登陆。
b.进入该用户的主目录下,运行脚本:. das/dasprofile.
c.注销。
d.作为root登陆,通过输入命令/opt/ibm/db2/V9.7/instance/dasdrop除去DB2管理服务器。
5、删除DB2实例:
一旦删除系统上的实例,该实例下的所有DB2数据库都将不可用。
a.通过输入/opt/ibm/db2/V9.7/instance/db2idrop db2instname删除实例。
6、卸载DB2产品
以root身份登陆,到DB2版本产品CD-ROM上的根目录或DB2安装文件(通常就是tar解包文件)下找到db2_deinstall命令,
运行db2_deinstall -a命令可以删除所有DB2产品。
可能需要输入DB2安装路径,这里是/opt/ibm/db2/V9.7
然后也可以在LINUX中删除DB2用户,这并非必须,重新安装仍可使用它们。
下面是英文的简要说明:
Following are the steps to remove DB2 from Unix/Linux:
1.Remove DB[首先删除数据库]
(1)su - db2inst1
(2)db2 list db directory
(3)db2 drop db <db name>
2.Remove Instance【删除实例】
(1)su - root
(2)cd <db2 dir>/instance
(3)./db2ilist
(4)./db2idrop -f <instance name>
3.Remove das【删除das】
(1)su - root
(2)cd <db2 dir>/instance
(3)./daslist
(4)./dasdrop <das user>
4.Uninstall【卸载】
(1)su - root
(2)cd <db2 dir>/install
(3)./db2_deinstall -a
5.Remove user ( db2inst1,db2fenc1,dasusr1)【删除用户】
userdel -r <username>
please lookinto the file /etc/passwd before and after you deleted users
########################################################
db2
db2数据库之四:数据库系统安装/卸载-linux
http://blog.csdn.net/lhfeng/article/details/3169995
[root@localhost db2v9.7]# ./db2_deinstall -a
Enter full path name for the install directory -
------------------------------------------------
/opt/ibm/db2/V9.7/
DBI1016I Program db2_deinstall is performing uninstallation. Please
wait.
The execution completed successfully.
For more information see the DB2 uninstallation log at
"/tmp/db2_deinstall.log.27707".
用db2_install命令行安装DB2数据库
http://hi.baidu.com/shunxinyangkun/blog/category/Ibm
http://hi.baidu.com/shunxinyangkun/blog/category/Ibm
http://hi.baidu.com/shunxinyangkun/blog/category/Ibm
http://hi.baidu.com/shunxinyangkun/blog/category/Ibm
http://hi.baidu.com/shunxinyangkun/blog/item/12beaa24e3a4d21a4c088d83.html
一、 上传安装文件
二、 解压安装文件 :# tar –xfv DB2.tar
三、 解压后 ,会出现 db2setup 和db2_install 两个可用于安装的文件 , db2setup是调用视窗安装,过程很简单,按照提示进行就可以。db2_install是命令行安装。下面我们就着重强调一下如何进行命令行安装。
1、 运行./db2_install ,安装DB2.
安装完成后显示信息如图。有消息:A minor Error occurred while installing "DB2 Enterprise Server Edition " on this computer. Some features may not function correctly. , 但是不要担心,这一般是Installing or updating SA MP :.......Failure 。不会影响我们的安装使用。
|
必需的用户
|
用户名
|
组名
|
|
实例所有者
|
db2inst1
|
db2iadm1
|
|
受防护的用户
|
db2fenc1
|
db2fadm1
|
|
管理服务器用户
|
dasusr1
|
dasadm1
|
1、 添加组账号 。
mkgroupdasadm1
2、 添加db2 用户账号
用smit命令来添加用户:
1.db2inst1 属于 db2iadm1 组;
2.db2fenc1 属于 db2fadm1 组;
3.dasusr1 属于 dasadm1 组;
然后分别设置用户的密码
3、 实例操作:
# cd /opt/ibm/db2/V9.5/instance
# ./db2icrt -u db2fenc1 db2inst1 -p 50003
DBI1070I Program db2icrt completed successfully. –提示实例创建成功。
当启动DB2实例时,会发现,DB2的监听端口并没有随着DB2实例的启动而启动。
下面过程设置如何启动监听。
1、 先执行db2set-all来检查是否有 DB2COMM=TCPIP 一项,如果没有则应该执行“ db2set DB2COMM=TCPIP ”设置。
# db2set –all
# db2set DB2COMM=TCPIP
# db2 get dbm cfg | grep SVCENAME 检查配置 SVCENAME 的值,
如果 SVCENAME为空值,则需要用下面的步骤设定该值,
如果是一个端口号 ( 端口号应小于 65536),则不用读取/etc/services文件中的端口定义,
如果该值是一个字符串(如:db2c_db2inst1),则在实例启动时会自动读取/etc/services 中的该字符串对应的端口号来监听。
# db2 update database manager configuration using svcename db2c_db2inst1(或者为端口号如:50001) -- 我们也可以通过这种方式修改DB2监听的端口号.
运行完成后再次运行# db2 get dbm cfg | grep SVCENAME 检查配置 SVCENAME 的值是否更新。
3.6设置db2自动启动
#db2set


DB2AUTOSTART=YES
五、 DB2 管理服务器
1、 创建DB2 管理服务器。
# cd /opt/ibm/db2/V9.5/instance
# ./dascrt -u dasusr1
DBI1070I Program dascrt completed successfully.
2、 启 动DB2 管理服务器# su - dasusr1# db2admin startSQL4409W The DB2 Administration Server is already active. –启动完成,这时可以用命令netstat-an 查看DB2 管理服务器的监听端口523是否被监听。说明:DB2 管理服务器启动完成后,可以通过客户端对服务器数据库进行管理,比如在windows机器上通过DB2控制中心访问远端服务器数据库!
3、 停止DB2管理服务器。# su – dasusr1# db2admin stop
让root用户可以直接运行db2的命令
http://hi.baidu.com/shunxinyangkun/blog/item/c1312f81a3385bc3bc3e1ebf.html
在/etc/profile文件中追加:
export PATH=/opt/IBM/db2/V9.5/bin:$PATH
. /home/db2inst1/sqllib/db2profile
在/etc/group文件中添加root 用户:
dasadm:|;101:dasusr1,db2inst1,root
db2iadm:|:102:root
db2fadm:|:103:db2fenc1,root
用db2_deinstall -a命令行卸载DB2数据库
http://hi.baidu.com/shunxinyangkun/blog/item/2891d6caf93bec99c81768c4.html
1.drop all databases --drop database <NAME>
2.stop all db2 instances --./db2idrop <INSTANCE NAME>
3.uninstall db2 --./db2_deinstall -a
db2数据库之四:数据库系统安装-linux
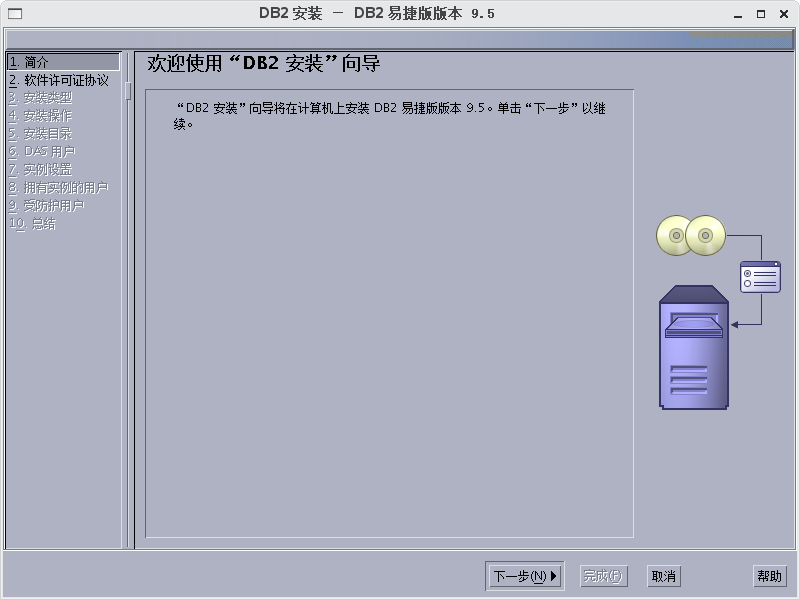
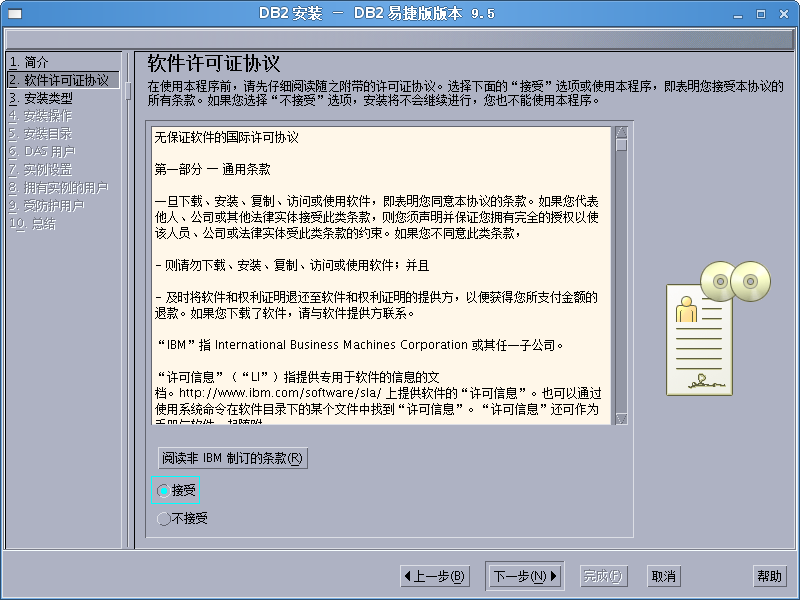
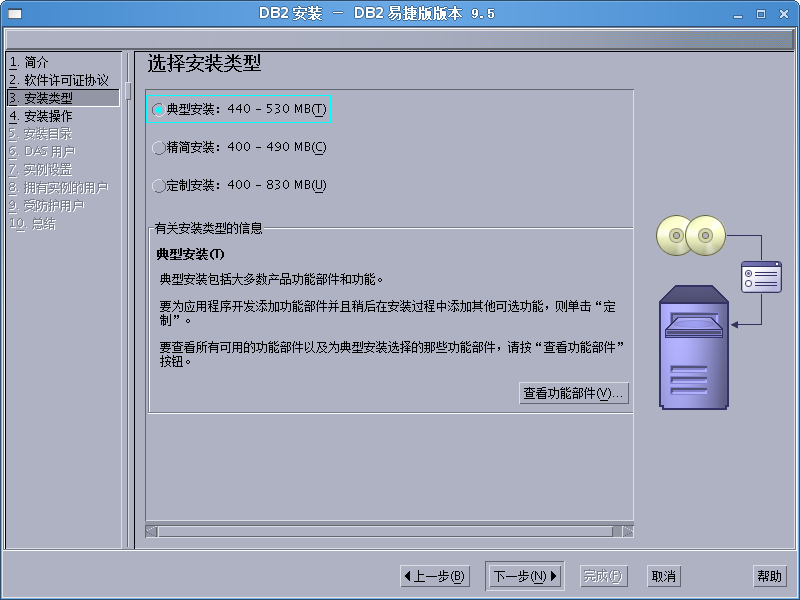
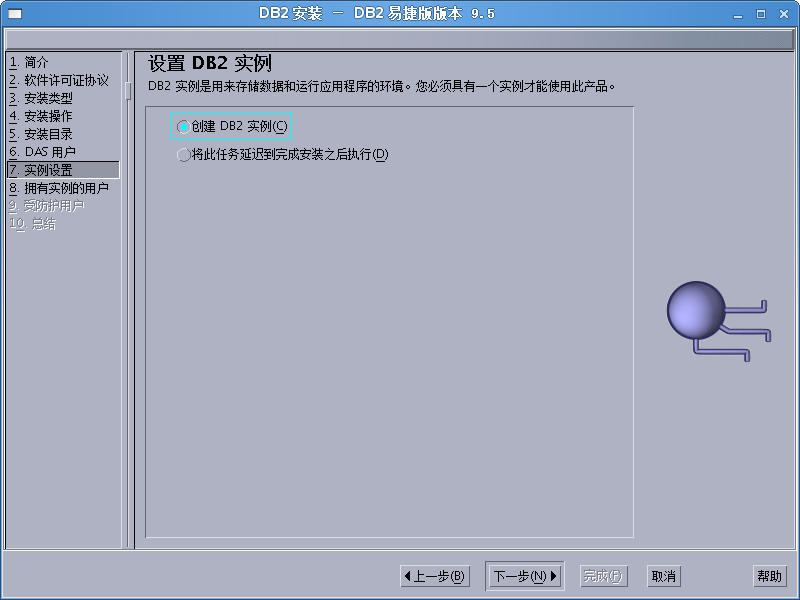
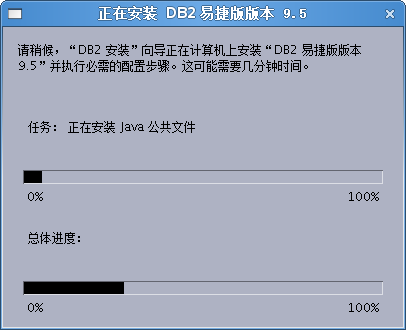
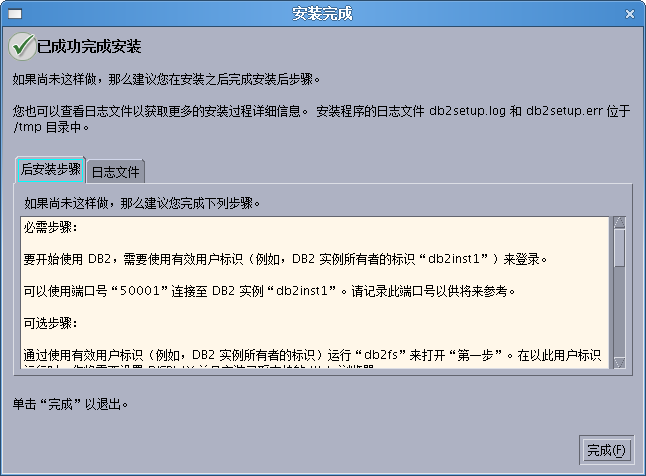
linux-lrq:/home/exp # ./db2setup
DBI1190I db2setup 正在准备"DB2 安装"向导,该向导将指导您完成程序安装过程。请稍候




linux-lrq:/home/exp # ./db2_deinstall
DBI1047I 用法:
db2_deinstall -F <featureName> | -a
[-l <logFile>]
[-b <installPath>]
[-t <trcFile>]
[-f sqllib]
[-h|-?]
说明:
-F 指定除去一个功能部件。除去所指定 DB2 组件后,您需要手工更新与
DB2 安装位置相关的 DB2 实例。此参数不能与 -a 配合使用,但以下
情况除外。如果要除去的功能部件是 IBM Tivoli System Automation
for Multiplatforms Base Component(TSAMP),并且您拥有 root 用
户权限,那么可以将 -F 与 -a 配合使用。
-a 从当前位置中除去所有已安装的 DB2 产品。此选项不能与 -F 配合使
用,但以下情况除外。如果要除去的功能部件是 IBM Tivoli System
Automation for Multiplatforms Base Component(TSAMP),并且您
拥有 root 用户权限,那么可以将 -F 与 -a 配合使用。在非 root 安
装中,将 -a 与 -f 配合使用也会除去非 root 实例,在此过程中,将
除去 $HOME/sqllib 目录。
-l 指定日志文件。如果是以 root 用户身份进行安装,那么缺省日志文件
是 /tmp/db2_deinstall.log$$,其中 $$ 表示进程标识。如果不是以
root 用户身份进行安装,那么缺省日志文件为 /tmp/db2_deinstall_
<userID>.log,其中 <userID> 表示进行非 root 用户安装的用户标识
。如果要除去的功能部件是 IBM Tivoli System Automation for
Multiplatforms Base Component(TSAMP),那么 SA MP Base
Component 的安装日志文件将保留在 DB2 日志文件所在的目录中。
-b 如果从 DB2 介质运行该命令,那么此选项有效。它指定要卸载的 DB2
产品的绝对安装路径。如果未指定该选项,那么此命令将提示您输入路
径。
-t 打开调试方式。会将调试信息写入指定的文件。
-f sqllib
此选项仅对于非 root 安装有效。将它与 -a 配合使用时,实例的顶级
目录及其中的任何内容都将被除去。
-h|-? 显示帮助信息。
用户响应:
重新输入该命令。
linux-lrq:/home/exp # ./db2_deinstall -a
输入安装目录的完整路径名 -
------------------------------------------------
/opt/ibm/db2/V9.5
DBI1016I Program db2_deinstall is performing uninstallation. Please wait.
The execution completed successfully.
For more information see the DB2 installation log at
"/tmp/db2_deinstall.log.589".
sql_temp
-- set schema sndbusr;
或
-- db2 set current schema sndbusr;
-- 查询商品库存
select * from xshwinventory xs left join catentry c on xs.partnumber = c.partnumber where c.catentry_id in(208601,167105);
或
select * from sndbusr.xshwinventory xs left join sndbusr.catentry c on xs.partnumber = c.partnumber where c.catentry_id in(208601,167105);
-- 导出商品库存
export to 'D:\库存.csv' of del select * from sndbusr.xshwinventory xs left join sndbusr.catentry c on xs.partnumber = c.partnumber where c.catentry_id in(208601,167105)with ur;
db2 v9 exception
Page Size Management Daemon
https://www-304.ibm.com/support/docview.wss?uid=isg1IZ46113
Very slow system operation when PSMD is in operation while
a particular page size pool has been exhausted but another
remains available for page size promotion or demotion.
23G 可分配给缓冲池的大小13.8G
IBMDEFAULTBP 2620000 4096 10G
BUF4K 128000 4096 500M
BUF8K 262000 8192 2G
BUF16K 131000 16384 2G
quick_db2_dynsql_snapshot_forV9.7.sh / DB2 9.7 快照自动抓取方法
http://dl.iteye.com/topics/download/0f0482d3-9bba-3a30-a141-74e3f061600a
#!/bin/bash
#############################################
## Update version for DB V9.7
## By Walter
## 12/26/2012
############################################
usage() {
        echo "\
Usage:
        `basename $0` -d databasename [-s sleeptime] [-u uid -p pw -n schema] [-r]
Description:

// To review the switch settings at the instance level, issue the GET DBM MONITOR SWITCHES or GET DBM CFG command.
db2 get dbm cfg   (for instance level)
db2 get monitor switches (for db level)

// Using the following command to turn on all monitor before collecting snapshot
// You can also turn all the monitors with single command.
db2 UPDATE DBM CFG USING DFT_MON_LOCK ON  (at the instance level)
//db2 update dbm cfg using DFT_MON_STMT ON DFT_MON_BUFPOOL ON DFT_MON_LOCK ON DFT_MON_SORT ON DFT_MON_TABLE ON DFT_MON_TIMESTAMP ON DFT_MON_UOW ON HEALTH_MON ON
db2 update monitor switches using lock ON sort ON bufferpool ON uow ON table ON statement ON TIMESTAMP ON

        -d -- database name
        -s -- sleep timer
        -u -- account id for the db2advis command
        -p -- password of the user
        -n -- schema name
        -r -- reset the db2 snapshot monitor counters
"
}

dbname=""
reset=""
uid=""
pw=""
schema=""
sleeptimer=0

while getopts "d:s:u:p:n:r" OPTION ; do
    case "$OPTION" in
        d) dbname=$OPTARG ;;
        s) sleeptimer=$OPTARG ;;
        u) uid=$OPTARG ;;
        p) pw=$OPTARG ;;
        n) schema=$OPTARG ;;
        r) reset=true ;;
       \?) usage ;
           exit 1
           ;;
    esac
done

if [ -z $dbname ]
then
        usage
        echo "Missing the database name, it is a mandatory argument!"
        exit 2
fi

if [ "$reset" = "true" ]
then
        echo "Resetting the db2 snapshot monitor counters ..."
        db2 reset monitor for database $dbname
        if [ $? -ne 0 ]
        then
        	echo "Failed to reset the db snapshot monitor! Please verify current user permission or database name is correct!"
        	exit 3
        fi
fi

if [ $sleeptimer -gt 0 ]
then
        echo "Sleeping ..."
        sleep $sleeptimer
fi

timestamp=`date +"%Y%m%d_%H%M%S"`
outfilename=${dbname}_${timestamp}.dynsql.snap

db2 get snapshot for dynamic sql on $dbname > ${dbname}_${timestamp}_snapshot_dynsql.raw
if [ $? -ne 0 ]
then
        echo "Failed to dump the snapshot for your db! Please verify current user permission or database name is correct!"
        exit 4
else
		echo "the db2 snapshot raw text output file is: ${dbname}_${timestamp}_snapshot_dynsql.raw"
fi

# extract the head line (column names)
sed -n '8,38s/\s\([^=]*\)= \(.*\)/\1/p' snapshot_dynsql.raw | sed '1,29s/\s\{0,\}$/#/;30,30s/\s\{0,\}$//' | tr -d '\n' | awk '{print $0}'> ${dbname}_${timestamp}_snapshot_dynsql.headline

# drops first 7 head lines and all blank lines from the raw snapshot output file to unify the content.
sed -n '8,$p'  snapshot_dynsql.raw | sed '/^$/d' > ${dbname}_${timestamp}_snapshot_dynsql.tmp

# extract the values and re-org to one line for each sql statement from 30 lines.
cat snapshot_dynsql.tmp | sed 's/\([^=]*\)= \(.*\)/\2/' | awk 'BEGIN {lines=0;} {lines++; if (lines%30==0) printf("%s\n",$0); else printf("%s#",$0)}' | sed '/^0#/d' > ${dbname}_${timestamp}_snapshot_dynsql.body

# Only pay attention to a number of columns as well as the avg exeuction time we manually calculated.
awk 'BEGIN {FS="#"; OFS="#"} {print $25,"avg execution time(sec.ms)",$26,$27,$1,$7,$9,$30}' ${dbname}_${timestamp}_snapshot_dynsql.headline > $outfilename
awk 'BEGIN {FS="#"; OFS="#"} {print $25,$25/$1,$26,$27,$1,$7,$9,$30}' ${dbname}_${timestamp}_snapshot_dynsql.body | sort -nrt# -k2 >> $outfilename

#Remove all the temporary file
rm -f ${dbname}_${timestamp}_snapshot_dynsql.headline ${dbname}_${timestamp}_snapshot_dynsql.body ${dbname}_${timestamp}_snapshot_dynsql.tmp

echo " The statistics file is $outfilename , it can be checked by MS Excel"


#############################
##
## You can use the db2advis command to find the recommended optimziation methods for these
## high cost dynamic sql statements
#############################
## 	db2advis -d icmnlsdb -s "Select Count(*) From RapidReconReportData Where ClientCode=? And
##						COMPONENTTYPE = ? And DATE(CreateTime) >= ? And DATE(CreateTime) <= ? And TIME(CreateTime) >= ? AND TIME(CreateTime) <= ?"
#############################

if [ -n "$uid" -a -n "$pw" -a -n "$schema" ]
then
//Take the top 100 sqls
    sed -n '2,$p' $outfilename | awk 'BEGIN{FS="#"} {print $8}' | grep -v -E "^CALL|^SET|^call|^set" | head -n 100 > ${outfilename}.sql
    > ${outfilename}.advis
    while read line; do
                    echo "*****************************"     >> ${outfilename}.advis
                    echo "**  SQL Statement $sqlnum  **" >> ${outfilename}.advis
                    echo "*****************************" >> ${outfilename}.advis
                    echo "$line" >> ${outfilename}.advis
                    echo "::::::::::::::::::::::::::::" >> ${outfilename}.advis
        						echo db2advis -d $dbname -a $uid/$pw -n $schema -s \"$line\" | sh 2>/dev/null >> ${outfilename}.advis
    done < ${outfilename}.sql

    rm -f ${outfilename}.sql

    echo "The db2 advising optimization result is ${outfilename}.advis"
fi

exit 0
[root@Loadrunner19 wyg]# vim /root/wyg/transfer.pl
#Transfer snapshot.txt to stmt.txt


use strict;
use IO::File;
use Time::Local;

#Open the snapshot.txt
unless (open(FILE1,$ARGV[0])) {
die ("Please enter the snapshot.txt\n");
}


my $date;
my $line;
my @array;
my $NumberExecutions;
my $NumberCompilations;
my $WorstPreparation;
my $BestPreparation;
my $TotalExecutionTime;
my $InternalRowsDeleted;
my $InternalRowsInserted;
my $InternalRowsupdated;
my $StatementText;
my $Statementsorts;
my $Statementsortoverflows;
my $Totalsorttime;
my $Rowsread;
my $AverageRowRead;
my $Rowswritten;
my $AverageRowSelect;
my $BPDLR;
my $BPDPR;
my $BPILR;
my $BPIPR;
my $BPTDLR;
my $BPTDPR;
my $BPTILR;
my $BPTIPR;
my $BPRatio;
my $flag = 0;
my $position;
my $AverageTime;
my $TUsrTm;
my $TSysTm;


#Show start time.
$date=localtime(time);
print "Start from ".$date;

#Write the tag to the txt.
open (OUTFILE, ">transfer.txt");
print OUTFILE (" NumEx;NumComp;WorstP;BestP;IntRDel;IntRIns;RowsRead;IntRUpd;RowsWri;Sorts;SortOflo;TSortTm;BPDLR;BPDPR;BPTDLR;BPTDPR;BPILR;BPIPR;BPTILR;BPTIPR;TELapTm;TUsrTm;TSysTm;AvgElap;AverageRowRead;AverageRowSelect;BPRatio;Text;\n");

#Close the file handle.
close(OUTFILE);
print("\nBegin to transfer,please wait!\n");

#Read the data from snapshot.txt.
while($line = <FILE1>)
{
	if($line=~/Number\sof\sexecutions/){
		$NumberExecutions=$line;
		$position=index($NumberExecutions,"=");
		$NumberExecutions=substr($NumberExecutions,$position+1,);
		if($NumberExecutions=~/\s0.*\s/){
			$flag=1;
			$NumberExecutions="";
			next;
		}else{

			$flag=2;
			#print $NumberExecutions;
		}
		$NumberExecutions=~s/\s//g;
	}
	if($line=~/Number\sof\scompilations/ && $flag==2){
		$NumberCompilations=$line;
		$position=index($NumberCompilations,"=");
		$NumberCompilations=substr($NumberCompilations,$position+1,);
		$NumberCompilations=~s/\s//g;
		#print $NumberCompilations;
	}
	if($line=~/Worst\spreparation\stime/ && $flag==2){
		$WorstPreparation=$line;
		$position=index($WorstPreparation,"=");
		$WorstPreparation=substr($WorstPreparation,$position+1,);
		$WorstPreparation=~s/\s//g;
		#print $WorstPreparation;
	}
	if($line=~/Best\spreparation\stime/ && $flag==2){
		$BestPreparation=$line;
		$position=index($BestPreparation,"=");
		$BestPreparation=substr($BestPreparation,$position+1,);
		$BestPreparation=~s/\s//g;
		#print $BestPreparation;
	}
	if($line=~/Internal\srows\sdelete/ && $flag==2){
		$InternalRowsDeleted=$line;
		$position=index($InternalRowsDeleted,"=");
		$InternalRowsDeleted=substr($InternalRowsDeleted,$position+1,);
		$InternalRowsDeleted=~s/\s//g;
		#print $InternalRowsDeleted;
	}
	if($line=~/Internal\srows\supdated/ && $flag==2){
		$InternalRowsupdated=$line;
		$position=index($InternalRowsupdated,"=");
		$InternalRowsupdated=substr($InternalRowsupdated,$position+1,);
		$InternalRowsupdated=~s/\s//g;
		#print $InternalRowsupdated;
	}
	if($line=~/Internal\srows\sinserted/ && $flag==2){
		$InternalRowsInserted=$line;
		$position=index($InternalRowsInserted,"=");
		$InternalRowsInserted=substr($InternalRowsInserted,$position+1,);
		$InternalRowsInserted=~s/\s//g;
		#print $InternalRowsInserted;
	}
	if($line=~/Statement\ssorts/ && $flag==2){
		$Statementsorts=$line;
		$position=index($Statementsorts,"=");
		$Statementsorts=substr($Statementsorts,$position+1,);
		$Statementsorts=~s/\s//g;
		#print $Statementsorts;
	}
	if($line=~/Statement\ssort\soverflows/ && $flag==2){
		$Statementsortoverflows=$line;
		$position=index($Statementsortoverflows,"=");
		$Statementsortoverflows=substr($Statementsortoverflows,$position+1,);
		$Statementsortoverflows=~s/\s//g;
		#print $Statementsortoverflows;
	}
	if($line=~/Total\ssort\stime/ && $flag==2){
		$Totalsorttime=$line;
		$position=index($Totalsorttime,"=");
		$Totalsorttime=substr($Totalsorttime,$position+1,);
		$Totalsorttime=~s/\s//g;
		#print $Totalsorttime;
	}
	if($line=~/Total\sexecution\stime/ && $flag==2){
		$TotalExecutionTime=$line;
		$position=index($TotalExecutionTime,"=");
		$TotalExecutionTime=substr($TotalExecutionTime,$position+1,);
		$TotalExecutionTime=~s/\s//g;
		#print $TotalExecutionTime;
	}
	if($line=~/Rows\sread/ && $flag==2){
		$Rowsread=$line;
		$position=index($Rowsread,"=");
		$Rowsread=substr($Rowsread,$position+1,);
		$Rowsread=~s/\s//g;
		#print $Rowsread;
	}
	if($line=~/Rows\swritten/ && $flag==2){
		$Rowswritten=$line;
		$position=index($Rowswritten,"=");
		$Rowswritten=substr($Rowswritten,$position+1,);
		$Rowswritten=~s/\s//g;
		#print $Rowswritten;
	}
	if($line=~/Buffer\spool\sdata\slogical\sreads/ && $flag==2){
		$BPDLR=$line;
		$position=index($BPDLR,"=");
		$BPDLR=substr($BPDLR,$position+1,);
		$BPDLR=~s/\s//g;
		#print $BPDLR;
	}
	if($line=~/Buffer\spool\stemporary\sdata\slogical\sreads/ && $flag==2){
		$BPTDLR=$line;
		$position=index($BPTDLR,"=");
		$BPTDLR=substr($BPTDLR,$position+1,);
		$BPTDLR=~s/\s//g;
		#print $BPTDLR;
	}
	if($line=~/Buffer\spool\sdata\sphysical\sreads/ && $flag==2){
		$BPDPR=$line;
		$position=index($BPDPR,"=");
		$BPDPR=substr($BPDPR,$position+1,);
		$BPDPR=~s/\s//g;
		#print $BPDPR;
	}
	if($line=~/Buffer\spool\stemporary\sdata\sphysical\sreads/ && $flag==2){
		$BPTDPR=$line;
		$position=index($BPTDPR,"=");
		$BPTDPR=substr($BPTDPR,$position+1,);
		$BPTDPR=~s/\s//g;
		#print $BPTDPR;
	}
	if($line=~/Buffer\spool\sindex\slogical\sreads/ && $flag==2){
		$BPILR=$line;
		$position=index($BPILR,"=");
		$BPILR=substr($BPILR,$position+1,);
		$BPILR=~s/\s//g;
		#print $BPILR;
	}
	if($line=~/Buffer\spool\stemporary\sindex\slogical\sreads/ && $flag==2){
		$BPTILR=$line;
		$position=index($BPTILR,"=");
		$BPTILR=substr($BPTILR,$position+1,);
		$BPTILR=~s/\s//g;
		#print $BPTILR;
	}
	if($line=~/Buffer\spool\sindex\sphysical\sreads/ && $flag==2){
		$BPIPR=$line;
		$position=index($BPIPR,"=");
		$BPIPR=substr($BPIPR,$position+1,);
		$BPIPR=~s/\s//g;
		#print $BPIPR;
	}
	if($line=~/Buffer\spool\stemporary\sindex\sphysical\sreads/ && $flag==2){
		$BPTIPR=$line;
		$position=index($BPTIPR,"=");
		$BPTIPR=substr($BPTIPR,$position+1,);
		$BPTIPR=~s/\s//g;
		#print $BPTIPR;
	}
        if($line=~/Total\suser\scpu\stime/ && $flag==2){
		$TUsrTm=$line;
		$position=index($TUsrTm,"=");
		$TUsrTm=substr($TUsrTm,$position+1,);
		$TUsrTm=~s/\s//g;
		#print $TUsrTm;
	}
        if($line=~/Total\ssystem\scpu\stime/ && $flag==2){
		$TSysTm=$line;
		$position=index($TSysTm,"=");
		$TSysTm=substr($TSysTm,$position+1,);
		$TSysTm=~s/\s//g;
		#print $TSysTm;
	}
	if($line=~/Statement\stext/ && $flag==2){
		$StatementText=$line;
		$position=index($StatementText,"=");
		$StatementText=substr($StatementText,$position+1,);
		#print $StatementText;
	}
	else{
		next;
	}
	if($flag==2){
	$AverageTime=sprintf("%.15f", ($TotalExecutionTime)/($NumberExecutions));
	$AverageRowRead=sprintf("%.5f", ($Rowsread)/($NumberExecutions));
		if($Rowsread==" 0"||$Rowswritten==" 0"){
			$AverageRowSelect=0;
		}else{
			$AverageRowSelect=sprintf("%.5f", ($Rowswritten)/($Rowsread));
		}
		if(($BPDLR+$BPILR)==0||($BPIPR+$BPDPR)==0){
			$BPRatio=100;
		}else{
			$BPRatio = (1-($BPIPR+$BPDPR)/($BPDLR+$BPILR))*100;
		}
	open (OUTFILE, ">>transfer.txt");
	print OUTFILE ($NumberExecutions.";".$NumberCompilations.";".$WorstPreparation.";".$BestPreparation.";".$InternalRowsDeleted.";".$InternalRowsInserted.";".$Rowsread.";".$InternalRowsupdated.";".$Rowswritten.";".$Statementsorts.";".$Statementsortoverflows.";".$Totalsorttime.";".$BPDLR.";".$BPDPR.";".$BPTDLR.";".$BPTDPR.";".$BPILR.";".$BPIPR.";".$BPTILR.";".$BPTIPR.";".$TotalExecutionTime.";".$TUsrTm.";".$TSysTm.";".$AverageTime.";".$AverageRowRead.";".$AverageRowSelect.";".$BPRatio.";".$StatementText);

	$StatementText="";
	$TotalExecutionTime="";
	$NumberExecutions="";
	$Statementsorts="";
	$Statementsortoverflows="";
	$Totalsorttime="";
	$TUsrTm="";
	$TSysTm="";
	}
}

#Show end time.
$date=localtime(time);
print "End at ".$date;

#Close the file handle.
close(OUTFILE);
close(FILE1)
如何卸载db2数据库 linux
http://zzuwxf.iteye.com/blog/1128872
卸载数据库时,经常会出现各种各样的警告,下面我们来看看通常的警告都如何处理。
假定db2的安装目录是 $db2_install
1. 停掉数据库服务,db2stop
2. 进入$db2_install/install 目录,运行./db2_deinstall -a命令。
3. 如果提示 “the deinstallation process cannot continue while there are DB2 instances related to the current DB2 copy,....",表明还有相关的db2实例,需要先把所有数据库实例drop了。进入目录$db2_install/instance,运行命令db2ilist,则会显示所有的数据库实例(如db2inst1),然后运行db2idrop db2inst1则会删掉实例名为db2inst1的数据库实例
4. 重复步骤2
5. 如果提示“The DB2 installer detects the DAS is using the current DB2 copy to uninstalled. The deinstallaton process cannot continue”,表明还有还需要把das服务drop掉。进入目录$db2_install/das /bin,运行./db2admim stop命令停掉das服务,然后进入$db2_install/instance,运行./dasdrop命令
6. 重复步骤2
db2fmcd和db2fmd
http://www.itpub.net/thread-1046341-1-1.html
http://www-01.ibm.com/support/knowledgecenter/SSEPGG_9.1.0/com.ibm.db2.udb.admin.doc/doc/c0008221.htm
db2fmcd unix的? db2fmcd 故障监视器协调程序(Fault Monitor Coordinator)守护程序进程。每个物理机器就有一个这样的进程。 db2fmd 为每个由故障监视器监控的 DB2 实例而启动的故障监视器守护程序进程。该进程是由协调守护程序(db2fmcd)监控的,因此,如果您杀死 db2fmd 进程,那么 db2fmcd 将使其重新运行。
比较奇怪的是:我可以kill掉db2inst1的db2fmd,但是却kill不掉dasusr1的db2fmd,在哪里可以控制db2fmd这个进程的启动和关闭?因为如果有db2fmd这个进程,有可能影响双机切换。
显示了 db2fmd 和 DB2INST1 的条目表示仍在该实例上运行故障监视器。要关闭故障监视器,请作为实例所有者输入以下命令:
db2fm -i db2inst1 -D
可以使用 DB2 故障监视控制器实用程序(FMCU)来防止 FMC 启动。由于 FMCU 要访问系统的 inittab 文件,所以它必须作为 root 用户运行。要禁止 FMC 运行,请作为 root 用户输入以下命令:
db2fmcu -d
注: 如果应用 DB2 版本 9.1 修订包 1 或 DB2 版本 9.1 修订包 2,那么就会复位此命令并再次将 inittab 配置为包括 FMC。在应用其中一个修订包后,要防止 FMC 启动,必须重新发出以上命令。
要撤销 db2fmcu -d 命令并将 inittab 重新配置为包括 FMC,请输入以下命令:
db2fmcu -u -p fullpath
其中 fullpath 是 db2fmcd 对象的完整路径,例如 /opt/IBM/db2/bin/db2fmcd。
也可以启用 FMC 以便在系统第一次引导时自动启动实例。要对 DB2INST1 实例启用此功能,请输入以下命令:
db2iauto -on db2inst1
要关闭自动启动行为,请输入以下命令:
db2iauto -off db2inst1
end