
原理:XLD是亚像素轮廓,XLD轮廓模板匹配,是直接利用灰度变化明显的地方,进行XLD轮廓提取,生成XLD轮廓模板,然后使用该模板,在目标图像中进行搜索匹配。
在HDevelop中
dev_close_window ()
read_image (Image, 'D:/bb/tu/1.jpg')
rgb1_to_gray (Image, GrayImage)
edges_sub_pix (GrayImage, Edges, 'canny', 1, 20, 40)
select_shape_xld (Edges, SelectedXLD, 'contlength', 'and', 130, 137.8)


create_shape_model_xld (SelectedXLD, 'auto', -0.2, 0.2, 0.05, 'auto', 'ignore_local_polarity', 5, ModelID)
*创建XLD轮廓模板
*参数1:输入将用于创建模型的xld轮廓
*参数2:金字塔层级    List of values: 1, 2, 3, 4, 5, 6, 7, 8, 9, 10, 'auto'
*参数3:模板起始旋转角度
*参数4:模板终止旋转角度
*参数5:角度的步长      限制:角度步长>0和角度步长<=pi/16
*参数6:生成模型的优化和可选方法
*      'auto', 'no_pregeneration', 'none', 'point_reduction_high', 'point_reduction_low'
*      'point_reduction_medium', 'pregeneration'
*参数7:匹配方法设置
*      'ignore_color_polarity', 'ignore_global_polarity', 'ignore_local_polarity', 'use_polarity'
*参数8:设置对比度      建议值:1,2,3,5,7,10,20,30,40
*参数9:模板句柄

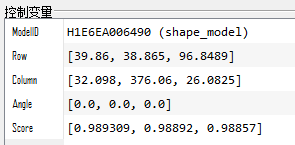
find_shape_model (GrayImage, ModelID, -0.2, 0.2, 0.8, 3, 0.5, 'least_squares', 0, 0.9, Row, Column, Angle, Score)

在QtCreator中
  HObject  ho_Image, ho_GrayImage, ho_Edges, ho_SelectedXLD;
  HTuple  hv_ModelID, hv_Row, hv_Column, hv_Angle;
  HTuple  hv_Score;
  ReadImage(&ho_Image, "D:/bb/tu/1.jpg");
  Rgb1ToGray(ho_Image, &ho_GrayImage);
  EdgesSubPix(ho_GrayImage, &ho_Edges, "canny", 1, 20, 40);
  SelectShapeXld(ho_Edges, &ho_SelectedXLD, "contlength", "and", 130, 137.8);


  CreateShapeModelXld(ho_SelectedXLD, "auto", -0.2, 0.2, 0.05, "auto", "ignore_local_polarity",
      5, &hv_ModelID);
  //创建XLD轮廓模板
  //参数1:输入将用于创建模型的xld轮廓
  //参数2:金字塔层级    List of values: 1, 2, 3, 4, 5, 6, 7, 8, 9, 10, 'auto'
  //参数3:模板起始旋转角度
  //参数4:模板终止旋转角度
  //参数5:角度的步长      限制:角度步长>0和角度步长<=pi/16
  //参数6:生成模型的优化和可选方法
  //     'auto', 'no_pregeneration', 'none', 'point_reduction_high', 'point_reduction_low'
  //     'point_reduction_medium', 'pregeneration'
  //参数7:匹配方法设置
  //     'ignore_color_polarity', 'ignore_global_polarity', 'ignore_local_polarity', 'use_polarity'
  //参数8:设置对比度      建议值:1,2,3,5,7,10,20,30,40
  //参数9:模板句柄

  FindShapeModel(ho_GrayImage, hv_ModelID, -0.2, 0.2, 0.8, 3, 0.5, "least_squares",
      0, 0.9, &hv_Row, &hv_Column, &hv_Angle, &hv_Score);
