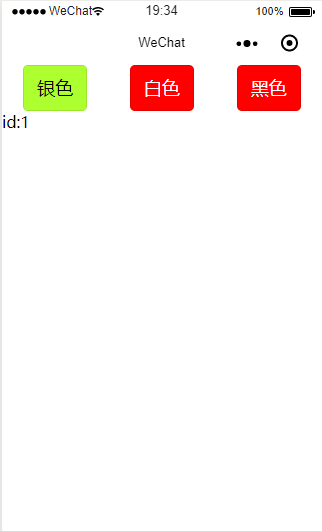
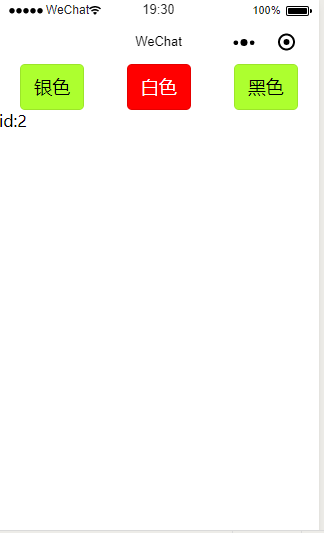
小程序实现多button单选/多选
红色为选中状态
单选
多选

①wxss
/* pages/button-select/button-select.wxss */

.button_container{
  display: flex;
  flex-direction: row;
  justify-content: space-around
}
/* 按钮未选中 */
.normal_button{
  background: greenyellow
}
/* 按钮选中 */
.checked_button{
  background: red;
  color: white

}
②wxm
样式选中改变是通过三元运算符实现的
<!--pages/button-select/button-select.wxml-->
<view class='button_container'>
  <block wx:for="{{buttons}}" wx:key="buttons">
  <button class='{{item.checked?"checked_button":"normal_button"}}' data-id='{{item.id}}' bindtap='radioButtonTap'>{{item.name}}</button>
  </block>
</view>
<text>{{msg}}</text>
③js
在
Page({...})中填充按钮数据
data: {
    buttons: [{ id: 1, name: '银色' }, { id: 2, name: '白色' }, { id: 3, name: '黑色' }],
    msg:'',
  },
默认使第一个按钮被选中
Page({...})
onLoad: function (options) {
    this.data.buttons[0].checked = true;
    this.setData({
      buttons: this.data.buttons,
    })
  },
在
Page({...})中添加事件监听方法(单选)
/**
 * 事件监听,实现单选效果
 * e是获取e.currentTarget.dataset.id所以是必备的,跟前端的data-id获取的方式差不多
 */
radioButtonTap: function (e) {
    console.log(e)
    let id = e.currentTarget.dataset.id
    console.log(id)
    for (let i = 0; i < this.data.buttons.length; i++) {
      if (this.data.buttons[i].id == id) {
        //当前点击的位置为true即选中
        this.data.buttons[i].checked = true;
      }
      else {
        //其他的位置为false
        this.data.buttons[i].checked = false;
      }
    }
    this.setData({
      buttons: this.data.buttons,
      msg: "id:"+id
    })
  },
在
Page({...})中添加事件监听方法(多选)
记得在wxml中修改绑定方法
bindtap='radioButtonTap'
  checkButtonTap:function(e){
    console.log(e)
    let id = e.currentTarget.dataset.id
    console.log(id)
    for (let i = 0; i < this.data.buttons.length; i++) {
      if (this.data.buttons[i].id == id) {
        if (this.data.buttons[i].checked == true) {
          this.data.buttons[i].checked = false;

        } else {
          this.data.buttons[i].checked = true;

        }
      }
    }
   this.setData({
     buttons: this.data.buttons,
     msg: "id:"+id
    })

  },