基本概念
1、前端控制器DispatcherServlet(不需要程序员开发)
作用接收请求,响应结果,相当于转发器,中央处理器。
有了DispatcherServlet减少了其它组件之间的耦合度。

2、处理器映射器HandlerMapping(不需要程序员开发)
作用:根据请求的url查找Handler


3、处理器适配器HandlerAdapter
作用:按照特定规则(HandlerAdapter要求的规则)去执行Handler

4、处理器Handler(需要程序员开发)
注意:编写Handler时按照HandlerAdapter的要求去做,这样适配器才可以去正确执行Handler

5、视图解析器View resolver(不需要程序员开发)
作用:进行视图解析,根据逻辑视图名解析成真正的视图(view)

6、视图View(需要程序员开发jsp)
View是一个接口,实现类支持不同的View类型(jsp、freemarker、pdf...)
公共部分:
1建立Maven Project,使用Archetype selection,选中webapp
2.右键 Build Path->Configure Build Path,修改JRE System Library为Workspace default JRE
3.修改pom.xml文件,使用jsp的话,额外添加jsp-api
        <dependency>
            <groupId>javax.servlet</groupId>
            <artifactId>jsp-api</artifactId>
            <version>2.0</version>
            <scope>provided</scope>
        </dependency>


<project xmlns="http://maven.apache.org/POM/4.0.0"
    xmlns:xsi="http://www.w3.org/2001/XMLSchema-instance"
    xsi:schemaLocation="http://maven.apache.org/POM/4.0.0 http://maven.apache.org/maven-v4_0_0.xsd">
    <modelVersion>4.0.0</modelVersion>
    <groupId>com.nothing</groupId>
    <artifactId>Test</artifactId>
    <packaging>war</packaging>
    <version>0.0.1-SNAPSHOT</version>
    <name>Test Maven Webapp</name>
    <url>http://maven.apache.org</url>
    <dependencies>
        <dependency>
            <groupId>junit</groupId>
            <artifactId>junit</artifactId>
            <version>3.8.1</version>
            <scope>test</scope>
        </dependency>
        <dependency>
            <groupId>javax.servlet</groupId>
            <artifactId>jstl</artifactId>
            <version>1.2</version>
        </dependency>
        <dependency>
            <groupId>javax.servlet</groupId>
            <artifactId>javax.servlet-api</artifactId>
            <version>3.0.1</version>
            <scope>compile</scope>
        </dependency>
        <dependency>
            <groupId>org.springframework</groupId>
            <artifactId>spring-web</artifactId>
            <version>4.1.2.RELEASE</version>
        </dependency>
        <dependency>
            <groupId>org.springframework</groupId>
            <artifactId>spring-webmvc</artifactId>
            <version>4.1.2.RELEASE</version>
        </dependency>
    </dependencies>
    <build>
        <finalName>Test</finalName>
    </build>
</project>
4.修改WEB-INF文件夹下的web.xml文件
<?xml version="1.0" encoding="UTF-8"?>
<web-app xmlns:xsi="http://www.w3.org/2001/XMLSchema-instance" xmlns="http://java.sun.com/xml/ns/javaee" xmlns:web="http://java.sun.com/xml/ns/javaee/web-app_2_5.xsd" xsi:schemaLocation="http://java.sun.com/xml/ns/javaee http://java.sun.com/xml/ns/javaee/web-app_2_5.xsd" id="WebApp_ID" version="2.5">
  <display-name>springmvcfirst1208</display-name>

  <!-- springmvc前端控制器 -->
  <servlet>
      <servlet-name>springmvc</servlet-name>
      <servlet-class>org.springframework.web.servlet.DispatcherServlet</servlet-class>
      <!-- contextConfigLocation配置springmvc加载的配置文件(配置处理器映射器、适配器等等)
      如果不配置contextConfigLocation,默认加载的是/WEB-INF/servlet名称-serlvet.xml(springmvc-servlet.xml)
       -->
      <init-param>
          <param-name>contextConfigLocation</param-name>
          <param-value>classpath:springmvc.xml</param-value>
      </init-param>
  </servlet>

  <servlet-mapping>
      <servlet-name>springmvc</servlet-name>
      <url-pattern>/</url-pattern>
  </servlet-mapping>


  <welcome-file-list>
    <welcome-file>index.html</welcome-file>
    <welcome-file>index.htm</welcome-file>
    <welcome-file>index.jsp</welcome-file>
    <welcome-file>default.html</welcome-file>
    <welcome-file>default.htm</welcome-file>
    <welcome-file>default.jsp</welcome-file>
  </welcome-file-list>
</web-app>
5。右键项目,新建source folder 名为config,然后在其中建立springmvc.xml文件来配置
先输入
<?xml version="1.0" encoding="UTF-8"?>
<beans xmlns="http://www.springframework.org/schema/beans"
    xmlns:xsi="http://www.w3.org/2001/XMLSchema-instance" xmlns:context="http://www.springframework.org/schema/context"
    xmlns:tx="http://www.springframework.org/schema/tx" xmlns:mvc="http://www.springframework.org/schema/mvc"
    xsi:schemaLocation="http://www.springframework.org/schema/beans
       http://www.springframework.org/schema/beans/spring-beans.xsd
       http://www.springframework.org/schema/context
       http://www.springframework.org/schema/context/spring-context.xsd
       http://www.springframework.org/schema/tx
       http://www.springframework.org/schema/tx/spring-tx.xsd
          http://www.springframework.org/schema/mvc
       http://www.springframework.org/schema/mvc/spring-mvc.xsd">


</beans>
6.
在WEB-INF目录下 建立view目录,display.jsp
内容如下
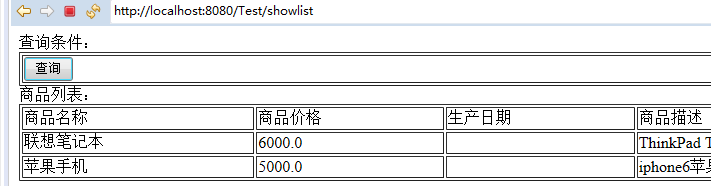
<%@ page language="java" contentType="text/html; charset=UTF-8"
    pageEncoding="UTF-8"%>
<%@ taglib uri="http://java.sun.com/jsp/jstl/core" prefix="c" %>
<%@ taglib uri="http://java.sun.com/jsp/jstl/fmt"  prefix="fmt"%>
<!DOCTYPE html PUBLIC "-//W3C//DTD HTML 4.01 Transitional//EN" "http://www.w3.org/TR/html4/loose.dtd">
<html>
<head>
<meta http-equiv="Content-Type" content="text/html; charset=UTF-8">
<title>查询商品列表</title>
</head>
<body>
<form action="${pageContext.request.contextPath }/item/queryItem.action" method="post">
查询条件:
<table width="100%" border=1>
<tr>
<td><input type="submit" value="查询"/></td>
</tr>
</table>
商品列表:
<table width="100%" border=1>
<tr>
    <td>商品名称</td>
    <td>商品价格</td>
    <td>生产日期</td>
    <td>商品描述</td>
    <td>操作</td>
</tr>
<c:forEach items="${itemsList }" var="item">
<tr>
    <td>${item.name }</td>
    <td>${item.price }</td>
    <td><fmt:formatDate value="${item.createtime}" pattern="yyyy-MM-dd HH:mm:ss"/></td>
    <td>${item.detail }</td>

    <td><a href="${pageContext.request.contextPath }/item/editItem.action?id=${item.id}">修改</a></td>

</tr>
</c:forEach>

</table>
</form>
</body>

</html>
7建立class,包名com.hello
public class MyClass1 implements Controller {
    @Override
    public ModelAndView handleRequest(HttpServletRequest request,
            HttpServletResponse response) throws Exception {

        //调用service查找 数据库,查询商品列表,这里使用静态数据模拟
        List<Items> itemsList = new ArrayList<Items>();
        //向list中填充静态数据

        Items items_1 = new Items();
        items_1.setName("联想笔记本");
        items_1.setPrice(6000f);
        items_1.setDetail("ThinkPad T430 联想笔记本电脑!");

        Items items_2 = new Items();
        items_2.setName("苹果手机");
        items_2.setPrice(5000f);
        items_2.setDetail("iphone6苹果手机!");

        itemsList.add(items_1);
        itemsList.add(items_2);

        //返回ModelAndView
        ModelAndView modelAndView =  new ModelAndView();
        //相当 于request的setAttribut,在jsp页面中通过itemsList取数据
        modelAndView.addObject("itemsList", itemsList);

        //指定视图
        modelAndView.setViewName("/WEB-INF/view/display.jsp");
        //modelAndView.setViewName("items/itemsList");

        return modelAndView;
    }

}
Items类为
package com.hello;

import java.util.Date;

public class Items {
    private Integer id;

    private String name;

    private Float price;

    private String pic;

    private Date createtime;

    private String detail;

    public Integer getId() {
        return id;
    }

    public void setId(Integer id) {
        this.id = id;
    }

    public String getName() {
        return name;
    }

    public void setName(String name) {
        this.name = name == null ? null : name.trim();
    }

    public Float getPrice() {
        return price;
    }

    public void setPrice(Float price) {
        this.price = price;
    }

    public String getPic() {
        return pic;
    }

    public void setPic(String pic) {
        this.pic = pic == null ? null : pic.trim();
    }

    public Date getCreatetime() {
        return createtime;
    }

    public void setCreatetime(Date createtime) {
        this.createtime = createtime;
    }

    public String getDetail() {
        return detail;
    }

    public void setDetail(String detail) {
        this.detail = detail == null ? null : detail.trim();
    }
}
方式一:
配置Bean name作为URL
在springmvc.xml中添加
<bean
        class="org.springframework.web.servlet.handler.BeanNameUrlHandlerMapping" />
    <bean name="/showlist" id="list1"
        class="com.hello.MyClass1" />
    <bean
        class="org.springframework.web.servlet.mvc.SimpleControllerHandlerAdapter" />
这里Bean name为/showlist,对应类MyClass1,他的handleRequest方法返回ModelAndView的viewName是
/WEB-INF/view/display.jsp
方式二
利用URL对应bean id的方式,
改成
    <bean name="/showlist" id="list1" class="com.hello.MyClass1" />
    <bean
        class="org.springframework.web.servlet.handler.SimpleUrlHandlerMapping">
        <property name="mappings">
            <props>
                <prop key="/anothershow">list1</prop>
            </props>
        </property>
    </bean>
当然适配器不可少
    <bean
        class="org.springframework.web.servlet.mvc.SimpleControllerHandlerAdapter" />
注意<props>可以有多个<prop>
方式三
URL映射还是使用方式1或者方式2,这里修改MyClass1文件
public class MyClass1 implements HttpRequestHandler {
    public void handleRequest(HttpServletRequest request,
            HttpServletResponse response) throws ServletException, IOException {

        //调用service查找 数据库,查询商品列表,这里使用静态数据模拟
        List<Items> itemsList = new ArrayList<Items>();
        //向list中填充静态数据

        Items items_1 = new Items();
        items_1.setName("联想笔记本");
        items_1.setPrice(6000f);
        items_1.setDetail("ThinkPad T430 联想笔记本电脑!");

        Items items_2 = new Items();
        items_2.setName("苹果手机");
        items_2.setPrice(5000f);
        items_2.setDetail("iphone6苹果手机!");

        itemsList.add(items_1);
        itemsList.add(items_2);request.setAttribute("itemsList", itemsList);
    request.getRequestDispatcher("/WEB-INF/view/display.jsp").forward(request, response);

    }

}
添加适配器
<bean class="org.springframework.web.servlet.mvc.HttpRequestHandlerAdapter"/>
方式四:使用注解的方式(终极方式)
删除以上配置
添加
    <context:component-scan base-package="com.hello" />
    <!--注解映射器 -->
    <bean class="org.springframework.web.servlet.mvc.method.annotation.RequestMappingHandlerMapping"/>
    <!--注解适配器 -->
    <bean class="org.springframework.web.servlet.mvc.method.annotation.RequestMappingHandlerAdapter"/>
或者推荐使用
<!-- 配置扫描的包 -->
    <context:component-scan base-package="com.hello" />

    <mvc:annotation-driven />

    <mvc:default-servlet-handler />
新建一个类
@Controller
public class MyClass2  {
    @RequestMapping("/show")
   public ModelAndView action() throws Exception {

        //调用service查找 数据库,查询商品列表,这里使用静态数据模拟
        List<Items> itemsList = new ArrayList<Items>();
        //向list中填充静态数据

        Items items_1 = new Items();
        items_1.setName("联想笔记本");
        items_1.setPrice(6000f);
        items_1.setDetail("ThinkPad T430 联想笔记本电脑!");

        Items items_2 = new Items();
        items_2.setName("苹果手机");
        items_2.setPrice(5000f);
        items_2.setDetail("iphone6苹果手机!");

        itemsList.add(items_1);
        itemsList.add(items_2);

        //返回ModelAndView
        ModelAndView modelAndView =  new ModelAndView();
        //相当 于request的setAttribut,在jsp页面中通过itemsList取数据
        modelAndView.addObject("itemsList", itemsList);

        //指定视图
        modelAndView.setViewName("/WEB-INF/view/display.jsp");
        //modelAndView.setViewName("items/itemsList");
        System.out.println("hello");
        return modelAndView;


    }

}
访问http://localhost:8080/Test/show即可。
补充
视图解析器
        <bean
        class="org.springframework.web.servlet.view.InternalResourceViewResolver">
        <property name="prefix" value="/WEB-INF/view/"></property>
        <property name="suffix" value=".jsp"></property>
    </bean>
当使用
modelAndView.setViewName("display");
就等效于原来的
modelAndView.setViewName("/WEB-INF/view/display.jsp");
视图解析器添加前缀和后缀。