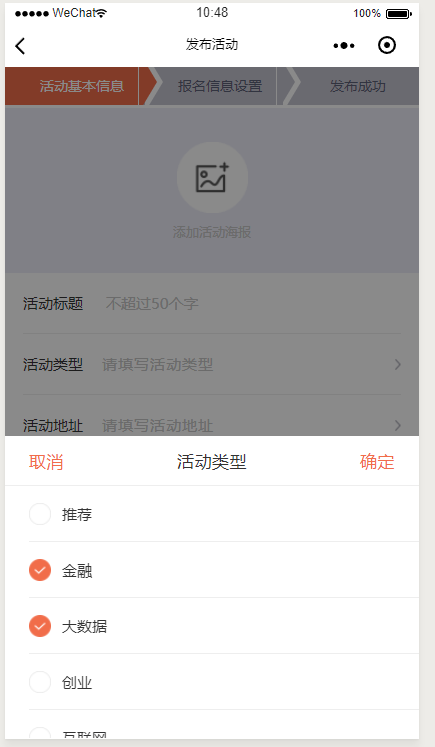
第一步,在组件里编写弹窗的代码
<!-- 活动类型弹框 -->
  <view class='bottomModel' wx:if="{{modelFlag}}" catchtouchmove="toCatch"></view>
  <view class='fixedModel' wx:if="{{modelFlag}}" animation='{{animationData}}'>
    <view class='wraps'>
      <view class='fixedTitle'>
        <view class='commony' bindtap='noShow'>取消</view>
        <view class='centerTitle'>活动类型</view>
        <view class='commony' bindtap='sure'>确定</view>
      </view>
      <view class='fixedContent'>
        <view class='contents' wx:for="{{arr}}"  wx:for-index="idx" wx:key="idx">
          <view class='items' bindtap='chooseItem' id="{{idx}}">
            <image class='icons' wx:if="{{item.checked}}" src='{{choose}}'></image>
            <image class='icons' wx:else src='{{quan}}'></image>
            <view>{{item.classify_name}}</view>
          </view>
        </view>
      </view>
    </view>
  </view>
第二部,在对应的点击事件中
//活动类型
  activityType: function () {
    // 用that取代this,防止不必要的情况发生
    var that = this;
    // 创建一个动画实例
    var animation = wx.createAnimation({
      // 动画持续时间
      duration: 500,
      // 定义动画效果,当前是匀速
      timingFunction: 'linear'
    })
    // 将该变量赋值给当前动画
    that.animation = animation
    // 先在y轴偏移,然后用step()完成一个动画
    animation.translateY(550).step()
    // 用setData改变当前动画
    that.setData({
      // 通过export()方法导出数据
      animationData: animation.export(),
      // 改变view里面的Wx:if
      modelFlag: true
    })
    // 设置setTimeout来改变y轴偏移量,实现有感觉的滑动
    setTimeout(function () {
      animation.translateY(0).step()
      that.setData({
        animationData: animation.export()
      })
    }, 200)
  },
第三部,隐藏弹框
noShow: function () {
    var that = this;
    var animation = wx.createAnimation({
      duration: 1000,
      timingFunction: 'linear'
    })
    that.animation = animation
    animation.translateY(550).step()
    that.setData({
      animationData: animation.export()

    })
    setTimeout(function () {
      animation.translateY(0).step()
      that.setData({
        animationData: animation.export(),
        modelFlag: false
      })
    }, 200)
  },
注意:上面的550是你弹框的高度rpx,上面的catchtouchmove是弹框显示的时候防止地图的遮罩层滚动
toCatch:function(){
    return false;
  },
效果如下
