所有文章
https://www.cnblogs.com/lay2017/p/11908715.html
正文
zuul在分布式项目中充当着一个网关的角色,而它最主要的功能像nginx一样针对上游服务器做反向代理。我们可以将它理解为一个服务的门面,作为客户端来说不需要再面向各式各样的服务,只需要面向zuul即可,简化了客户端与服务端的交互关系。
既然,zuul成为了客户端与服务端的中间层,那么zuul显然可以进行拦截、记录、安全管理、路由...等等各种处理。本文,将从路由这个点切入,看看路由的过程。
ZuulServlet
首先,客户端和服务端的交互显然少不了的http,所以先找到zuul针对Servlet的实现

可以看到,ZuulServlet直接继承了HttpServlet。所以,ZuulServlet依然走的是http通信协议,我们跟进ZuulServlet的service方法。
@Override
public void service(javax.servlet.ServletRequest servletRequest, javax.servlet.ServletResponse servletResponse) throws ServletException, IOException {
    try {
        init((HttpServletRequest) servletRequest, (HttpServletResponse) servletResponse);

        // 初始化一个上下文
        RequestContext context = RequestContext.getCurrentContext();
        context.setZuulEngineRan();
        // 路由前置处理-------------------
        try {
            // pre类型的ZuulFilter
            preRoute();
        } catch (ZuulException e) {
            // error类型的ZuulFilter
            error(e);
            // post类型的ZuulFilter
            postRoute();
            return;
        }
        // 路由处理-----------------------
        try {
            // route类型的ZuulFilter
            route();
        } catch (ZuulException e) {
            // error类型的ZuulFilter
            error(e);
            // post类型的ZuulFilter
            postRoute();
            return;
        }
        // 路由后置处理--------------------
        try {
            // post类型的ZuulFilter
            postRoute();
        } catch (ZuulException e) {
            // error类型的ZuulFilter
            error(e);
            return;
        }

    } catch (Throwable e) {
        // ...
    } finally {
        RequestContext.getCurrentContext().unset();
    }
}
显然,service方法很清晰地描绘了一个这样的路由过程:
浏览器发起响应 -> preFilter -> routeFilter -> postFilter -> 浏览器接受响应
|---------|-----------|-------> errorFilter -> 浏览器接受响应
PreDecorationFilter
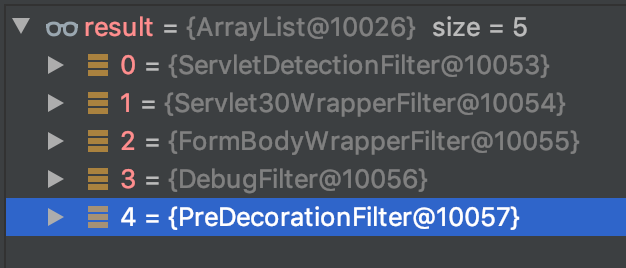
preFilter无非就是对Servlet的请求信息进行处理,为routeFilter做准备。默认的preFilter有这么5个
这里我们以PreDecorationFilter为例,看看它的处理过程。
public Object run() {
    RequestContext ctx = RequestContext.getCurrentContext();
    final String requestURI = this.urlPathHelper.getPathWithinApplication(ctx.getRequest());
    // 获取路由信息
    Route route = this.routeLocator.getMatchingRoute(requestURI);
    if (route != null) {
        // ... 处理路由信息,添加到context当中
    } else {
        // ...
    }
    return null;
}
PreDecorationFilter主要是做了一个路由准备。例如:http://localhost:8080/consumer/user/get?userId=1
这里的route信息将会是

经过PreDecorationFilter以后,我们已经知道了一个请求该路由到哪里去。
RibbonRoutingFilter
routeFilter默认有以下三种,这里以RibbonRoutingFilter为例

跟进RibbonRoutingFilter的run方法
@Override
public Object run() {
    RequestContext context = RequestContext.getCurrentContext();
    this.helper.addIgnoredHeaders();
    try {
        RibbonCommandContext commandContext = buildCommandContext(context);
        // 转发请求
        ClientHttpResponse response = forward(commandContext);
        // 设置响应结果到上下文
        setResponse(response);
        return response;
    }
    catch (ZuulException ex) {
        throw new ZuulRuntimeException(ex);
    }
    catch (Exception ex) {
        throw new ZuulRuntimeException(ex);
    }
}
run方法中做了一次请求转发,我们跟进forward看看
protected ClientHttpResponse forward(RibbonCommandContext context) throws Exception {
    Map<String, Object> info = this.helper.debug(context.getMethod(),
            context.getUri(), context.getHeaders(), context.getParams(),
            context.getRequestEntity());
    // 构造RibbonCommand
    RibbonCommand command = this.ribbonCommandFactory.create(context);
    try {
        // 执行RibbonCommand
        ClientHttpResponse response = command.execute();

        return response;
    }
    catch (HystrixRuntimeException ex) {
        return handleException(info, ex);
    }

}
这里构造并执行了一个RibbonComand,具体的实例对象是HttpClientRibbonCommand,我们看看它的类图
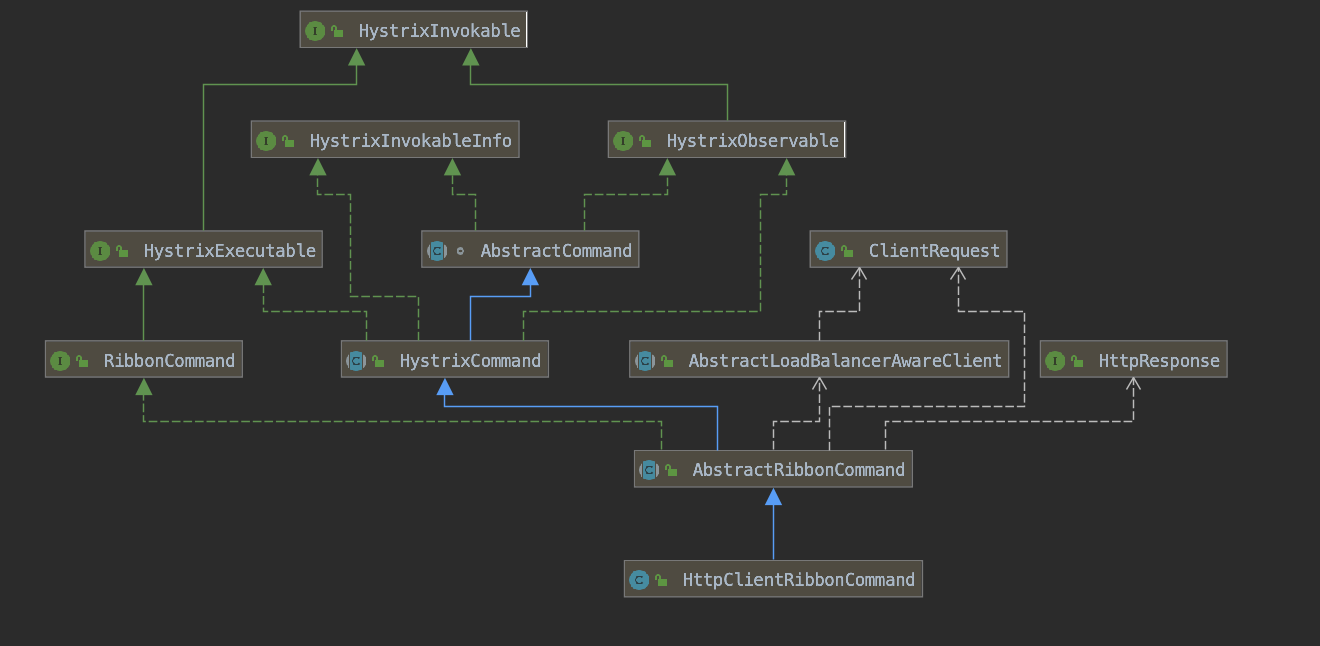
HttpClientRibbonCommand主要是包含了三种实现
1、ClientRequest:实现了请求响应
2、RibbonCommand表示了一个负载均衡的实现
3、HystrixCommand表示了一个熔断的实现
到这里我们基本可以知道HttpClientRibbonCommand的请求过程
Hystrix熔断前置判断 -> Ribbon负载均衡处理 -> http请求到上游服务 -> 返回响应结果 -> 设置到上下文当中
SendResponseFilter
经过routeFilter以后,我们已经获得了上游服务器的response结果。然后就是postFilter,默认的postFilter只有一个SendResponseFilter,顾名思义其实就是发送响应结果返回到客户端。
打开SendResponseFilter的run方法
@Override
public Object run() {
    try {
        addResponseHeaders();
        writeResponse();
    }
    catch (Exception ex) {
        ReflectionUtils.rethrowRuntimeException(ex);
    }
    return null;
}
只做了一件事,写入响应数据,跟进writeResponse方法
private void writeResponse() throws Exception {
    RequestContext context = RequestContext.getCurrentContext();

    // ...
    HttpServletResponse servletResponse = context.getResponse();

    // ...

    OutputStream outStream = servletResponse.getOutputStream();
    // 获取输入流
    InputStream is = null;
    try {
        if (context.getResponseBody() != null) {
            String body = context.getResponseBody();
            // 响应内容转化为字节流
            is = new ByteArrayInputStream(body.getBytes(servletResponse.getCharacterEncoding()));
        } else {
            // ...
        }

        // ...

        if (is != null) {
            // 写入响应流
            writeResponse(is, outStream);
        }
    } finally {
        // 清理...
    }
}
这里生成了字节流并写入outStream,继续跟进writeResponse
private void writeResponse(InputStream zin, OutputStream out) throws Exception {
    byte[] bytes = buffers.get();
    int bytesRead = -1;
    while ((bytesRead = zin.read(bytes)) != -1) {
        out.write(bytes, 0, bytesRead);
    }
}
单纯地写入输出流
总结
Zuul作为网关,主要实现都包含在了ZuulFilter的实现当中。以一个ThreadLocal实现的RequestContext来传递节点数据。如果想做一些自定义的处理可以通过实现ZuulFilter。