一、微服务程序编写
1、在已写好的微服务程序中添加pom依赖:
<dependency>
    <groupId>org.springframework.cloud</groupId>
    <artifactId>spring-cloud-starter-netflix-eureka-client</artifactId>
</dependency>
例子程序的完整pom文件如下,只是一个简单的mvc程序,添加了SpringBoot的Actuactor:
<?xml version="1.0" encoding="UTF-8"?>
<project xmlns="http://maven.apache.org/POM/4.0.0" xmlns:xsi="http://www.w3.org/2001/XMLSchema-instance"
    xsi:schemaLocation="http://maven.apache.org/POM/4.0.0 http://maven.apache.org/xsd/maven-4.0.0.xsd">
    <modelVersion>4.0.0</modelVersion>

    <groupId>com.example</groupId>
    <artifactId>microservice-consumer-movie</artifactId>
    <version>0.0.1-SNAPSHOT</version>
    <packaging>jar</packaging>

    <name>ServiceConsumer</name>
    <description>Demo project for Spring Boot</description>

    <parent>
        <groupId>org.springframework.boot</groupId>
        <artifactId>spring-boot-starter-parent</artifactId>
        <version>2.1.0.RELEASE</version>
        <relativePath/>
    </parent>

    <properties>
        <project.build.sourceEncoding>UTF-8</project.build.sourceEncoding>
        <project.reporting.outputEncoding>UTF-8</project.reporting.outputEncoding>
        <java.version>1.8</java.version>
    </properties>

    <dependencies>
        <dependency>
            <groupId>org.springframework.boot</groupId>
            <artifactId>spring-boot-starter-web</artifactId>
        </dependency>

        <dependency>
            <groupId>org.projectlombok</groupId>
            <artifactId>lombok</artifactId>
            <optional>true</optional>
        </dependency>
        <dependency>
            <groupId>org.springframework.boot</groupId>
            <artifactId>spring-boot-starter-test</artifactId>
            <scope>test</scope>
        </dependency>

        <dependency>
            <groupId>org.springframework.boot</groupId>
            <artifactId>spring-boot-starter-actuator</artifactId>
        </dependency>

        <dependency>
            <groupId>org.springframework.cloud</groupId>
            <artifactId>spring-cloud-starter-netflix-eureka-client</artifactId>
        </dependency>
    </dependencies>

    <dependencyManagement>
        <dependencies>
            <dependency>
                <groupId>org.springframework.cloud</groupId>
                <artifactId>spring-cloud-dependencies</artifactId>
                <version>Finchley.RELEASE</version>
                <type>pom</type>
                <scope>import</scope>
            </dependency>
        </dependencies>
    </dependencyManagement>

    <build>
        <plugins>
            <plugin>
                <groupId>org.springframework.boot</groupId>
                <artifactId>spring-boot-maven-plugin</artifactId>
            </plugin>
        </plugins>
    </build>


</project>
2、在Spring Cloud Edgware版本以前,要将微服务注册到Eureka Server或者其它微服务发现组件上,必须在启动类上添加@EnableEurekaClient或者@EnableDiscoveryClient,之后的版本不需要了。
3、配置application.yml或application.properties:
server:
  port: 8000
spring:
  main:
    allow-bean-definition-overriding: true
  jpa:
    generate-ddl: false
    show-sql: true
    hibernate:
      ddl-auto: none
  datasource:
    platform: h2
    schema: classpath:db/schema.sql
    data: classpath:db/data.sql
  logging:
    level:
      root: INFO
      org.hibernate: INFO
      org.hibernate.type.descriptor.sql.BasicBinder: TRACE
      org.hibernate.type.descriptor.sql.BasicExtractor: TRACE
  application:
    name: microservice-provider-user
eureka:
  client:
    service-url:
      defaultZone: http://peer1:8761/eureka/,http://peer2:8762/eureka/  #设置与Eureka Server的交互地址,如果是Eureka Server集群,可以通过逗号分隔配置多个地址
  instance:
    prefer-ip-address: true
例子程序的github地址是https://github.com/zjianliu/ServiceProvider
二、将微服务注册到Eureka Server
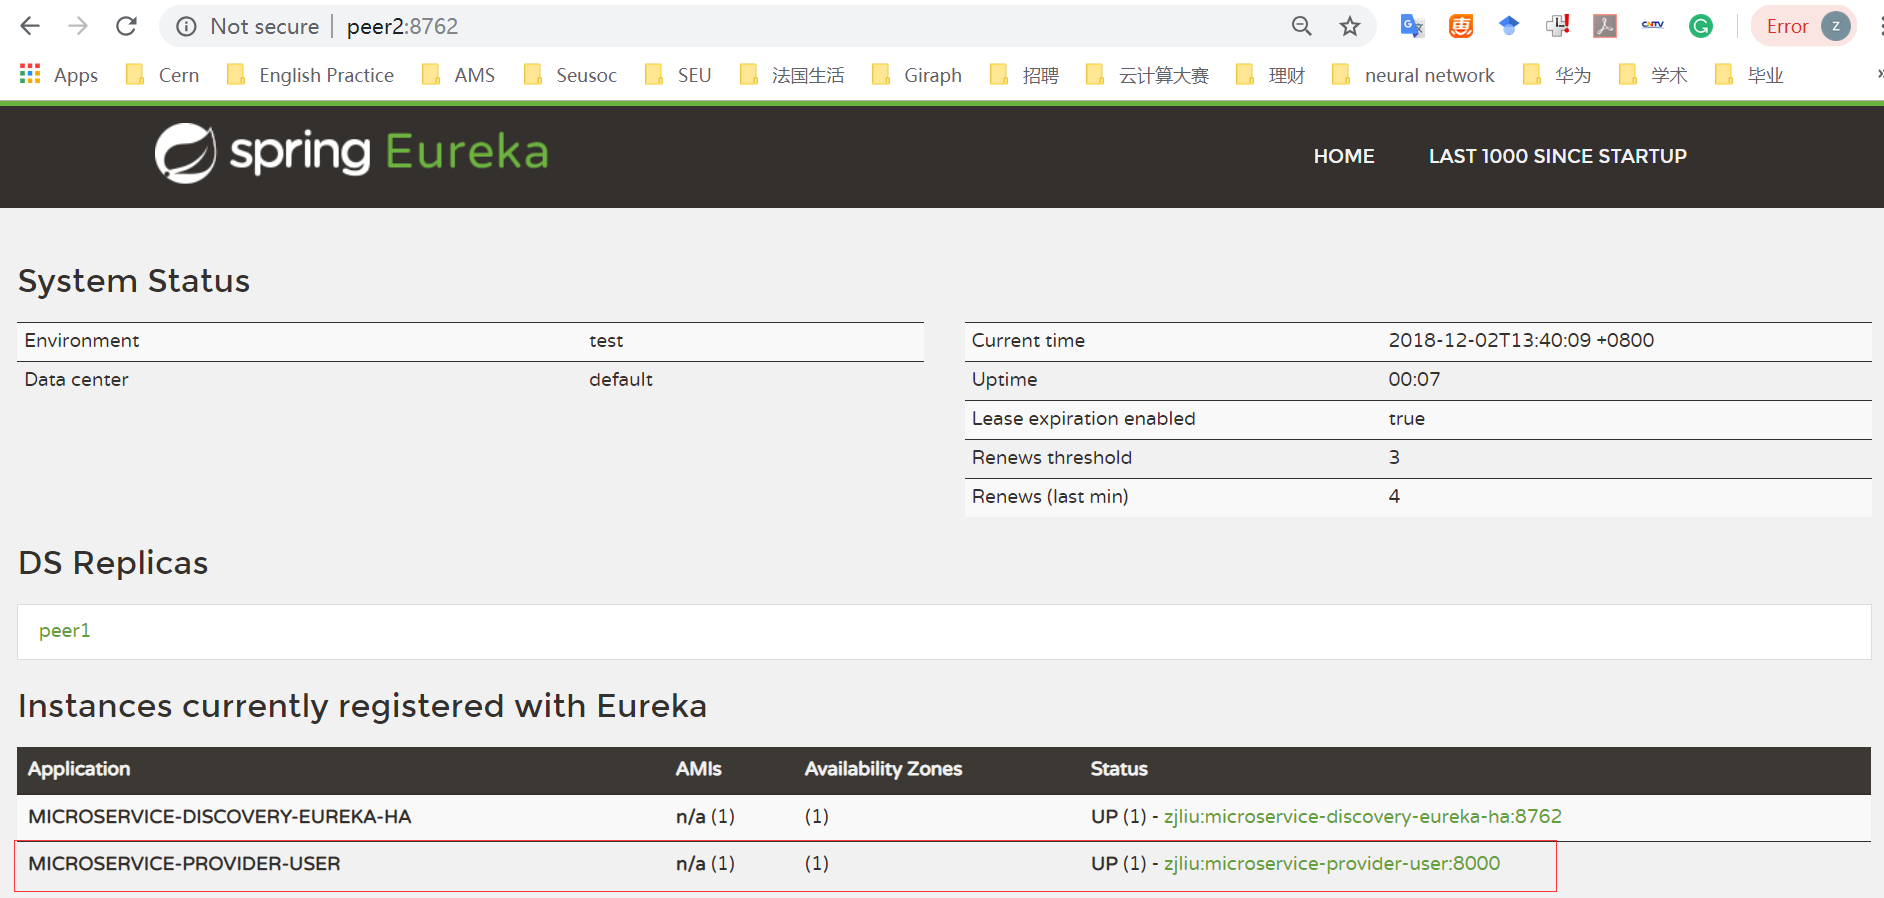
运行微服务,访问http://localhost:8761,可以发现,微服务已经被注册了
