一, 安装配置
必须安装python3以上


配置文件自己下载,搜索名字百度
解压---->Python --->./configure-->yum install -y zlib* -->make && make install
安装 redis-py-master
unzip redis-py-master.zip
进去目录里面
python3 setup.py install
安装 redis-py-cluster-unstable.zip
unzip redis-py-cluster-unstable.zip
进去目录里面
python3 setup.py install
二 , 调用
测试是否连接

 1 [root@db01 redis-py-cluster-unstable]# python3
 2 Python 3.6.1 (default, Nov 30 2018, 17:06:14)
 3 [GCC 4.8.5 20150623 (Red Hat 4.8.5-28)] on linux
 4 Type "help", "copyright", "credits" or "license" for more information.
 5 >>> import redis
 6 >>> r = redis.StrictRedis(host='localhost', port=6379, db=0,password='123')
 7 >>> r.set('foo', 'bar')
 8 True
 9 >>> r.get('foo')
10 b'bar'
11 >>>

连接redis sentinel

 1 ## 导入redis sentinel包
 2 >>>from redis.sentinel import Sentinel
 3 ##指定sentinel的地址和端口号
 4 >>> sentinel = Sentinel([('localhost', 26380)], socket_timeout=0.1)
 5 ##测试,获取以下主库和从库的信息
 6 >>> sentinel.discover_master('mymaster')
 7 >>> sentinel.discover_slaves('mymaster')
 8
 9 ##配置读写分离
10 #写节点
11 >>> master = sentinel.master_for('mymaster', socket_timeout=0.1,password="123")
12 #读节点
13 >>> slave = sentinel.slave_for('mymaster', socket_timeout=0.1,password="123")
14 ###读写分离测试   key
15 >>> master.set('oldboy', '123')
16 >>> slave.get('oldboy')
17 '123'

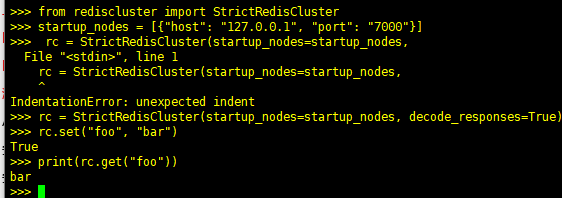
python连接rediscluster集群测试

1 python3
2 >>> from rediscluster import StrictRedisCluster
3 >>> startup_nodes = [{"host": "127.0.0.1", "port": "7000"}]
4 ### Note: decode_responses must be set to True when used with python3
5 >>> rc = StrictRedisCluster(startup_nodes=startup_nodes, decode_responses=True)
6 >>> rc.set("foo", "bar")
7 True
8 >>> print(rc.get("foo"))
9 'bar'

