首先安装tigervnc-server:
yum install tigervnc-server
安装好后,设置 vi /etc/sysconfig/vncservers
[root@gateway-001 ~]# cat /etc/sysconfig/vncservers
# The VNCSERVERS variable is a list of display:user pairs.
#
# Uncomment the lines below to start a VNC server on display :2
# as my 'myusername' (adjust this to your own).  You will also
# need to set a VNC password; run 'man vncpasswd' to see how
# to do that.
#
# DO NOT RUN THIS SERVICE if your local area network is
# untrusted!  For a secure way of using VNC, see this URL:
# https://access.redhat.com/knowledge/solutions/7027

# Use "-nolisten tcp" to prevent X connections to your VNC server via TCP.

# Use "-localhost" to prevent remote VNC clients connecting except when
# doing so through a secure tunnel.  See the "-via" option in the
# `man vncviewer' manual page.

VNCSERVERS="1:root"
VNCSERVERARGS[2]="-geometry 800x600 -nolisten tcp -localhost"
VNCSERVERS="2:work"
VNCSERVERARGS[2]="-geometry 1024x768  -nolisten tcp -localhost"
启动vncserver服务器:
[root@gateway-001 ~]# service vncserver start切换到work用户,设置vncpasswd
在服务器上可以看到打开的vnc端口:
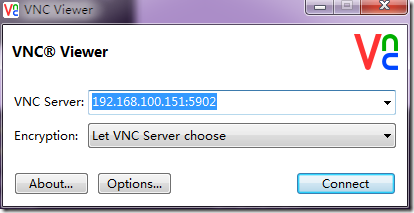
在windows上安装viewvnc,输入ip地址和端口号进行连接:
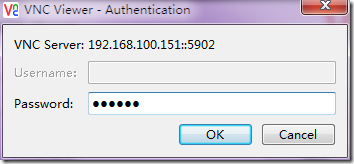
输入密码:
可以看到成功的连接上了centos 6.5的桌面:
/etc/sysconfig/iptables
# Firewall configuration written by system-config-firewall
# Manual customization of this file is not recommended.
*filter
:INPUT ACCEPT [0:0]
:FORWARD ACCEPT [0:0]
:OUTPUT ACCEPT [0:0]
-A INPUT -m state --state ESTABLISHED,RELATED -j ACCEPT
-A INPUT -m state --state NEW -m tcp -p tcp --dport 6000:6010 -j ACCEPT
-A INPUT -m state --state NEW -m udp -p udp --dport 177 -j ACCEPT
-A INPUT -p icmp -j ACCEPT
-A INPUT -i lo -j ACCEPT
-A INPUT -m state --state NEW -m tcp -p tcp --dport 22 -j ACCEPT
-A INPUT -j REJECT --reject-with icmp-host-prohibited
-A FORWARD -j REJECT --reject-with icmp-host-prohibited


COMMIT
关闭防火墙: /etc/init.d/iptables stop 使用root账号


