下面是从NVIDIA官网搬运过来的。
2. Pre-installation Actions
- Verify the system has a CUDA-capable GPU.
- Verify the system is running a supported version of Linux.
- Verify the system has gcc installed.
- Verify the system has the correct kernel headers and development packages installed.
- Download the NVIDIA CUDA Toolkit.
- Handle conflicting installation methods.
2.1. Verify You Have a CUDA-Capable GPU
To verify that your GPU is CUDA-capable, go to your distribution's equivalent of System Properties, or, from the command line, enter:
$ lspci | grep -i nvidia
If you do not see any settings, update the PCI hardware database that Linux maintains by enteringupdate-pciids(generally found in/sbin) at the command line and rerun the previouslspcicommand.
If your graphics card is from NVIDIA and it is listed in http://developer.nvidia.com/cuda-gpus, your GPU is CUDA-capable.
The Release Notes for the CUDA Toolkit also contain a list of supported products.
2.2. Verify You Have a Supported Version of Linux
The CUDA Development Tools are only supported on some specific distributions of Linux. These are listed in the CUDA Toolkit release notes.
To determine which distribution and release number you're running, type the following at the command line:
$ uname -m && cat /etc/*release
You should see output similar to the following, modified for your particular system:
x86_64
Red Hat Enterprise Linux Workstation release 6.0 (Santiago)
Thex86_64line indicates you are running on a 64-bit system. The remainder gives information about your distribution.
2.3. Verify the System Has gcc Installed
Thegcccompiler is required for development using the CUDA Toolkit. It is not required for running CUDA applications. It is generally installed as part of the Linux installation, and in most cases the version of gcc installed with a supported version of Linux will work correctly.
To verify the version of gcc installed on your system, type the following on the command line:
$ gcc --version
If an error message displays, you need to install the development tools from your Linux distribution or obtain a version ofgccand its accompanying toolchain from the Web.
2.4. Verify the System has the Correct Kernel Headers and Development Packages Installed
The CUDA Driver requires that the kernel headers and development packages for the running version of the kernel be installed at the time of the driver installation, as well whenever the driver is rebuilt. For example, if your system is running kernel version 3.17.4-301, the 3.17.4-301 kernel headers and development packages must also be installed.
While the Runfile installation performs no package validation, the RPM and Deb installations of the driver will make an attempt to install the kernel header and development packages if no version of these packages is currently installed. However, it will install the latest version of these packages, which may or may not match the version of the kernel your system is using. Therefore, it is best to manually ensure the correct version of the kernel headers and development packages are installed prior to installing the CUDA Drivers, as well as whenever you change the kernel version.
$ uname -rThis is the version of the kernel headers and development packages that must be installed prior to installing the CUDA Drivers. This command will be used multiple times below to specify the version of the packages to install. Note that below are the common-case scenarios for kernel usage. More advanced cases, such as custom kernel branches, should ensure that their kernel headers and sources match the kernel build they are running.
RHEL/CentOS
$ sudo yum install kernel-devel-$(uname -r) kernel-headers-$(uname -r)
Fedora
$ sudo dnf install kernel-devel-$(uname -r) kernel-headers-$(uname -r)
OpenSUSE/SLES
$ uname -r
3.16.6-2-default
In this example, the version is3.16.6-2and the variant isdefault. The kernel headers and development packages can then be installed with the following command, replacing<variant>and<version>with the variant and version discovered from the previousunamecommand:
$ sudo zypper install kernel-<variant>-devel=<version>
Ubuntu
$ sudo apt-get install linux-headers-$(uname -r)
2.5. Choose an Installation Method
The CUDA Toolkit can be installed using either of two different installation mechanisms: distribution-specific packages (RPM and Deb packages), or a distribution-independent package (runfile packages). The distribution-independent package has the advantage of working across a wider set of Linux distributions, but does not update the distribution's native package management system. The distribution-specific packages interface with the distribution's native package management system. It is recommended to use the distribution-specific packages, where possible.
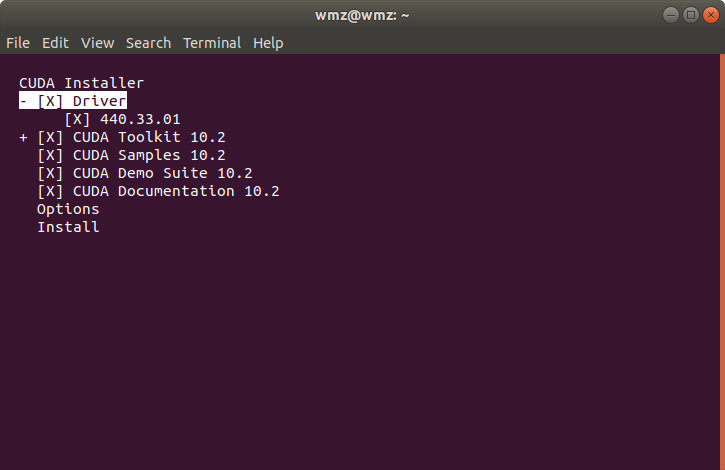

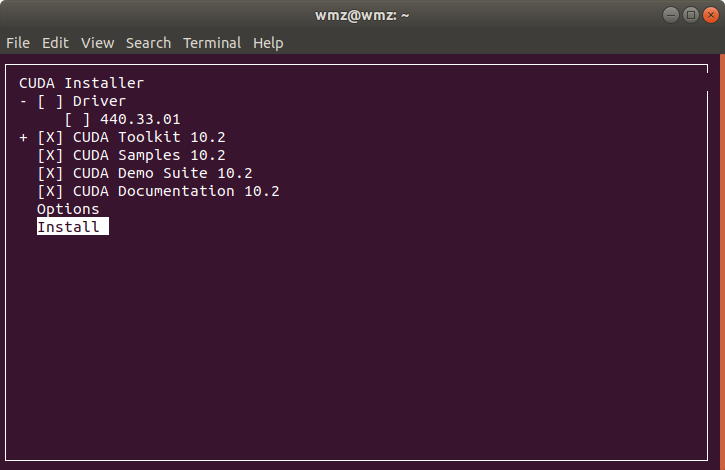
上图右边[ ]中的x是将光标移动到那一行后按Enter键实现的。
然后就可以执行安装了。
安装完成,比期待的时间快多了。

安装完后,在.bashrc文件末尾添加环境变量
sudo vim ~/.bashrc (没有安装vim 可以使用gedit:sudo gedit ~/.bashrc)
export CUDA_HOME=/usr/local/cuda
export PATH=$PATH:$CUDA_HOME/bin
export LD_LIBRARY_PATH=/usr/local/cuda-10.0/lib64${LD_LIBRARY_PATH:+:${LD_LIBRARY_PATH}}
保存退出后,输入以下命名
source ~/.bashrc
cd /usr/local/cuda/samples/1_Utilities/deviceQuery
sudo make
./deviceQuery
能正常运行的话显示的是你的显卡信息,说明CUDA安装成功
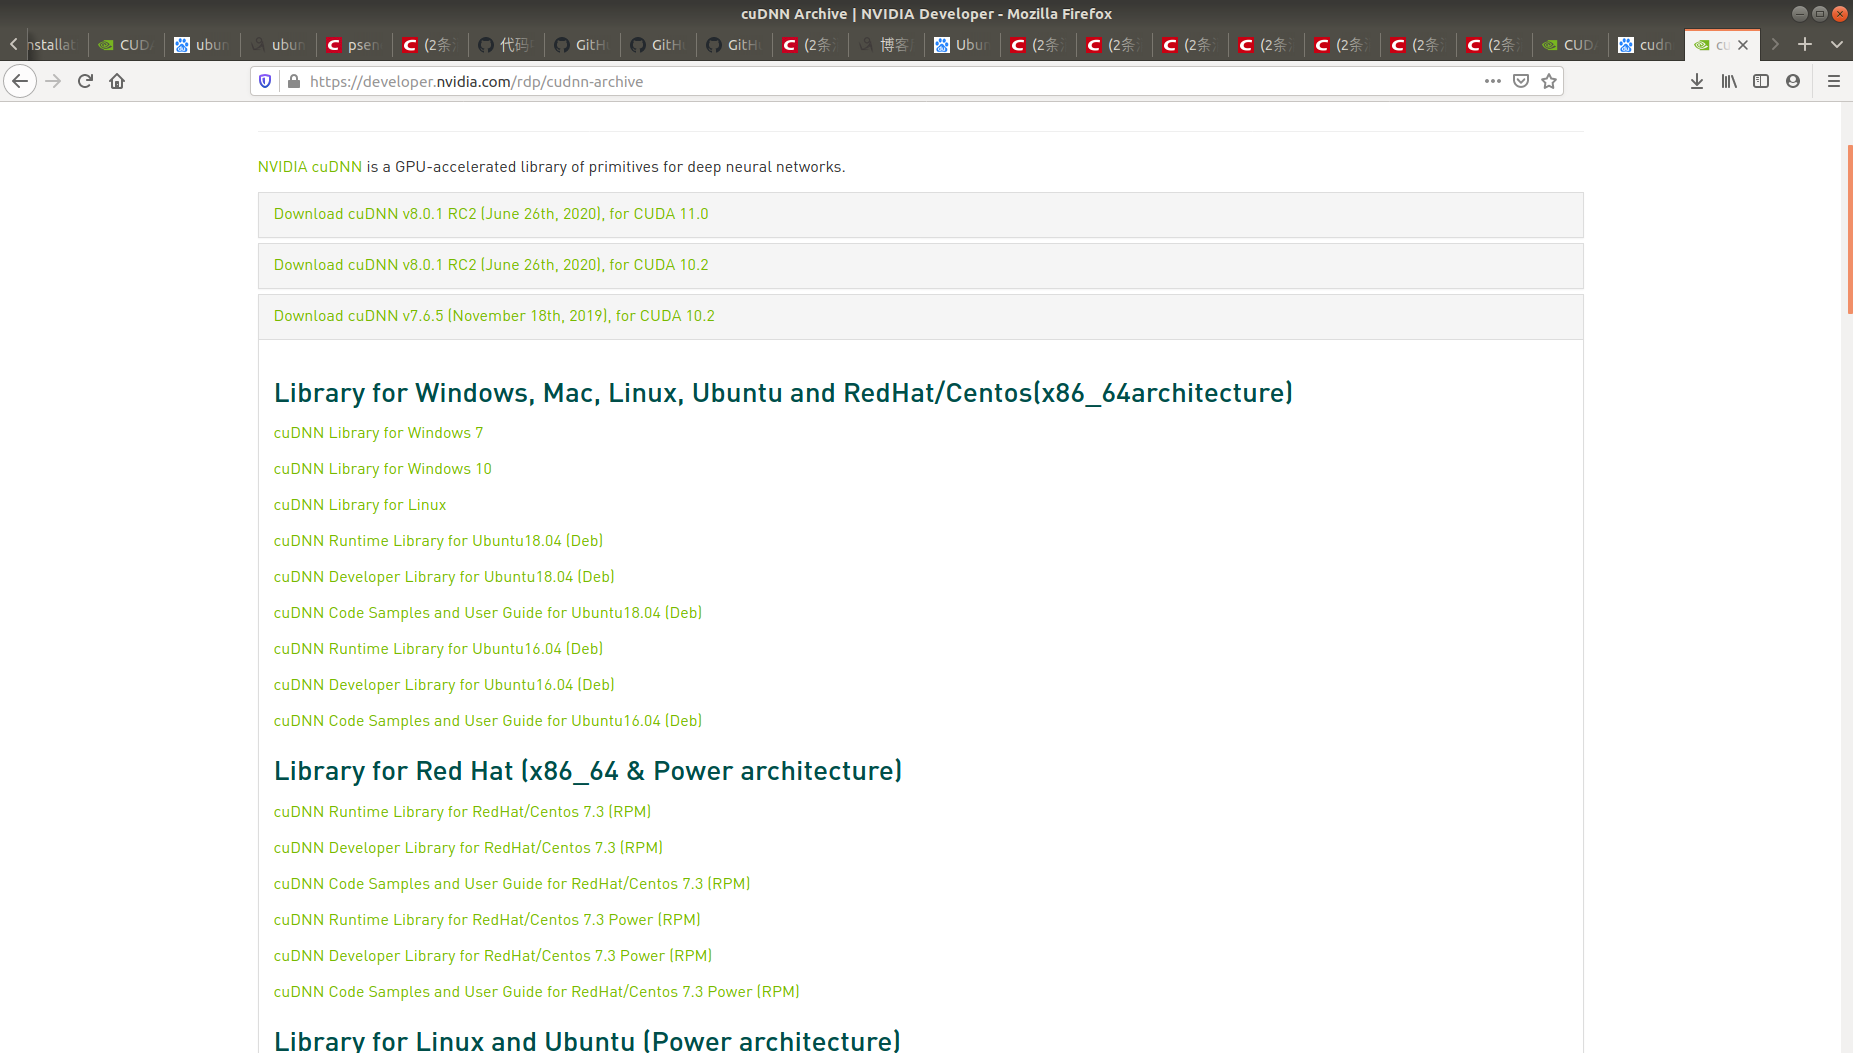
安装CUDNN:
下载的是cuDNN Library for Linux
进入解压后的cudnn目录 应该能看到cuda文件夹
sudo cp cuda/include/cudnn.h /usr/local/cuda/include/
sudo cp cuda/lib64/libcudnn* /usr/local/cuda/lib64/
sudo chmod a+r /usr/local/cuda/include/cudnn.h
sudo chmod a+r /usr/local/cuda/lib64/libcudnn*
查看cudnn版本
cat /usr/local/cuda/include/cudnn.h | grep CUDNN_MAJOR -A 2
输出信息如下:
$ cat /usr/local/cuda/include/cudnn.h | grep CUDNN_MAJOR -A 2#define CUDNN_MAJOR 7
#define CUDNN_MINOR 6
#define CUDNN_PATCHLEVEL 5
--
#define CUDNN_VERSION (CUDNN_MAJOR * 1000 + CUDNN_MINOR * 100 + CUDNN_PATCHLEVEL)

#include "driver_types.h"
从上到下输出7 6 5 即表示cudnn7.6.5
参考:https://docs.nvidia.com/cuda/cuda-installation-guide-linux/index.html#pre-installation-actions
参考:https://blog.csdn.net/zhiman_zhong/article/details/91491780
参考:https://blog.csdn.net/weixin_41424027/article/details/90708926?utm_medium=distribute.pc_relevant.none-task-blog-BlogCommendFromMachineLearnPai2-1.channel_param&depth_1-utm_source=distribute.pc_relevant.none-task-blog-BlogCommendFromMachineLearnPai2-1.channel_param#CUDA_80