一、pistache配置
1、安装cmake【https://www.cnblogs.com/judes/p/10327638.html】
2、下载pistache【git:https://github.com/judesmorning/pistache】
3、编译成.a
cd pistache-master
mkdir build
cd build
cmake -G "Unix Makefiles" -DCMAKE_BUILD_TYPE=Release ..
make
sudo make install
4、得到结果:
libpistache.a:pistache-master/build/src
头文件:pistache-master/include
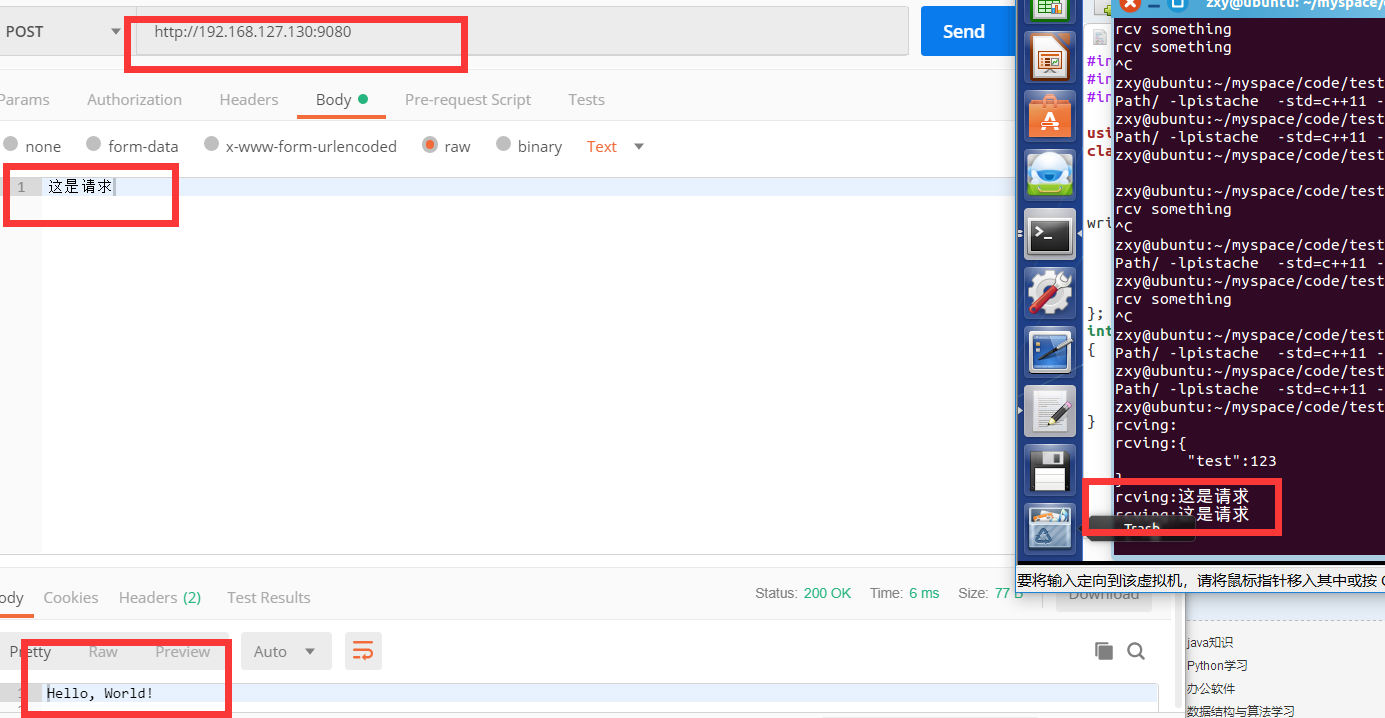
5、测试代码testmain.cpp
#include <iostream>
#include <string>
#include "pistache/endpoint.h"

using namespace Pistache;
class MyHandler:public Http::Handler{
    HTTP_PROTOTYPE(MyHandler)

    virtual void onRequest(const Http::Request& request, Http::ResponseWriter writer)
    {
      std::cout << "rcving:" << request.body() << std::endl;
        writer.send(Http::Code::Ok, "Hello, World!
");
    }
};
int main(int argc,char** argv)
{
    Http::listenAndServe<MyHandler>("*:9080");//自动阻塞,不会退出线程
    //(void)getchar();
    return 0;
}
把.a放在 /home/zxy/myspace/soPath/下,路径随意
6、编译
g++ testmain.cpp -L /home/zxy/myspace/soPath/ -lpistache -std=c++11 -pthread
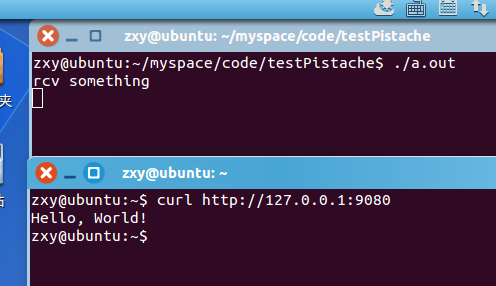
7、测试
./aout运行
再开一个终端:
curl http://127.0.0.1:9080
二、postman发送数据