redis 集群实现的原理请参考http://www.tuicool.com/articles/VvIZje
集群环境至少需要3个节点。推荐使用6个节点配置,即3个主节点,3个从节点。
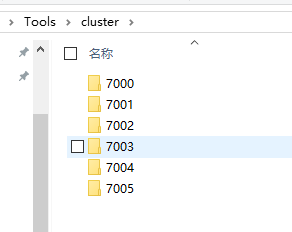
新建6个文件夹 分别是 7000/7001/7002/7003/7004/7005
将redis.windows.conf 复制一份
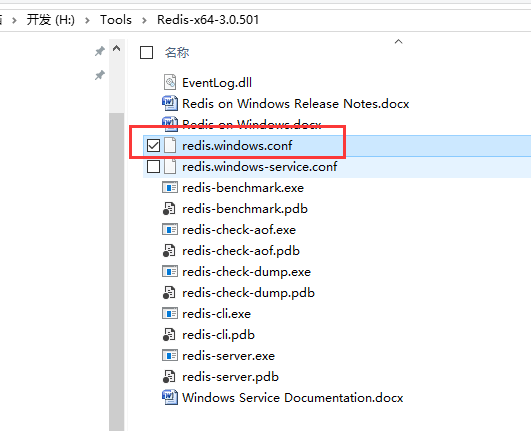
然后修改配置文件中的下面选项
- port 7000 (redis 端口号)
- daemonize yes (是否以后台daemon方式运行 windows上不支持,可以忽略)
- cluster-enabled yes (开启集群)
- cluster-config-file nodes.conf (集群模式下,每个redis节点生成一个自己的集群配置文件,这个文件不需要人工修改,由redis自己维护)
- cluster-node-timeout 5000 (集群模式时,当前节点在与其他节点保活探测时,多久没有响应时认为其他节点处于fail状态,上面是5秒)
- appendonly yes (是否开启appendonlylog,开启的话每次写操作会记一条log,这会提高数据抗风险能力,但影响效率。)
-
cluster-require-full-coverage yes (默认为Yes,丢失一定比例Key后(可能Node无法连接或者挂掉),集群停止接受写操作 no:允许某些slot没有active节点的时候其余slot还能用。就是其中1个实例挂掉,不会导致整个redis cluster都不可用了)
- cluster-slave-validity-factor 10 (控制从节点FailOver相关的 设置设为0,从节点会一直尝试启动FailOver.设为正数,失联大于一定时间(factor*节点TimeOut),不再进行FailOver)
分别放到 上面的5个文件夹里面
(注意:拷贝完成之后要修改 7001/7002/7003/7004/7005 目录下面 redis.conf 文件中的 port 参数,分别改为对应的文件夹的名称)
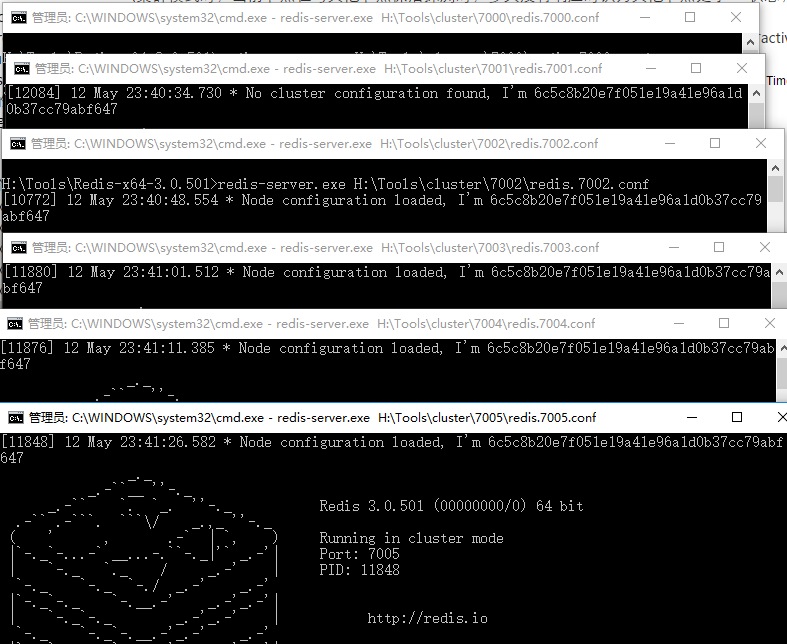
分别启动这 6 个 redis 实例
redis-server.exe H:Toolscluster7000
edis.7000.conf
redis-server.exe H:Toolscluster7001
edis.7001.conf
redis-server.exe H:Toolscluster7002
edis.7002.conf
redis-server.exe H:Toolscluster7003
edis.7003.conf
redis-server.exe H:Toolscluster7004
edis.7004.conf
redis-server.exe H:Toolscluster7005
edis.7005.conf
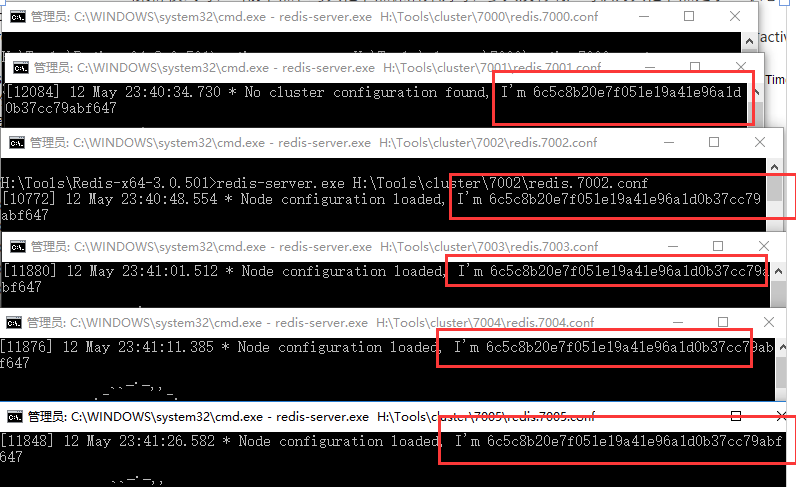
启动后会看到以下日志信息,提示Node.conf不存在,并且每个节点创建了一个NodeID
最后一步
组建集群配置
源码src文件下提供了一个叫做redis-trib.rb的脚本文件,是一个Ruby脚本用于创建集群,检测及重新分片等 .
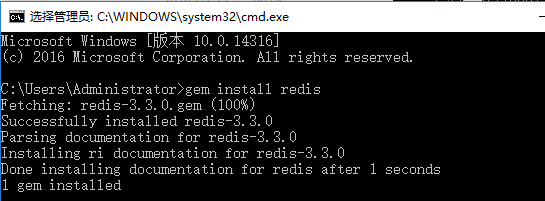
但你得安装ruby环境。

然后安装redis 的 ruby 函式庫
运行命令:
ruby H:Toolscluster
edis.trib.rb create --replicas 1 127.0.0.1:7000 127.0.0.1:7001 127.0.0.1:7002 127.0.0.1:7003 127.0.0.1:7004 127.0.0.1:7005
建立的过程中 Ruby 会要求更改 nodes.conf ,就输入 yes 就可以了。

输入yes后 我满怀期待等到成功的消息。谁知道给我一个无限的waiting?
H:Toolscluster>ruby H:Toolscluster
edis.trib.rb create --replicas 0 127.0.0.1:7001 127.0.0.1:7002 127.0.0.1:7003 127.0.0.1:7004 127.0.0.1:7005
>>> Creating cluster
Connecting to node 127.0.0.1:7001: OK
Connecting to node 127.0.0.1:7002: OK
Connecting to node 127.0.0.1:7003: OK
Connecting to node 127.0.0.1:7004: OK
Connecting to node 127.0.0.1:7005: OK
>>> Performing hash slots allocation on 5 nodes...
Using 5 masters:
127.0.0.1:7001
127.0.0.1:7002
127.0.0.1:7003
127.0.0.1:7004
127.0.0.1:7005
M: 6c5c8b20e7f051e19a41e96a1d0b37cc79abf647 127.0.0.1:7001
   slots:0-3276 (3277 slots) master
M: 6c5c8b20e7f051e19a41e96a1d0b37cc79abf647 127.0.0.1:7002
   slots:3277-6553 (3277 slots) master
M: 6c5c8b20e7f051e19a41e96a1d0b37cc79abf647 127.0.0.1:7003
   slots:6554-9829 (3276 slots) master
M: 6c5c8b20e7f051e19a41e96a1d0b37cc79abf647 127.0.0.1:7004
   slots:9830-13106 (3277 slots) master
M: 6c5c8b20e7f051e19a41e96a1d0b37cc79abf647 127.0.0.1:7005
   slots:13107-16383 (3277 slots) master
Can I set the above configuration? (type 'yes' to accept): yes
>>> Nodes configuration updated
>>> Assign a different config epoch to each node
>>> Sending CLUSTER MEET messages to join the cluster
Waiting for the cluster to join..........................................................................................................................................................
NND,一时摸不着头脑,网上一查了几个方案 都试了还是不行。
google查了也没找到相关信息。
就在stackoverflow上发帖求助老外。http://stackoverflow.com/questions/37193338/redis-cluster-error
还是没人鸟我啊。。可能是我英语太差了 。
因为是用ruby的代码去配置cluster的。
接下来就调试ruby代码 看下到底是哪里出了问题才导致block在waiting的。
要修改一下redis.trib.rb文件才可以调试,因为参数不是通过COMMAND的ARGV传过去的。

调试的时候运行到下面的代码的时候报错了
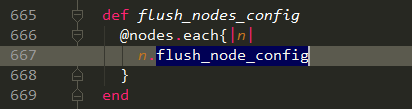
错误信息为:ERR Slot 6387 is already busy
解决方案是改成下面这样 (http://stackoverflow.com/questions/34230131/err-slot-xxx-is-already-busy-rediscommanderror)
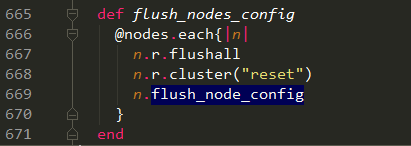
ok 解决了一个问题了。
F5运行 不会报错了 ,但TMD还是会block在waiting。此处省略一万头马。
分析了一下。这里会7001,7002,7003,7004,7005 都会发送给7000 meet这个命令。
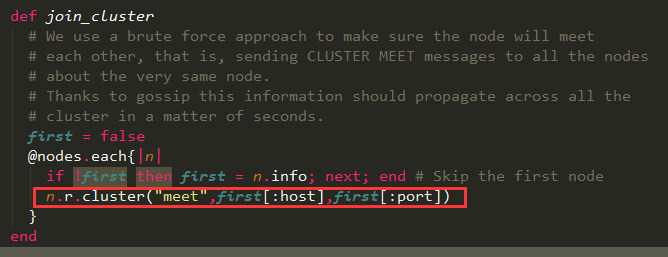
然后会收到签名后才算是分配成功

发现
signatures里面全是7000的回执签名。
不对啊。应该接收到的是 7001——7005的才对啊。
除非都发给自己啦?
仔细一看,7000-7005的nodeId都是一样。不出错才怪!

在回过头看下之前启动redis的命令,才发现创建的NodeID都是一样的,一开始就错了!!!
配置修改成如下:
port 7005
appendonly yes
appendfilename "appendonly.7005.aof"
cluster-enabled yes
cluster-config-file nodes.7005.conf
cluster-node-timeout 15000
cluster-slave-validity-factor 10
cluster-migration-barrier 1
cluster-require-full-coverage yes
然后重新来过
出现以下结果说明配置好了:>>> Creating cluster
Connecting to node 127.0.0.1:7000: OK
Connecting to node 127.0.0.1:7001: OK
Connecting to node 127.0.0.1:7002: OK
Connecting to node 127.0.0.1:7003: OK
Connecting to node 127.0.0.1:7004: OK
Connecting to node 127.0.0.1:7005: OK
>>> Performing hash slots allocation on 6 nodes...
Using 3 masters:
127.0.0.1:7000
127.0.0.1:7001
127.0.0.1:7002
Adding replica 127.0.0.1:7003 to 127.0.0.1:7000
Adding replica 127.0.0.1:7004 to 127.0.0.1:7001
Adding replica 127.0.0.1:7005 to 127.0.0.1:7002
M: fa810d10bca15ffc480953329c12da988fc3f52a 127.0.0.1:7000
slots:0-5460 (5461 slots) master
M: 65e347cbe71aeae7b983ce85cf14eec1f0c1e0b7 127.0.0.1:7001
slots:5461-10922 (5462 slots) master
M: 17739ba52d2c171db5c960962e4ec8845c6e63b0 127.0.0.1:7002
slots:10923-16383 (5461 slots) master
S: d7c9a9c3982dde2f0cc551f227e023b5746373b5 127.0.0.1:7003
replicates fa810d10bca15ffc480953329c12da988fc3f52a
S: fbac6089f7889b68726dd152daaf71834a97dd6e 127.0.0.1:7004
replicates 65e347cbe71aeae7b983ce85cf14eec1f0c1e0b7
S: 76867e63d75e1ff00dc4a5f60a91ea4634a083aa 127.0.0.1:7005
replicates 17739ba52d2c171db5c960962e4ec8845c6e63b0
>>> Nodes configuration updated
>>> Assign a different config epoch to each node
>>> Sending CLUSTER MEET messages to join the cluster
Waiting for the cluster to join
>>> Performing Cluster Check (using node 127.0.0.1:7000)
M: fa810d10bca15ffc480953329c12da988fc3f52a 127.0.0.1:7000
slots:0-5460 (5461 slots) master
M: 65e347cbe71aeae7b983ce85cf14eec1f0c1e0b7 127.0.0.1:7001
slots:5461-10922 (5462 slots) master
M: 17739ba52d2c171db5c960962e4ec8845c6e63b0 127.0.0.1:7002
slots:10923-16383 (5461 slots) master
S: d7c9a9c3982dde2f0cc551f227e023b5746373b5 127.0.0.1:7003
replicates fa810d10bca15ffc480953329c12da988fc3f52a
S: fbac6089f7889b68726dd152daaf71834a97dd6e 127.0.0.1:7004
replicates 65e347cbe71aeae7b983ce85cf14eec1f0c1e0b7
S: 76867e63d75e1ff00dc4a5f60a91ea4634a083aa 127.0.0.1:7005
replicates 17739ba52d2c171db5c960962e4ec8845c6e63b0
[OK] All nodes agree about slots configuration.
>>> Check for open slots...
>>> Check slots coverage...
[OK] All 16384 slots covered.
测试一下
从 port 7000 set 一个 值 并且设定过期时间为10秒
然后从 port 7001 里面get出来。

没问题!