1.前提准备
1.1在服务器上安装ubuntu14
1.2为ubuntu14配置静态ip
使用命令 sudo vim /etc/network/interfaces打开配置文件
修改内容如下:

使用命令sudo vim /etc/resolv.conf打开配置文件
修改内容如下:

由于配置的DNS在重启后会还原,因此需要使用sudo vim /etc/resolvconf/resolv.conf.d/base打开配置文件
修改内容如下:

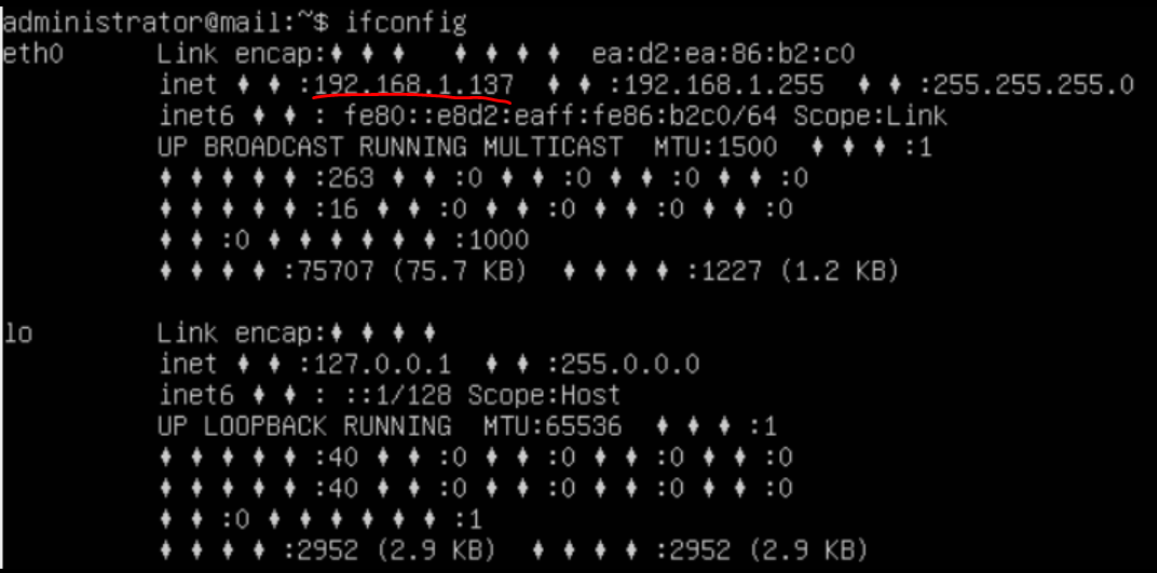
重启服务器或者网卡,使用ifconfig查看ip是否已经改变
配置完毕后使用ping www.baidu.com测试

使用Ctrl+C终止连接
1.3在ubuntu14上安装ssh
使用命令sudo apt-get install openssh-server 安装ssh
安装完毕后使用service ssh测试

1.4配置Xshell 5,远程连接ubuntu14
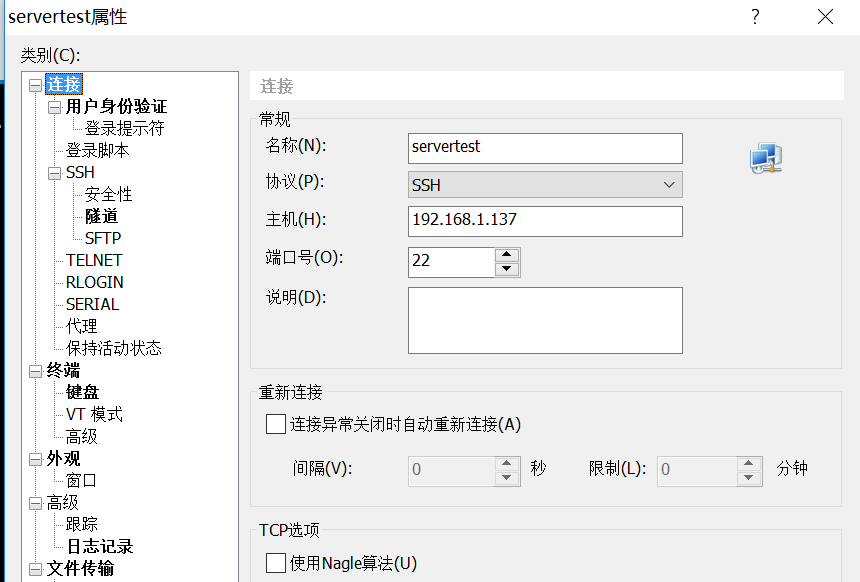
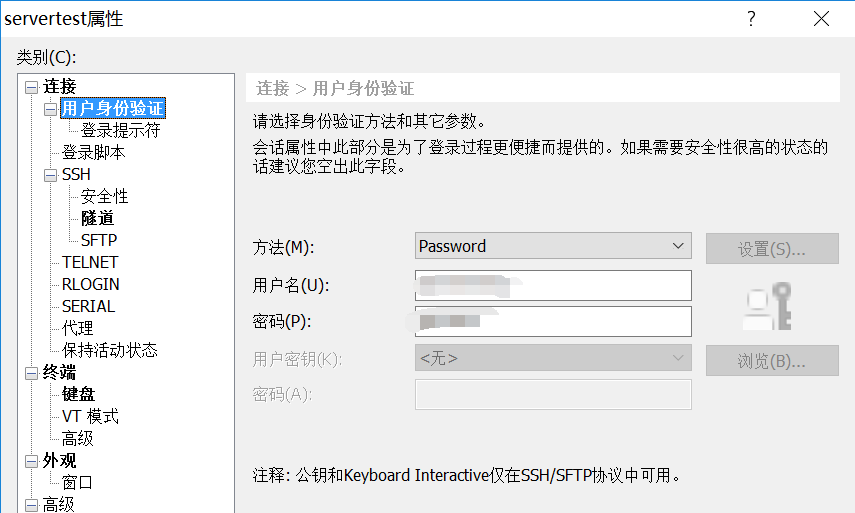
现在我们就可以使用xshell 5远程连接服务器上的ubuntu14了
2.搭建邮件服务器
使用postfix和dovecot搭建邮件服务器
2.1安装postfix
使用命令sudo apt-get install postfix安装postfix
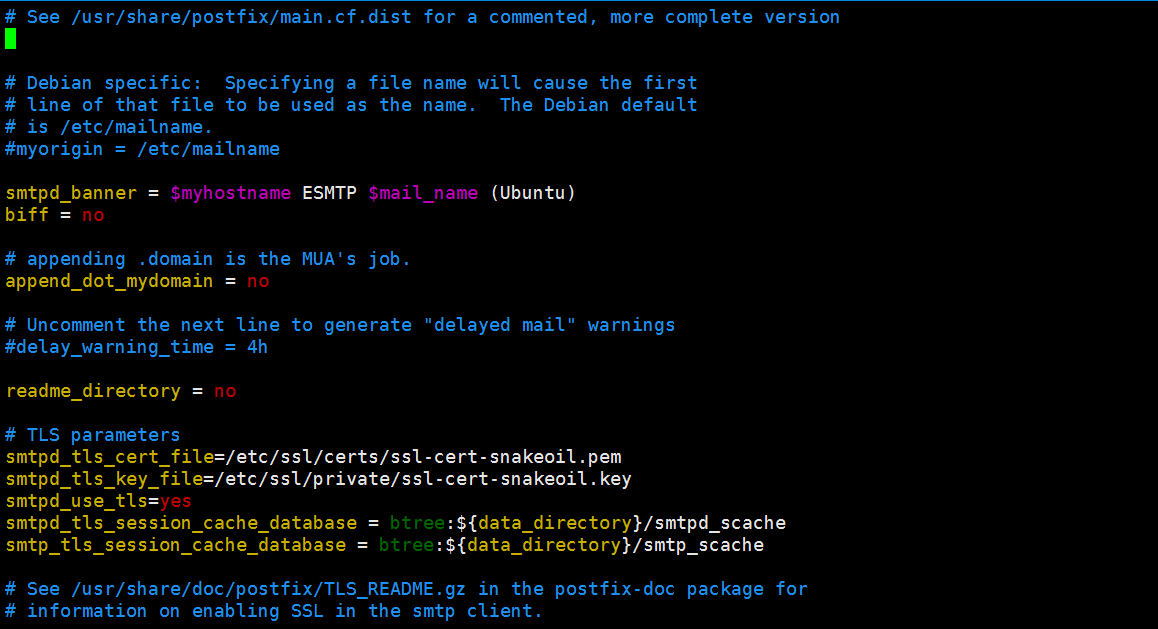
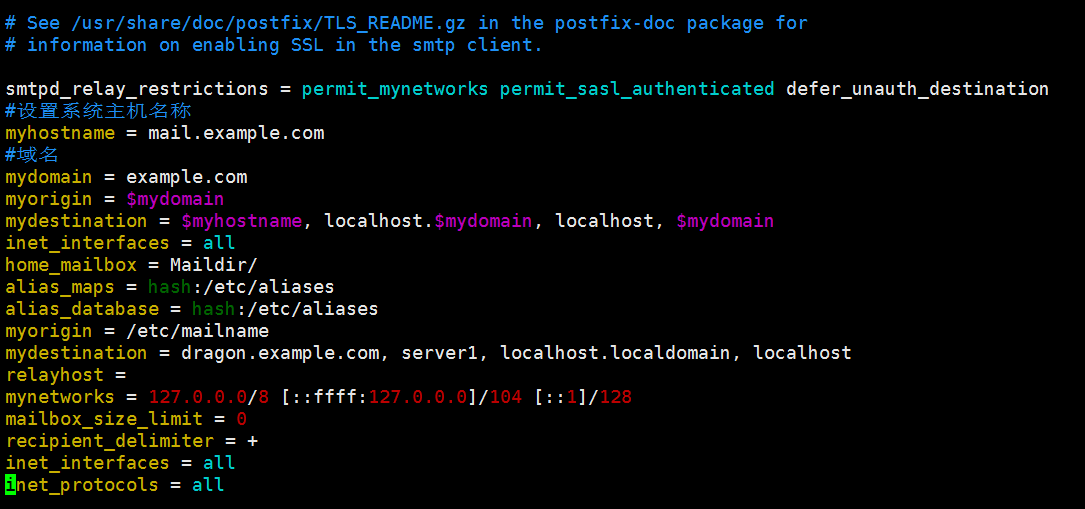
配置psotfix,使用sudo vim /etc/postfix/main.cf打开配置文件
2.2安装dovecot
使用命令sudo apt-get install dovecot-imapd dovecot-pop3d安装dovecot
使用命令sudo vim /etc/dovecot/dovecot.conf 打开配置文件

1. 使用 maildir 格式(与 postfix 格式对应)
mail_location = maildir:~/Maildir
2. 侦听所有默认端口
listen = *
3. 设置安全的远程访问
disable_plaintext_auth = no
4.由于用户名 / 密码都是明文,我们应该要求建立安全连接以防止信息泄露
ssl = required
ssl_cert_file = /etc/ssl/certs/dovecot.pem
ssl_key_file = /etc/ssl/private/dovecot.pem
5.重启配置:
sudo service dovecot reload
3.测试
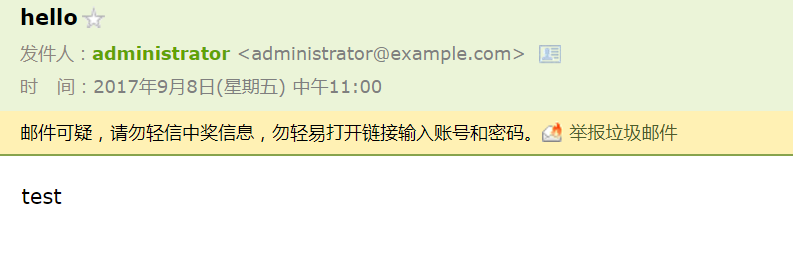
输入telnet localhost smtp ,接着输入以下命令
1 mail from: administrator@example.com
2 rcpt to: QQNumber@qq.com
3 data
4 Subject: hello
5 test
6 .
7 quit
查看邮件