一、什么是Promise?
Promise对象表示一个异步操作的最终状态(成功或失败),主要用于多层回调嵌套或处理多并发请求。
接收两个参数:resolve表示成功,reject表示失败。
new Promise(function(resolve,reject){...})
来看一个例子:
        new Promise(function(resolve,reject){
            resolve();
            reject();
        }).then(function(){
            console.log('成功!')
        },function(){
            console.log('失败!')
        })
运行结果:成功!
分析一下:如果resolve执行后,执行then里面的第一个函数;如果reject执行后,则执行then里面的第二个函数。
Promise最终只表示一个状态,要么成功,要么失败,一个执行成功,另一个不看。此例中,resolve执行后,reject就不执行了。故只执行第一个函数。相反,如果reject先执行,那么resolve对应的函数就不执行了。
换一种写法再来看下:
        new Promise(function(resolve,reject){
            resolve();
            reject();
        }).then(function(){
            console.log('成功!')
        }).catch(function(){
            console.log('失败!')
        })
将reject对应的函数写在catch里面是不是更清晰了?
那什么时候该执行resolve(),什么时候该执行reject()呢?先看一个小例子(后面会更详细讲用途)
     let flag = false;
        new Promise(function(resolve,reject){
            flag ? resolve() : reject();
        }).then(function(){
            console.log('成功!')
        }).catch(function(){
            console.log('失败!')
        })
运行结果: 失败!
就是当需要根据两种状态(成功或失败)分别写对应的逻辑处理的时候,分别执行resolve和reject。那可能会问,那我为什么不用 if……else直接写呢?
因为Promise的强大还在于可以链式调用,并且可以将返回结果作为参数继续使用,类似多层回调。
        new Promise(function(resolve,reject){
            resolve([1,2]);
            reject();
        }).then(function(arr){
            let [arg1,arg2] = arr; //这里解构赋值
            var result1 = arg1+arg2; //1+2=3
            return result1;
        }).then(function(result1){
            var result2 = ++result1; //4
            return result2;
        }).then(function(result2){
            alert(result2 * 2);  //8
        }).catch(function(){
            console.log('error')
        })
运行结果:8
如果throw一个错误,会被catch捕捉,并且catch后也可以链式写then,如下:
        new Promise(function(resolve,reject){
            resolve([1,2]);
            reject();
        }).then(function(arr){
            let [arg1,arg2] = arr; //这里解构赋值
            var result1 = arg1+arg2;
            return result1;
        }).then(function(result1){
            var result2 = ++result1;
            return result2;
        }).then(function(result2){
            throw 'this is a bug';
        }).catch(function(v){
            console.log(v); //打印this is a bug
            return 'abc'
        }).then(function(m){
            console.log(m); //abc
        })
运行结果:

二、Promise的静态方法:
-
Promise.resolve()
-
Promise.reject()
-
Promise.race():接收一个数组为参数,多个Promise,谁快执行谁,无论resolve还是reject。
-
Promise.all():接收一个数组为参数,数组里有一个失败则失败。(用于处理多并发请求)
例子分别如下:
        Promise.resolve('hello').then(function(m){
            console.log(m);
        })
运行结果:hello
        Promise.reject('this is error').then(function(){

        }).catch(function(err){
            console.log(err);
        })
运行结果:this is error
        Promise.race([new Promise(function(resolve,reject){
            setTimeout(resolve,500,'one')
        }),new Promise(function(resolve,reject){
            setTimeout(resolve,400,'two') //比第一个快
        })]).then(function(str){
            alert(str);  //two
        }).catch(function(){

        })
运行结果:two,再增加一个reject看下
        Promise.race([new Promise(function(resolve,reject){
            setTimeout(resolve,500,'one')
        }),new Promise(function(resolve,reject){
            setTimeout(resolve,400,'two')
        }),new Promise(function(resolve,reject){
            setTimeout(reject,300,'bug') //最快
        })]).then(function(str){
            alert(str);
        }).catch(function(err){
            alert(err);  //bug
        })
运行结果:bug
        Promise.all([Promise.resolve('abc'),1,2]).then(function(m){
            alert(m);  //abc,1,2
        }).catch(function(err){
            alert(err);
        })
运行结果:abc,1,2 增加一个reject看下
        Promise.all([Promise.resolve('abc'),Promise.reject('bug'),1,2]).then(function(m){
            alert(m);
        }).catch(function(err){
            alert(err); //bug
        })
运行结果:bug 有一个失败则失败
三、Promise用途例子(帮助更好的理解Promise)
1、控制显隐

<!DOCTYPE html>
<html lang="en">
<head>
    <meta charset="UTF-8">
    <meta name="viewport" content="width=device-width, initial-scale=1.0">
    <meta http-equiv="X-UA-Compatible" content="ie=edge">
    <title>Document</title>
    <style>
        #div1{
            100px;
            height: 100px;
            background: #f80;
        }
    </style>
</head>
<body>
    <input type="button" value="点击" id="btn">
    <div id="div1"></div>
    <script>
        var btn = document.getElementById('btn');
        var div1 = document.getElementById('div1');
        var changeNode = true;
        btn.onclick = function(){
            show();
        }
        function show(){
            changeNode = !changeNode;
            new Promise(function(resolve,reject){
                changeNode ? resolve() : reject();
            }).then(function(){
                div1.style.display = 'block';
            }).catch(function(){
                div1.style.display = 'none';
            })
        }
    </script>
</body>
</html>
2、选项卡切换
普通方法实现
<!DOCTYPE html>
<html lang="en">
<head>
    <meta charset="UTF-8">
    <meta name="viewport" content="width=device-width, initial-scale=1.0">
    <meta http-equiv="X-UA-Compatible" content="ie=edge">
    <title>Document</title>
    <style>
        div{
            display: none;
            100px;
            height: 100px;
            border: 1px solid #000;
        }
        div.active{
            display: block;
            background: #f00;
        }
        input.active{
            background: #f00;
        }
    </style>
</head>
<body>
    <input type="button" value="点击1" class="active">
    <input type="button" value="点击2" >
    <input type="button" value="点击3" >
    <div class="active">11111</div>
    <div>22222</div>
    <div>33333</div>
    <script>
        var btns = document.getElementsByTagName('input');
        var aDiv = document.getElementsByTagName('div');
        for(let i=0;i<btns.length;i++){
            btns[i].onclick = function(){
                for(var j=0;j<btns.length;j++){
                    btns[j].className='';
                    aDiv[j].className='';
                }
                this.className = 'active';
                aDiv[i].className = 'active';
            }
        }
    </script>
</body>
</html>
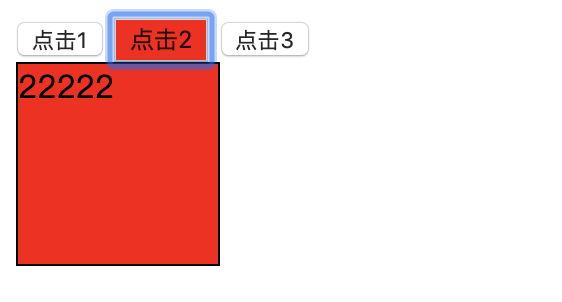
效果:

使用Promise实现自动切换
    <script>
        var btns = document.getElementsByTagName('input');
        var aDiv = document.getElementsByTagName('div');
        var index = 0;
        setInterval(show,1000);
        function show(){
            index++;
            return new Promise(function(resolve,reject){
                index == btns.length ? reject() : resolve();
            }).then(function(){
                for(var j=0;j<btns.length;j++){
                    btns[j].className='';
                    aDiv[j].className='';
                }
                btns[index].className = 'active';
                aDiv[index].className = 'active';
            }).catch(function(){
                index = -1;
          show();
            })
        }
    </script>
3、使用Promise写ajax
        window.onload = function(){
            //调用封装好的ajax
            ajax('a.php','get').then(function(res){
                console.log(res);
            }).catch(function(err){
                console.log(err);
            })

            function ajax(url,method){
                return new Promise(function(resolve,reject){
                    var xhr = new XMLHttpRequest();
                    xhr.open(url,method,true);
                    xhr.send(null);
                    xhr.onload=function(){
                        if(xhr.status >= 200 && xhr.status<300 || xhr.status==304){
                            resolve(xhr.responseText);
                        }else{
                            reject(xhr.status);
                        }
                    }
                    xhr.onerror=function(){
                        reject('连接失败!');
                    }
                })
            }
        }