1.部署好PHP环境
2.下载安装ZendStudio
3.php.ini添加配置:
1)下载对应php版本的xdebug版本
2)php.ini文件中增加如下配置;并将php_xdebug.dll 放置于你配置路径的相应文件中
 1 [XDebug]
 2 ;调试功能模块儿
 3 ;extension=php_xdebug-2.2.5-5.3-vc9.dll
 4 zend_extension ="D:/PHP/php-5.3.28/ext/php_xdebug-2.2.5-5.3-vc9.dll"
 5 xdebug.remote_handler=dbgp
 6 ;开启远程调试
 7 xdebug.remote_enable = On
 8 ;远程主机
 9 xdebug.remote_host=localhost
10 ;主机端口
11 xdebug.remote_port=19000
12 ;开启自动跟踪
13 xdebug.auto_trace = On
14 ;开启异常跟踪
15 xdebug.show_exception_trace = On
16 ;开启远程调试自动启动
17 xdebug.remote_autostart = On
18 ;收集变量
19 xdebug.collect_vars = On
20 ;收集返回值
21 xdebug.collect_return = On
22 ;收集参数
23 xdebug.collect_params = On
24 ;临时跟踪信息输出
25 ;xdebug.trace_output_dir="d:/PHP/php-5.3.28/temp"
26 ;显示局部变量
27 xdebug.show_local_vars = On
28 xdebug.profiler_enable = On
29 ;xdebug.profiler_output_dir ="d:/PHP/php-5.3.28/temp"
30 xdebug.trace_enable_trigger =On
3)配置完成后重启Apache(或者IIS,Nginx)
4.打开ZendStudio,进行相关设置
1)Window —> Preferences —> PHP —> PHP Executables —> Add

红色框中添加完成后,点击OK.
2)Window —> Preferences —> PHP —> PHP Servers,编辑Default PHP Web Server如下:

其中:BaseURL为你调试所使用的url路径,也就是你的网站url,一般本地调试设置为http://localhost即可
Local Web Root为你调试的网站根目录
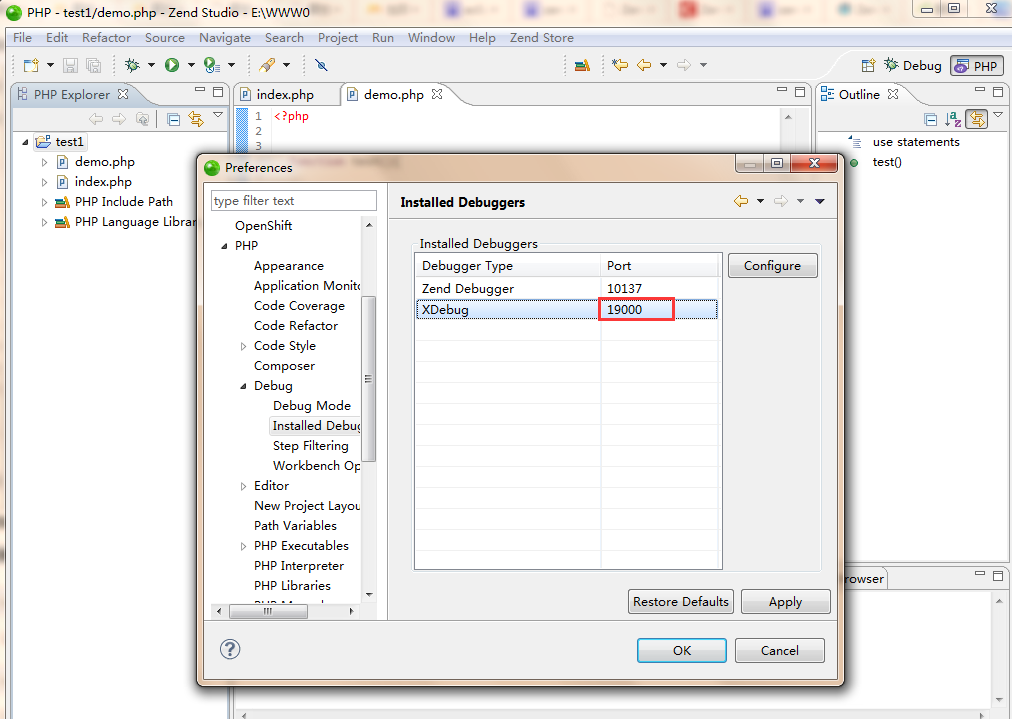
3)Window —> Preferences —> Debug—> Installed Debuggers,注意修改xdebug的端口号为 你php.ini中添加的xdebug的端口号,为不与系统其他端口号冲突,笔者设置为 19000,同上php.ini文件中的 xdebug.remote_port

点击ok
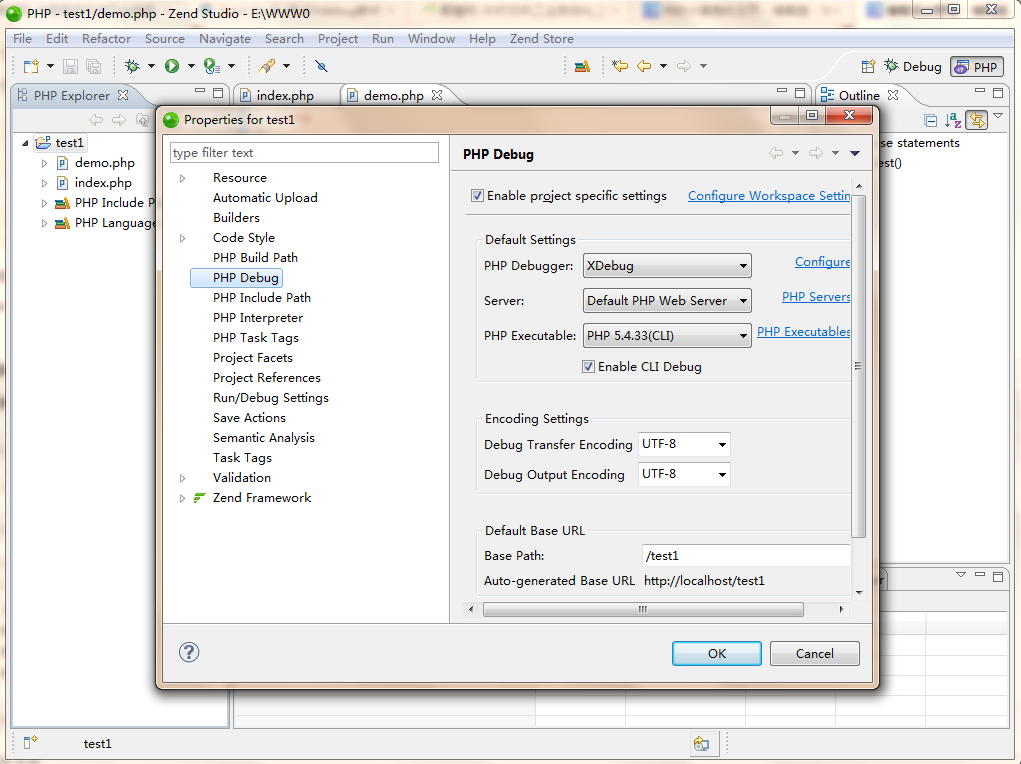
4)新建Local PHP Project ,例如新建project 为test1(已有project的话就不用新建,随便选择一个project),选择test1(选择任意project),右键:
Properties —> PHP Debug,设置你刚才添加的Xdebug,如图:

点击ok。至此,Xdebug就配置完成了。
5)选择步骤4)中的项目下的任意php文件,点击菜单栏中的调试按钮,就可以调试了,如下:

5.本文至此结束,如遇到相关问题可联系笔者博客资料中的联系方式。