添加rabbitmq的依赖
<dependency>
            <groupId>org.springframework.boot</groupId>
            <artifactId>spring-boot-starter-amqp</artifactId>
</dependency>
在配置文件中添加必要的配置信息
spring.rabbitmq.host=192.168.0.86
spring.rabbitmq.port=5672
spring.rabbitmq.username=admin
spring.rabbitmq.password=123456
好了,基本的配置就已经配置完毕了
rabbitmq有六种模式

我们逐个来看springboot是怎么实现的呢
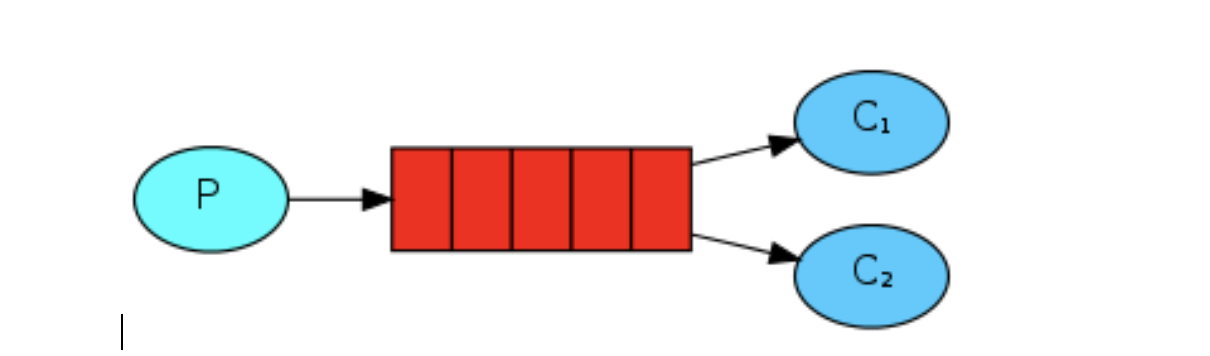
1.hello world

P代表生产者,C代表消费者,红色代码消息队列。P将消息发送到消息队列,C对消息进行处理。
我们先创建一个队列
@Bean
    public Queue Queue() {
        return new Queue("hello");
    }
然后我再创建一个生产者

@Controller
public class HelloSender {

    @Autowired
    private AmqpTemplate rabbitTemplate;

    public void send() {
        String context = "hello " + new Date();
        System.out.println("Sender : " + context);
        this.rabbitTemplate.convertAndSend("hello", context);
    }
}
再创建一个消费者
@Component
@RabbitListener(queues = "hello")
public class HelloReceiver {
    @RabbitHandler
    public void process(String hello) {
        System.out.println("Receiver  : " + hello);
    }
}
再写一个测试用例看看
@RunWith(SpringRunner.class)
@SpringBootTest
public class RabbitmqApplicationTests {
        @Autowired
        private HelloSender helloSender;

        @Test
        public void hello() throws Exception {
            helloSender.send();
        }
}

成功!
2.工作模式(竞争)
一个消息产生者,多个消息的消费者。竞争抢消息
我们先创建一个队列
@Bean
    public Queue Queue2() {
        return new Queue("neo");
    }
再创建一个消息生产者
@Controller
public class NeoSender {
@Autowired
private AmqpTemplate rabbitTemplate;
public void send(int i) {
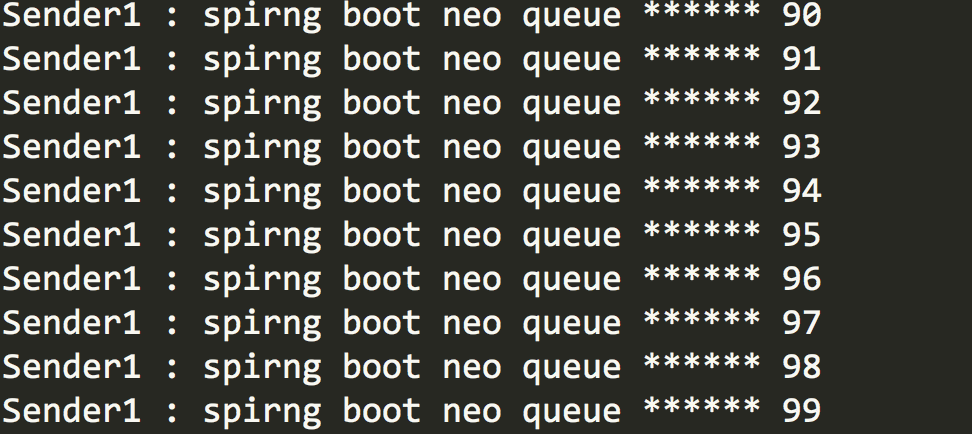
String context = "spirng boot neo queue"+" ****** "+i;
System.out.println("Sender1 : " + context);
this.rabbitTemplate.convertAndSend("neo", context);
}
}
再创建两个消息的消费者
 1 @Component
 2 @RabbitListener(queues = "neo")
 3 public class NeoReceiver1 {
 4     @RabbitHandler
 5     public void process(String neo) {
 6         System.out.println("Receiver 1: " + neo);
 7     }
 8 }
 9
10
11
12 @Component
13 @RabbitListener(queues = "neo")
14 public class NeoReceiver2 {
15     @RabbitHandler
16     public void process(String neo) {
17         System.out.println("Receiver 2: " + neo);
18     }
19
20 }
我们写一个测试用例
@Test
    public void oneToMany() throws Exception {
        for (int i=0;i<100;i++){
           // Thread.sleep(10);
            neoSender.send(i);
        }
    }
运行
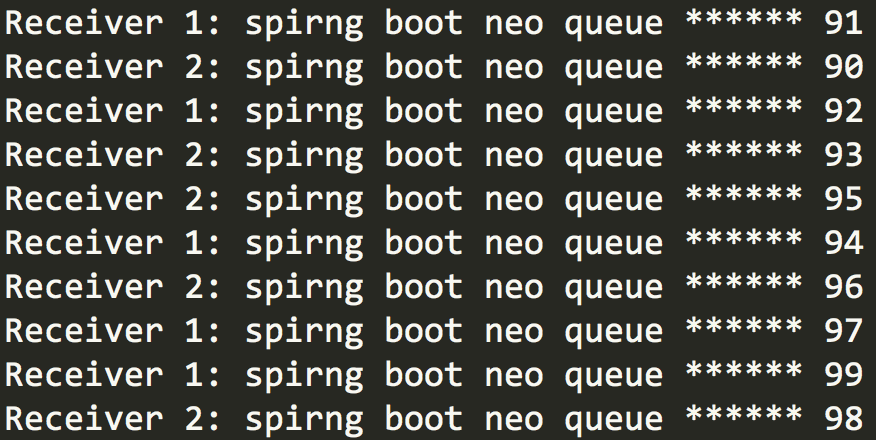
可以看到消息均匀的被两个消费者消费了。
通过这个例子我们可以看做高并发情况下的消息产生和消费,这会产生一个消息丢失的问题。万一客户端在处理消息的时候挂了,那这条消息就相当于被浪费了,针对这种情况,rabbitmq推出了消息ack机制,熟悉tcp三次握手的一定不会陌生。
我们看看springboot是实现ack的
很简单,在我们的配置类中,配置一个新的消费者,将原先的消费者先都去掉:
@Bean
    public SimpleMessageListenerContainer messageContainer() {
        SimpleMessageListenerContainer container = new SimpleMessageListenerContainer(connectionFactory());
        container.setQueues(Queue());
        container.setExposeListenerChannel(true);
        container.setMaxConcurrentConsumers(1);
        container.setConcurrentConsumers(1);
        container.setAcknowledgeMode(AcknowledgeMode.MANUAL);//消息确认后才能删除
        container.setPrefetchCount(5);//每次处理5条消息
        container.setMessageListener(new ChannelAwareMessageListener() {

            public void onMessage(Message message, com.rabbitmq.client.Channel channel) throws Exception {
                byte[] body = message.getBody();
                System.out.println("消费端接收到消息 : " + new String(body));
                channel.basicAck(message.getMessageProperties().getDeliveryTag(), false);
            }
        });
        return container;
    }
但这里会有个问题,test模式下消息发送完毕系统就会直接shutdown,所以只能消费部分消息,不过等真正启动项目,这个问题就不存在了。
3.发布订阅模式

生产者将消息不是直接发送到队列,而是发送到X交换机,然后由交换机发送给两个队列,两个消费者各自监听一个队列,来消费消息。
这种方式实现同一个消息被多个消费者消费。工作模式是同一个消息只能有一个消费者。
我们新建三个队列
@Bean
    public Queue AMessage() {
        return new Queue("fanout.A");
    }

    @Bean
    public Queue BMessage() {
        return new Queue("fanout.B");
    }

    @Bean
    public Queue CMessage() {
        return new Queue("fanout.C");
    }
再新建一个交换机
@Bean
    FanoutExchange fanoutExchange() {
        return new FanoutExchange("fanoutExchange");
    }
再把这些队列绑定到交换机上去
@Bean
    Binding bindingExchangeA(Queue AMessage, FanoutExchange fanoutExchange) {
        return BindingBuilder.bind(AMessage).to(fanoutExchange);
    }

    @Bean
    Binding bindingExchangeB(Queue BMessage, FanoutExchange fanoutExchange) {
        return BindingBuilder.bind(BMessage).to(fanoutExchange);
    }

    @Bean
    Binding bindingExchangeC(Queue CMessage, FanoutExchange fanoutExchange) {
        return BindingBuilder.bind(CMessage).to(fanoutExchange);
    }
基本的配置完成后,再新建一个消息生产者
@Component
public class FanoutSender {
    @Autowired
    private AmqpTemplate rabbitTemplate;

    public void send() {
        String context = "hi, fanout msg ";
        System.out.println("Sender : " + context);
        this.rabbitTemplate.convertAndSend("fanoutExchange","", context);
    }
}
同样的,我们再新建三个消息消费者
 1 @Component
 2 @RabbitListener(queues = "fanout.A")
 3 public class FanoutReceiveA {
 4
 5     @RabbitHandler
 6     public void process(String message) {
 7         System.out.println("fanout Receiver A  : " + message);
 8     }
 9 }
10
11 @Component
12 @RabbitListener(queues = "fanout.B")
13 public class FanoutReceiverB {
14     @RabbitHandler
15     public void process(String message) {
16         System.out.println("fanout Receiver B: " + message);
17     }
18 }
19
20 @Component
21 @RabbitListener(queues = "fanout.C")
22 public class FanoutReceiverC {
23     @RabbitHandler
24     public void process(String message) {
25         System.out.println("fanout Receiver C: " + message);
26     }
27 }
三个消费者分别监听3个队列的内容
新建一个测试用例:
@RunWith(SpringRunner.class)
@SpringBootTest
public class FanoutTest {
    @Autowired
    private FanoutSender fanoutSender;

    @Test
    public void setFanoutSender(){
        fanoutSender.send();
    }

}
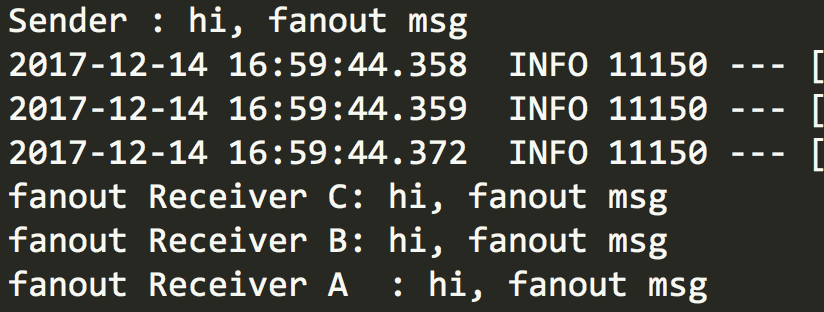
三个队列都接受到了消息
4:路由模式
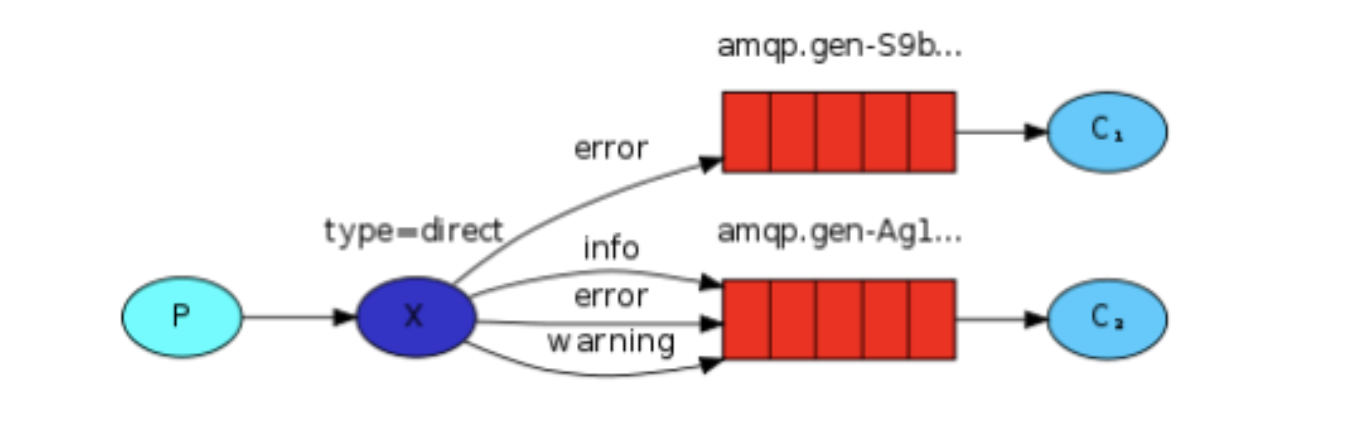
需要将一个队列绑定到交换机上,要求该消息与一个特定的路由键完全匹配,这是一个完整的匹配。
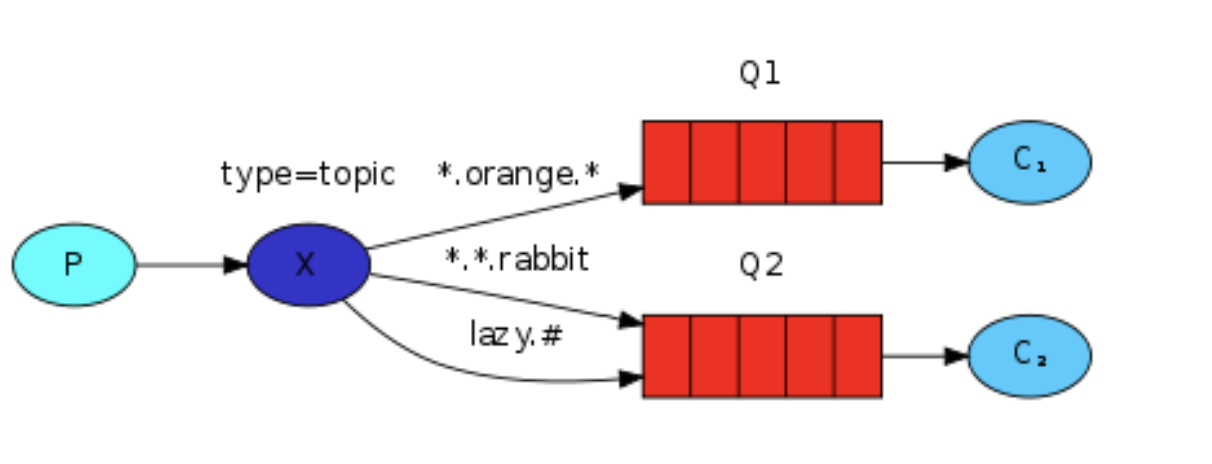
5.主题模式
发送端不只按固定的routing key发送消息,而是按字符串匹配发送,接收端同样如此
符号#匹配一个或多个词,符号*匹配不多不少一个词。
4/5两者模式很相似,我们放在一起演示
新建两个队列
final static String message = "topic.A";
    final static String messages = "topic.B";


    @Bean
    public Queue queueMessage() {
        return new Queue(TopicRabbitConfig.message);
    }

    @Bean
    public Queue queueMessages() {
        return new Queue(TopicRabbitConfig.messages);
    }
新建一个交换机
@Bean
    TopicExchange exchange() {
        return new TopicExchange("topicExchange");
    }
绑定队列到交换机上,路由模式,需要完整匹配topic.message,才能接受
@Bean
    Binding bindingExchangeMessage(Queue queueMessage, TopicExchange exchange) {
        return BindingBuilder.bind(queueMessage).to(exchange).with("topic.message");
    }
topic模式,前缀匹配到topic.即可接受
@Bean
    Binding bindingExchangeMessages(Queue queueMessages, TopicExchange exchange) {
        return BindingBuilder.bind(queueMessages).to(exchange).with("topic.#");
    }
我们新建三个消息生产者
@Component
public class TopicSend {
    @Autowired
    private AmqpTemplate rabbitTemplate;

    public void send() {
        String context = "hi, i am message all";
        System.out.println("Sender : " + context);
        this.rabbitTemplate.convertAndSend("topicExchange", "topic.1", context);
    }

    public void send1() {
        String context = "hi, i am message 1";
        System.out.println("Sender : " + context);
        this.rabbitTemplate.convertAndSend("topicExchange", "topic.message", context);
    }

    public void send2() {
        String context = "hi, i am messages 2";
        System.out.println("Sender : " + context);
        this.rabbitTemplate.convertAndSend("topicExchange", "topic.messages", context);
    }
}
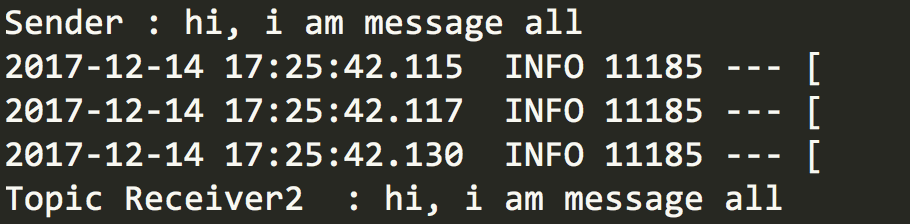
send的key是topic.1 send1的key是topic.message,send2的key是topic.messages
所以理论上send会被两个队列消费,1.2都应该只有一个队列消费
我们再新建两个消费者
@Component
@RabbitListener(queues = "topic.A")
public class TopicReceiver {
    @RabbitHandler
    public void process(String message) {
        System.out.println("Topic Receiver1  : " + message);
    }

}

@Component
@RabbitListener(queues = "topic.B")
public class TopicReceiver2 {
    @RabbitHandler
    public void process(String message) {
        System.out.println("Topic Receiver2  : " + message);
    }
}
写三个测试用例
@RunWith(SpringRunner.class)
@SpringBootTest
public class TopicTest {
    @Autowired
    private TopicSend sender;

    @Test
    public void topic() throws Exception {
        sender.send();
    }

    @Test
    public void topic1() throws Exception {
        sender.send1();
    }

    @Test
    public void topic2() throws Exception {
        sender.send2();
    }

}
send的运行结果
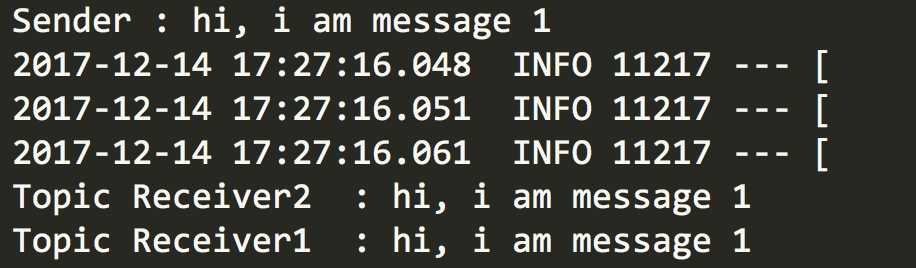
send1的运行结果
send2的运行结果
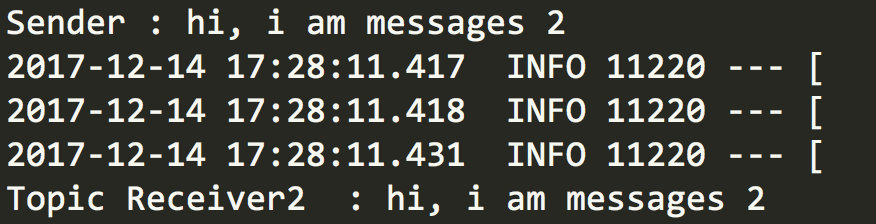
结果符合预期。
转自:https://www.cnblogs.com/xmzJava/p/8036591.html