完成小模块 发视频或者截图 确认情况 是否是正确的 有没有错误
1.Nodejs
2.Git 用git 去克隆地址 然后打开文件夹即可
提交工作改动
文件改动:
- 链接账号 、密码
- 把地址改为生产地址 2个index.js(前台) actions.js(后台)
- git pull
- git status
- git add ‘ 文件名’ (可以用vscode里面+)
- git commit -m ‘备注’
- git push
文件打包:
- 测试环境地址改为生产环境地址(编译前一定要改为线上地址)
- cnpm run build 打包
- 然后从仓库地址 pull下来 (先拉)
- 把dist文件改成需要的文件名(后改名)
- 覆盖掉仓库的文件夹(用dist改名去覆盖,仓库的位置在专门上传的地方)

- git status
- git add .
- git commit -m ' xxx' 提交备注修改内容
- git push
- 地址改回来
3.微信PC版
4. 更新自己的项目
…or create a new repository on the command line
echo "# product" >> README.md
git init
git add README.md
git commit -m "first commit"
git remote add origin https://github.com/Dearke/product.git
git push -u origin master

git remote rm origin
git remote add origin https://github.com/Dearke/product.git
…or push an existing repository from the command line
git remote add origin https://github.com/Dearke/product.git
git push -u origin master
创建远程分支
1 #本地开发我们可能会创建一个新的分支(远程并没有此分支)
2 #本地
3 git checkout -b f-category
4 #然后mkdir a.txt
5 git add a.txt
6 #此时 git push origin,会出错是因为远程没有此分支。
7 git push origin f-category #将此分支推到远程,并在远程创建分支(或者 f-category:dev方式推送到远程分支)
解决上传冲突 :
git branch 查看分支
git checkout -b ' 分支名'
git add . 切换分支前
git commit -m 'xx'
git checkout master 回到主支
git merge (分支) 合并到主支
git branch -a 查看分支
git brand -d (分支名) 删除分支
解决下拉失败
git stash lish
git stash 把改动文件放到栈存
git stash lish 栈存[0] -----> 新栈存
git stash apply ----> 默认放第一个栈存
git commit 系统找不到指定的路径


- git log --pretty=oneline 出现冒号后 按q(quit)
- git reset --hard fcf46c423554ae1816ac34edf685c75b0906f4d5
- git log --pretty=oneline


git checkout -- readme.txt 撤销修改
把readme.txt文件在工作区的修改全部撤销,这里有两种情况:
一种是readme.txt自修改后还没有被放到暂存区,现在,撤销修改就回到和版本库一模一样的状态;
一种是readme.txt已经添加到暂存区后,又作了修改,现在,撤销修改就回到添加到暂存区后的状态。
总之,就是让这个文件回到最近一次git commit或git add时的状态。
打包后 git push 版本不对
- 可能是要把所有的文件夹都拉一遍 然后只改需要传的文件夹 再push
git reflog Git提供了一个命令用来记录你的每一次命令:
现在总结一下:
-
HEAD指向的版本就是当前版本,因此,Git允许我们在版本的历史之间穿梭,使用命令git reset --hard commit_id。 -
穿梭前,用
git log可以查看提交历史,以便确定要回退到哪个版本。 -
要重返未来,用
git reflog查看命令历史,以便确定要回到未来的哪个版本。
5. 命名规范
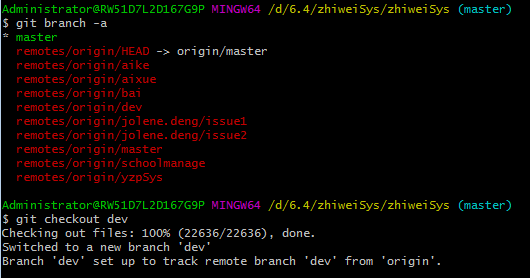
6.git clone文件后,文件夹为空 (地址正确,有.git文件)
- git branch -a 查看分支
- git checkout 切换分支
7.pull拉取代码之前, 把自己修改的代码存在堆栈
- git stash 存进去
- git stash pop 取出来
8.更新了分支却branch检测不到
- git fetch 更新分支

 1 .DS_Store
 2 node_modules/
 3 /dist/
 4 npm-debug.log*
 5 yarn-debug.log*
 6 yarn-error.log*
 7
 8 # Editor directories and files
 9 .idea
10 .vscode
11 *.suo
12 *.ntvs*
13 *.njsproj
14 *.sln
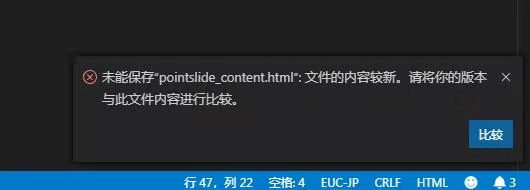
9. VSCode git pull后 文件无法保存
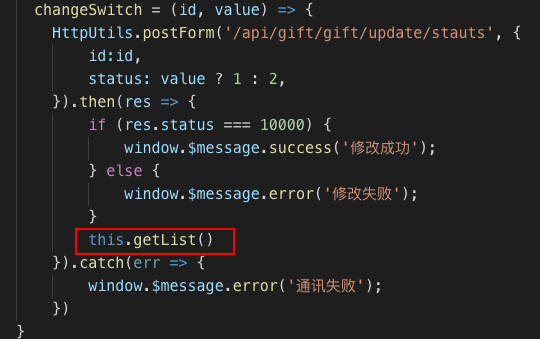
10.修改状态后一定要重新刷新列表!!!
  getList() {
    HttpUtils.postForm('/api/gift/gift/list', {
        ...this.state.form,
    }).then(res => {
        // console.log('钱包列表',res)
        if (res.status === 10000) {
            this.setState({
                data: res.data,
            })
        }
    }).catch(err => {
        console.log(err);
        window.$message.error('通讯失败')
    })
}

11. 
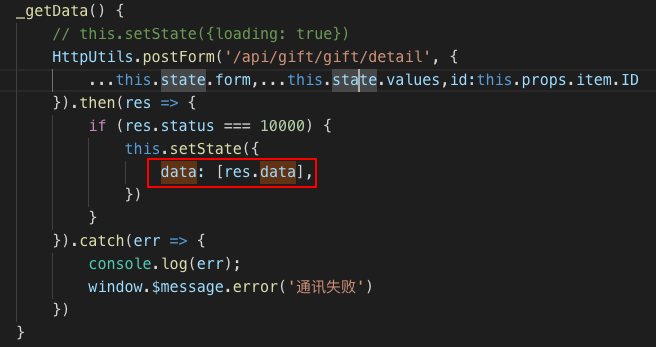
返回数据

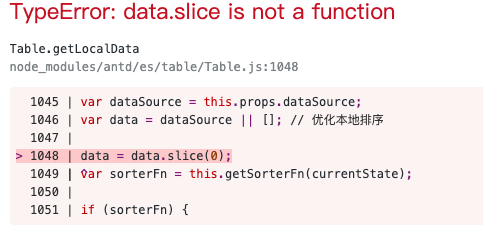
slice方法是返回一个新的数据,而后台返回的数据时一个对象,所以要给 data数据加一个中括号,改为数组格式
解决方法:
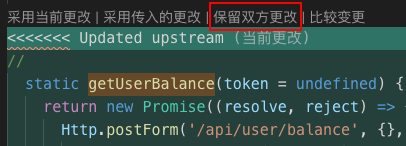
1. 取消保存文件
2. 在启动的程序中看报错 (会有报错 ======= 或者是<<<<<<<), 然后找到文件 选择 保留双方更改 / 采用传入的更改
12.
大概错误发生在Select组件里面 然后就去组件里找

发现多了一个∂字母
13.git 代理 浏览器可以翻墙 而pod install 报错 403

// 查看当前代理设置

git config --global http.proxy

// 设置当前代理为 http://127.0.0.1:1080 或 socket5://127.0.0.1:1080

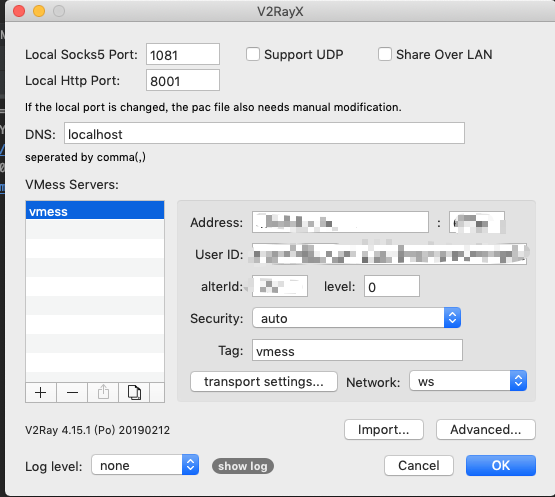
git config --global http.proxy 'http://127.0.0.1:自己的http端口'  设置http翻墙代理

git config --global https.proxy 'http://127.0.0.1:这里是8001' 设置https翻墙代理
git config --global http.proxy 'socks5://127.0.0.1:1080' git config --global https.proxy 'socks5://127.0.0.1:1080' / / 删除代理 git config --global --unset https.proxy
14. 解决 页面刷新报错 原因位置: URL 地址栏

game_id:this.props.history&&this.props.history.location.state.id

解决方案 : 给需要跳转的页面添加个# 符号 , 并且加上网页的标识符
15.像这种在特定数组中取某个值的接口,一定要做条件判断,不然又得空数组会报错,找起来也麻烦
 if (res.status === 10000) {
    this.setState({
      lastProfit: res.data.data.length  && res.data.data[0].profit
    })
  }
16.动态改变 LottieView 插件的速度speed,
 settimeout=()=>{
    this.setState({
      speed1:parseInt(Math.random()*100)/100,
      speed2:parseInt(Math.random()*100)/100
    })
    this.timer=setTimeout(()=>{
      this.settimeout();
    },1000)
  }
安卓动,ios速度不变?

试了重装APP 删除ios文件夹下的pods 文件然后重新pod install 都没用
最后复制了这段话才可以
17.打包Androio Studio 最终release版本
https://www.oracle.com/technetwork/java/javase/downloads/jdk8-downloads-2133151.html
我第六步没做也成功了
Mac 系统安卓APK到安卓手机
adb install 路径(把文件移动到终端即可)
18.设置代理解决跨域问题 别人给了接口地址
http://192.168.1.173:8889/api/v1/contract/balance?key=asdkjaslkdjhaskdqw325e45q6we&exchange=huobidm&access_key=bvrge3rf7j-f82060a9-fb26d31b-df478&secret_key=71727f50-3c4e4695-16b7da4a-7751a
然后设置了代理 setupProxy.js 文件
const proxy = require('http-proxy-middleware')

module.exports = function (app) {
    app.use(proxy('/boot', {
        target: 'http://192.168.1.173:8889',
        pathRewrite: {
            '^/boot': '', // rewrite path
        },
        changeOrigin: true
    }))
};
再用post请求
 window.$http.postForm('/boot/api/v1/contract/balance', {
           key:'asdkjaslkdjhaskdqw325e45q6we',
           exchange:'huobidm',
           access_key:'bvrge3rf7j-f82060a9-fb26d31b-df478&secret_key=71727f50-3c4e4695-16b7da4a-7751a'
        }).then(res => {
            this.setState({loading: false})
           console.log('让我康康',res)
        })
发现页面报错404

或者 200 没数据(访问了自己本地的页面)
解决方法:改为get请求
 window.$http.get('/boot/api/v1/contract/balance?key=asdkjaslkdjhaskdqw325e45q6we&exchange=huobidm&access_key=bvrge3rf7j-f82060a9-fb26d31b-df478&secret_key=71727f50-3c4e4695-16b7da4a-7751a').then(res => {
           console.log('让我康康',res)
        }).catch(err => {
            window.$message.error('通讯失败')
            console.log(err)
        })
成功获取数据
19. 局域网搭建服务器跑html项目
1 下载node.js
官网地址: https://nodejs.org
下载完成后在命令行输入命令$ node -v以及$ npm -v检查版本,确认是否安装成功。
2 下载http-server
在终端输入:$ npm install http-server -g
3 开启 http-server服务
终端进入目标文件夹,然后在终端输入:
$ http-server -c-1   (⚠️只输入http-server的话,更新了代码后,页面不会同步更新)
Starting up http-server, serving ./
Available on:
  http://127.0.0.1:8080
  http://192.168.8.196:8080
Hit CTRL-C to stop the server
4 关闭 http-server服务
按快捷键CTRL-C
终端显示^Chttp-server stopped.即关闭服务成功。
20.减小webpack打包后文件大小/解决打包后文件过大问题
找到根目录的config-overrides.js文件
插入
config.devtool = false;
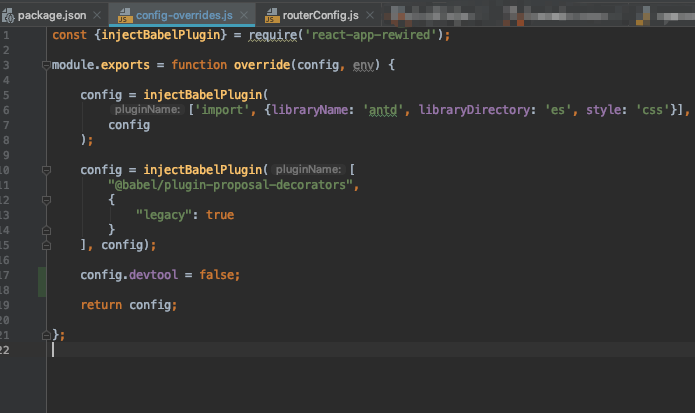
关闭devtool工具中的 source-map (debug工具) 打包以后的文件就会少了js.map文件
21.发送build文件给后台
两个项目(前台/后台)用一个域名 ,可以将两个项目的同一个文件夹下的文件放在一起
项目A前台: static文件夹(包括JS/CSS文件夹)和Views(index.html) 文件夹
项目B后台: static文件夹(包括JS/media文件夹)和Views(admin.html) 文件夹
把 两个JS文件夹下的文件合并到一起 组成一个JS文件夹
把index.html 和 admin.html 文件放在一起 组成一个Views文件夹
22.前台获取不到JSON文件
可以用express下的app.post
const exampleProxy = createProxyMiddleware('/',options);

const options = {
  target: 'https://www.fowin.io', // target host
  changeOrigin: true,               // needed for virtual hosted sites
  // pathRewrite : {
  //   '^/api/' : ''
  // }
};

//这个要放在 代理前面 不然无法生效
app.post('/static/nav.json',(req,res)=>{
  res.json(navList) //navList 是本地JSON文件
});

//代理
app.use(exampleProxy);
然后在页面里获取
 getFooterNav() {
    HttpUtils.postForm('/static/nav.json').then(res => {
      this.setState({
        navList:res //这里是获取的main.js文件中post的本地JSON数据
      })
    }).catch(err => {

    })
  }
这里请求了网络,虽然在前端不能真正的获取 代理下的/static/nav.json文件
但是 在后端部署的时候 因为都是本地是有 static文件夹下是有nav.json文件的 所以可以获取到数据
23.修改代码后 有的东西不一定刷新就会生效 要清除掉本地的缓存才可以。
