文档 https://router.vuejs.org/zh-cn
npm install vue-router --save
调用

import Vue from 'vue'
import VueRouter from 'vue-router'

Vue.use(VueRouter)
流程
a. views目录内组件
b. router目录映射路由js (路径与a中组件)
c. main.js 对象属性router
d. 标签router-link / router-view
1.基本路由
index.html
routeview 标签选中自带class .router-link-active ,定义样式

<!DOCTYPE html>
<html>
  <head>
    <meta charset="utf-8">
    <meta name="viewport" content="width=device-width,initial-scale=1.0">
    <link rel="stylesheet" href="./static/css/bootstrap.css">
    <title>vue_demo</title>

    <style>
      .router-link-active {
        color: red !important;
      }
    </style>

  </head>

  <body>
    <div id="app">

    </div> <!--app -->
  </body>

</html>
views/About.vue
与路由相关组件放置与views目录下

<template>
<div>about</div>
</template>

<script>
export default {

}

</script>

<style>

</style>
views/Home.vue

<template>
<div>home</div>
</template>

<script>
export default {

}

</script>

<style>

</style>
router/index.js
绑定path与对应views下的组件
使用redirect 跳转默认页

/**
 * Created by infaa on 2018/9/21.
 */
import Vue from 'vue'
import VueRouter from 'vue-router'
import About from '../views/About.vue'
import Home from '../views/Home.vue'

Vue.use(VueRouter)

export default new VueRouter({
  routes: [
    {
      path: '/about',
      component: About
    },
    {
      path: '/home',
      component: Home
    },
    {
      path: '/',
      redirect: '/about'
    }
  ]

})
app.js
使用router 方法,利用router-link to=''xxx“区分 ,router-view 自动匹配到views下的组件

<template>
  <div>
    <div class="row">
      <div class="col-xs-offset-2 col-xs-8">
        <div class="page-header"><h2>Router Basic - 01</h2></div>
      </div>
    </div>

    <div class="row">
      <div class="col-xs-2 col-xs-offset-2">
        <div class="list-group">
          <router-link to="/about" class="list-group-item">About</router-link>
          <router-link to="/home" class="list-group-item">Home</router-link>
        </div>
      </div>
      <div class="col-xs-6">
        <div class="panel">
          <div class="panel-body">
              <router-view></router-view>

          </div>
        </div>
      </div>
    </div>
  </div>
</template>

<script>
export default {

}

</script>

<style>

</style>
main.js 需要注册router

/**
 * Created by infaa on 2018/9/19.
 */
import Vue from 'vue'
import App from './App'
import router2 from './router'

/* eslint-disable no-new */

new Vue({
  el: '#app',
  components: {App},
  template: '<App/>',
  router: router2
})
2. 嵌套路由
页面内子页面含有需要路由页面(子标签页等)
注册路由时,使用children :[] ,注意path: '/home/childa' 绝对路径形式 或者 path:'childa'
代码略
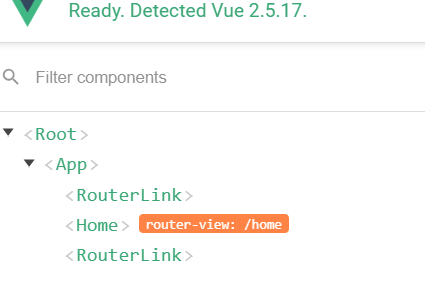
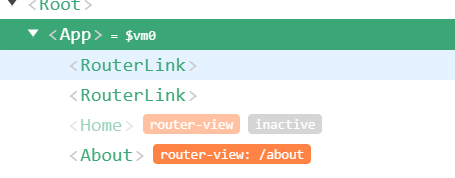
3. 缓存路由组件
路由组件切换时死亡,切换回来时重新创建。
来回切换时内容消失

调试时发现切换后消失,只有about home之一

缓存 对router-view使用keepalive标签
app.uve

<template>
  <div>
    <div class="row">
      <div class="col-xs-offset-2 col-xs-8">
        <div class="page-header"><h2>Router Basic - 01</h2></div>
      </div>
    </div>

    <div class="row">
      <div class="col-xs-2 col-xs-offset-2">
        <div class="list-group">
          <router-link to="/about" class="list-group-item">About</router-link>
          <router-link to="/home" class="list-group-item">Home</router-link>
        </div>
      </div>
      <div class="col-xs-6">
        <div class="panel">
          <div class="panel-body">
            <keep-alive>
                    <router-view></router-view>
            </keep-alive>


          </div>
        </div>
      </div>
    </div>
  </div>
</template>

<script>
export default {

}

</script>

<style>

</style>
切换后input内容不消失。
路由组件不重建

4. url参数传递
path: '/home/msssage/:urlid'
传递router-link to="`/home/message/${message.id}`"
routerview的id {{route.params.id}}
routerview的内容
const id = this.$route.params.id*1 (*1 转化为num)
this.msgDetail = this.allMSG.find(detail => detail.di ===id)

<template>
  <div>
    <p>ID:{{$route.params.id}}</p>
    <ul>
      <li>id:{{messageDetail.id}}</li>
      <li>title:{{messageDetail.title}}</li>
      <li>content:{{messageDetail.content}}</li>
    </ul>
  </div>
</template>

<script>
export default {
  data () {
    return {
      messageDetail: {}
    }
  },
  mounted () {
    setTimeout(() => {
      const allMessageDetails = [
        {
          id: 1,
          title: 'massage001',
          content: 'message001 content'
        },
        {
          id: 2,
          title: 'massage002',
          content: 'message002 content'
        },
        {
          id: 3,
          title: 'massage003',
          content: 'message003 content'
        },
        {
          id: 4,
          title: 'massage004',
          content: 'message004 content'
        }
      ]
      this.allMessageDetail = allMessageDetails
      const id = this.$route.params.id * 1
      this.messageDetail = allMessageDetails.find(detail => detail.id === id)
    }, 1000)
  },
  watch: {
    $route: function (value) { // 路由路径变化param
      const id = value.params.id * 1
      this.messageDetail = this.allMessageDetail.find(detail => detail.id === id)
    }
  }
}
</script>

<!-- Add "scoped" attribute to limit CSS to this component only -->
<style>
</style>
5. router-view 参数传递
router-view msg="abc"
通过props
6. 编程式路由导航
影响返回前进
this.$router.push
this.$router.replace

<template>
  <div>
    <ul>
      <li v-for="message in messages" :key="message.id">
        <router-link :to="`/home/message/detail/${message.id}`">{{message.title}}</router-link>
        <button @click="pushShow(message.id)">push查看</button>
        <button @click="replaceShow(message.id)">replace查看</button>
      </li>
    </ul>
    <button @click="$router.back()">回退</button>
    <hr>
    <router-view></router-view>
  </div>
</template>

<script>
export default {
  data () {
    return {
      messages: []
    }
  },
  mounted () {
    // 模拟ajax请求从后台获取数据
    setTimeout(() => {
      const messages = [
        {
          id: 1,
          title: 'massage001',
          content: 'message001 content'
        },
        {
          id: 2,
          title: 'massage002',
          content: 'message002 content'
        },
        {
          id: 3,
          title: 'massage003',
          content: 'message003 content'
        },
        {
          id: 4,
          title: 'massage004',
          content: 'message004 content'
        }
      ]
      this.messages = messages
    }, 1000)
  },
  methods: {
    pushShow (id) {
      this.$router.push(`/home/message/detail/${id}`)
    },
    replaceShow (id) {
      this.$router.replace(`/home/message/detail/${id}`)
    }
  }
}
</script>

<!-- Add "scoped" attribute to limit CSS to this component only -->
<style>
</style>
this.$router.back
## 注意route 当前组件
router 路由器 push replace back方法
