基于Spring的开发框架,旨在简化配置快速开发,是新一代web开发框架。下面介绍一下常用的几个功能:
1、Spring单元测试
针对DAO层
(1) @RunWith(Spring.class),表示要在Spring环境中做测试, 于是就可以使用@Autowired等注解了,
(2) @SpringBootTest(classes=TestBeanConfiguration.class),表示可以使用SpringBoot环境了,这样可以用@Autowired注解,把@Mapper注释过的Mapper对象引入.为了引入外部依赖的Bean对象,需要指定classes=TestBeanConfiguration.class.
注意: 之所以要指定classes=TestBeanConfiguration.class,这时因为Product这个类,并没有使用@Component等注解注入IOC容器.
(3) @Transactional注解来开启事务
(4) @Rollback(true)表示开启回滚数据功能,默认为True.
@RunWith(SpringRunner.class)
@SpringBootTest(classes=TestBeanConfiguration.class)
@Transactional
@Rollback(true)
public class ProductMapperTest {

    @Autowired
    private ProductMapper mapper;

    @Autowired
    private Product product;

    @Before
    public void setUp(){
        product.setPname("持续交付");
        product.setType("书籍");
        product.setPrice(69d);
    }

    @Test
    public void testAdd() {
        Assert.assertEquals(Integer.valueOf(1), mapper.add(product));
    }

}
针对Service层
@RunWith(SpringRunner.class)
@SpringBootTest(webEnvironment=WebEnvironment.RANDOM_PORT)
public class ProductControllerTest {

    @Autowired
    private TestRestTemplate template;

    @Test
    public void test() {
        String body = template.getForObject("/ms/product/1", String.class);
        Assert.assertEquals("success", body);
    }

}
针对Controller
@RunWith(SpringRunner.class)
@SpringBootTest(webEnvironment=WebEnvironment.RANDOM_PORT)
public class ProductControllerTest {

    @Autowired
    private TestRestTemplate template;

    @Test
    public void test() {
        String body = template.getForObject("/ms/product/1", String.class);
        Assert.assertEquals("success", body);
    }

}
2、Springboot配置文件
@Configuration
@EnableAutoConfiguration //自动加载配置信息
@ComponentScan("com.kelly")//使包路径下带有注解的类可以使用@Autowired自动注入
public class StartApplication {
    public static void main(String[] args) {
        SpringApplication.run(StartApplication.class, args);
    }
}
我们使用@Value("${属性名}")来注入application.yml/application.properties的配置值
当我们使用自定义配置文件的时候,只需要:
@Component
@ConfigurationProperties(prefix="defineTest")
@PropertySource("classpath:define.properties")
public class DefineEntity {

    private String pname;

    private String password;

    public String getPname() {
        return pname;
    }

    public void setPname(String pname) {
        this.pname = pname;
    }

    public String getPassword() {
        return password;
    }

    public void setPassword(String password) {
        this.password = password;
    }
}
在使用的时候注入DefineEntity Bean即可。
注意:如果需要使用@PropertySource注解的方式加载值,那就要使用properties文件。
3、多环境配置文件
在Spring Boot中多环境配置文件名需要满足application-{profile}.properties的格式,其中{profile}对应你的环境标识,比如:
application-dev.properties:开发环境,
application-test.properties:测试环境
application-prod.properties:正式环境
下面介绍三种配置文件的加载方式:
1)直接在启动类上使用@PropertySource注解来加载不同的配置文件

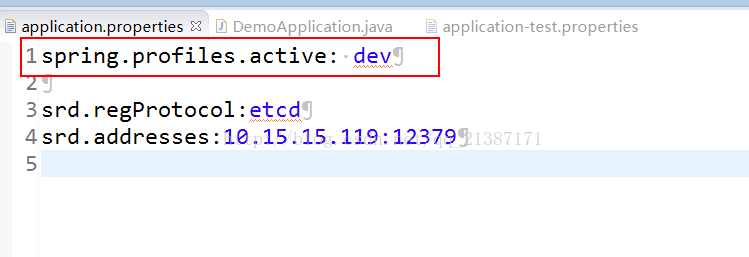
2)修改spring.profiles.active属性
3)执行命令行
如上面介绍所讲的一样,我们可以使用命令行,比如执行java -jar xxx.jar --spring.profiles.active=test
通过上面,三种不同执行方式,我们也可以发现配置文件的优先级,优先级高的配置或覆盖优先级低的配置,同时公共配置属性放到application.properties,私有的配置属性放在application-{profile}.properties文件中。