常见的SpringBoot外部配置有常规属性配置、类型安全的配置、日志配置、Profile配置
一、常规属性配置
在spring中,注入properties中的配置值时,需要两步:
- 通过注解@PropertySource指明 properties文件的位置
- 通过注解@Value注入配置值
而在springboot中,只要将配置项加载配置文件中,就可以通过注解@Value注入
例如我在application.properties中增加如下配置:
demo:
  userName: zhangsan
  message: HelloWorld
然后在类中就可以直接通过注解@Value注入并获取到值了:
 @Value("${demo.userName}")
    private String userName;

 @Value("${demo.message}")
    private String message;
二、类型安全的配置
上面的配置方式,在配置项很多的情况下,如果每个都用注解@Value注入就很繁琐了,针对这种情况,springboot提供了一种称之为基于安全类型的配置方式,通过注解@ConfigurationProperties将properties(或者yml)属性和一个bean及其属性关联,从而实现类型安全的配置。下面举一个例子说明,本次我使用yml配置文件。
1、首先新建一个自定义的配置文件user.yml
user:
  userName: zhangsan
  age: 26
  sex: male
2、创建一个名为UserSettings.java的bean,与配置项中的属性进行关联
package com.hyc.settings;

import org.springframework.boot.context.properties.ConfigurationProperties;
import org.springframework.context.annotation.PropertySource;
import org.springframework.stereotype.Component;

/**
 * 基于类型安全的配置:将属性中的配置映射成一个bean
 * 注解@PropertySource指定自定义配置文件的路径
 * 注解@ConfigurationProperties加载配置文件中的配置项,prefix指定配置的前缀
 */
@Component
@PropertySource(value = "classpath:user.yml")
@ConfigurationProperties(prefix = "user")
public class UserSettings {
    private String userName;

    private int age;

    private String sex;

    public String getUserName() {
        return userName;
    }

    public void setUserName(String userName) {
        this.userName = userName;
    }

    public int getAge() {
        return age;
    }

    public void setAge(int age) {
        this.age = age;
    }

    public String getSex() {
        return sex;
    }

    public void setSex(String sex) {
        this.sex = sex;
    }
}
上面的bean中,有三个注解,分别代表着:
- @Component注解使这个类能够被扫描到;
- @PropertySource注解中的value属性定义对应的配置文件的路径,如果是在application.yml(或application.properties)中,则不需要此注解;
- @ConfigurationProperties注解将加载指定配置文件中的配置项,并通过属性prefix指定配置的前缀,本例中是user
需要注意的是,这种方式需要增加下面的依赖:
<dependency>
            <groupId>org.springframework.boot</groupId>
            <artifactId>spring-boot-configuration-processor</artifactId>
            <optional>true</optional>
</dependency>
3、注入配置
直接在需要使用配置项值的类中,通过注解@Autowired注入bean,并通过调用它的get方法来获取:
/**
     * 将配置项映射类自动注入,就能调用它的get方法获取配置值了
     */
    @Autowired
    private UserSettings user;


    @RequestMapping("/")
    String index() {

        return "name: " + user.getUserName() + " age:" + user.getAge() + " sex:" + user.getSex();
    }
明显这种方式看上去更加整洁清晰。
三、日志配置
SpringBoot支持Java Util Logging、 Log4J、SLF4J和Logback多种日志框架,但是默认是logback,这个可以在日志依赖配置
spring-boot-starter-logging-2.1.0.RELEASE.pom中找到,配置如下:
  <groupId>org.springframework.boot</groupId>
  <artifactId>spring-boot-starter-logging</artifactId>
  <version>2.1.0.RELEASE</version>
  <name>Spring Boot Logging Starter</name>
  <description>Starter for logging using Logback. Default logging starter</description>
  <url>https://projects.spring.io/spring-boot/#/spring-boot-parent/spring-boot-starters/spring-boot-starter-logging</url>
上面红色部分描述了springboot默认使用的是LogBack,但是在这个pom文件中,已经加入了其他日志的依赖,如下:
 <dependencies>
    <dependency>
      <groupId>ch.qos.logback</groupId>
      <artifactId>logback-classic</artifactId>
      <version>1.2.3</version>
      <scope>compile</scope>
    </dependency>
    <dependency>
      <groupId>org.apache.logging.log4j</groupId>
      <artifactId>log4j-to-slf4j</artifactId>
      <version>2.11.1</version>
      <scope>compile</scope>
    </dependency>
    <dependency>
      <groupId>org.slf4j</groupId>
      <artifactId>jul-to-slf4j</artifactId>
      <version>1.7.25</version>
      <scope>compile</scope>
    </dependency>
  </dependencies>
所以我们使用时不需要额外增加相关日志框架的依赖了!!!
- 日志级别及优先级为trace<debug<info<warn<error;
- 默认是info级别,就是会输出优先级大于等于info的日志;
- 日志默认输出到控制台,可以设置输出到文件,并配置文件路径;
下面以上述三点为例,在application.yml中进行配置:
1 logging:
2   file: ./log/demo.log
3   level:
4     com.hyc.*: trace
其中:
- file用来配置日志路径及文件名;
- level用来配置日志级别,需要注意的是level需要以map的形式配置,不能直接在level后配置日志级别,本例中的配置意义是com.hyc下所有包中的日志级别都是trace,这样就可以给不同的包配置不同的日志级别了;
下面来写一个测试类,测试日志的输出:
@RestController
@SpringBootApplication
public class DemoApplication {

    Logger logger = LoggerFactory.getLogger(getClass());

    @RequestMapping("/log")
    public void logging() {
        logger.trace("trace logger");
        logger.debug("debug logger");
        logger.info("info logger");
        logger.warn("warn logger");
        logger.error("error logger");
    }

    public static void main(String[] args) {

        SpringApplication app = new SpringApplication(DemoApplication.class);
        app.setBannerMode(Banner.Mode.OFF);
        app.run(args);
    }
}
运行,查看控制台和日志文件:
1️⃣控制台
2018-11-27 17:35:33.127 TRACE 7038 --- [nio-8088-exec-2] ication$$EnhancerBySpringCGLIB$$43201a05 : trace logger
2018-11-27 17:35:33.128 DEBUG 7038 --- [nio-8088-exec-2] ication$$EnhancerBySpringCGLIB$$43201a05 : debug logger
2018-11-27 17:35:33.128  INFO 7038 --- [nio-8088-exec-2] ication$$EnhancerBySpringCGLIB$$43201a05 : info logger
2018-11-27 17:35:33.128  WARN 7038 --- [nio-8088-exec-2] ication$$EnhancerBySpringCGLIB$$43201a05 : warn logger
2018-11-27 17:35:33.128 ERROR 7038 --- [nio-8088-exec-2] ication$$EnhancerBySpringCGLIB$$43201a05 : error logger
2️⃣日志文件
2018-11-27 17:35:32.788 TRACE 7038 --- [http-nio-8088-exec-1] ication$$EnhancerBySpringCGLIB$$43201a05 : trace logger
2018-11-27 17:35:32.789 DEBUG 7038 --- [http-nio-8088-exec-1] ication$$EnhancerBySpringCGLIB$$43201a05 : debug logger
2018-11-27 17:35:32.789  INFO 7038 --- [http-nio-8088-exec-1] ication$$EnhancerBySpringCGLIB$$43201a05 : info logger
2018-11-27 17:35:32.789  WARN 7038 --- [http-nio-8088-exec-1] ication$$EnhancerBySpringCGLIB$$43201a05 : warn logger
2018-11-27 17:35:32.789 ERROR 7038 --- [http-nio-8088-exec-1] ication$$EnhancerBySpringCGLIB$$43201a05 : error logger
因为配置的日志级别是trace,所以会输出trace及其以上级别的日志;
除上述配置之外,还有其他的一些配置,可以参考下面默认配置项进行配置:
logging.config= # Location of the logging configuration file. For instance, `classpath:logback.xml` for Logback.
logging.exception-conversion-word=%wEx # Conversion word used when logging exceptions.
logging.file= # Log file name (for instance, `myapp.log`). Names can be an exact location or relative to the current directory.
logging.file.max-history=0 # Maximum of archive log files to keep. Only supported with the default logback setup.
logging.file.max-size=10MB # Maximum log file size. Only supported with the default logback setup.
logging.level.*= # Log levels severity mapping. For instance, `logging.level.org.springframework=DEBUG`.
logging.path= # Location of the log file. For instance, `/var/log`.
logging.pattern.console= # Appender pattern for output to the console. Supported only with the default Logback setup.
logging.pattern.dateformat=yyyy-MM-dd HH:mm:ss.SSS # Appender pattern for log date format. Supported only with the default Logback setup.
logging.pattern.file= # Appender pattern for output to a file. Supported only with the default Logback setup.
logging.pattern.level=%5p # Appender pattern for log level. Supported only with the default Logback setup.
logging.register-shutdown-hook=false # Register a shutdown hook for the logging system when it is initialized.
四、Profile配置
profile用来提供不同的环境配置,如开发环境、生产环境和测试环境中,需要使用不同的端口,数据库等信息时,可以使用profile来完成,基本用法分以下几步:
- 针对不同的环境创建不同的配置文件application-{profile}.yml(或application-{profile.properties})
- 在全局配置application.yml中通过spring.profiles.active={profile}来指定环境
下面针对开发、测试、生产环境配置不同的端口和数据库,来完成一次多环境的配置:
第一步:创建不同环境的配置文件
1️⃣开发环境application-dev.yml
server:
  port: 8088
spring:
  datasource:
    driver-class-name: org.postgresql.Driver
    url: jdbc:postgresql://localhost:5433/dev?useUnicode=true&characterEncoding=utf-8&useSSL=false
    username: dev
    password: dev
2️⃣测试环境application.test.yml
server:
  port: 8088
spring:
  datasource:
    driver-class-name: org.postgresql.Driver
    url: jdbc:postgresql://10.192.22.5:5433/test?useUnicode=true&characterEncoding=utf-8&useSSL=false
    username: test
    password: test
3️⃣生产环境application-prod.yml
server:
  port: 88
spring:
  datasource:
    driver-class-name: org.postgresql.Driver
    url: jdbc:postgresql://10.192.22.3:5433/prod?useUnicode=true&characterEncoding=utf-8&useSSL=false
    username: prod
    password: prod
第二步:在全局配置application.yml中指定开发环境
server:
  port: 8088
  servlet:
    context-path: /
spring:
  profiles:
    active: dev
目录如下:
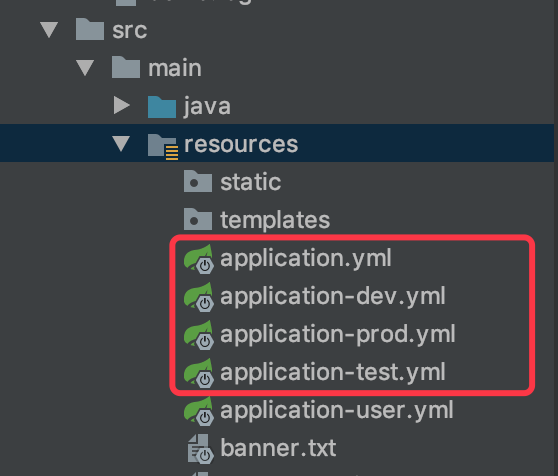
注意:active后面的就是application-{profile}.yml中的profile的值!!!
可以通过日志查看是否配置成功:
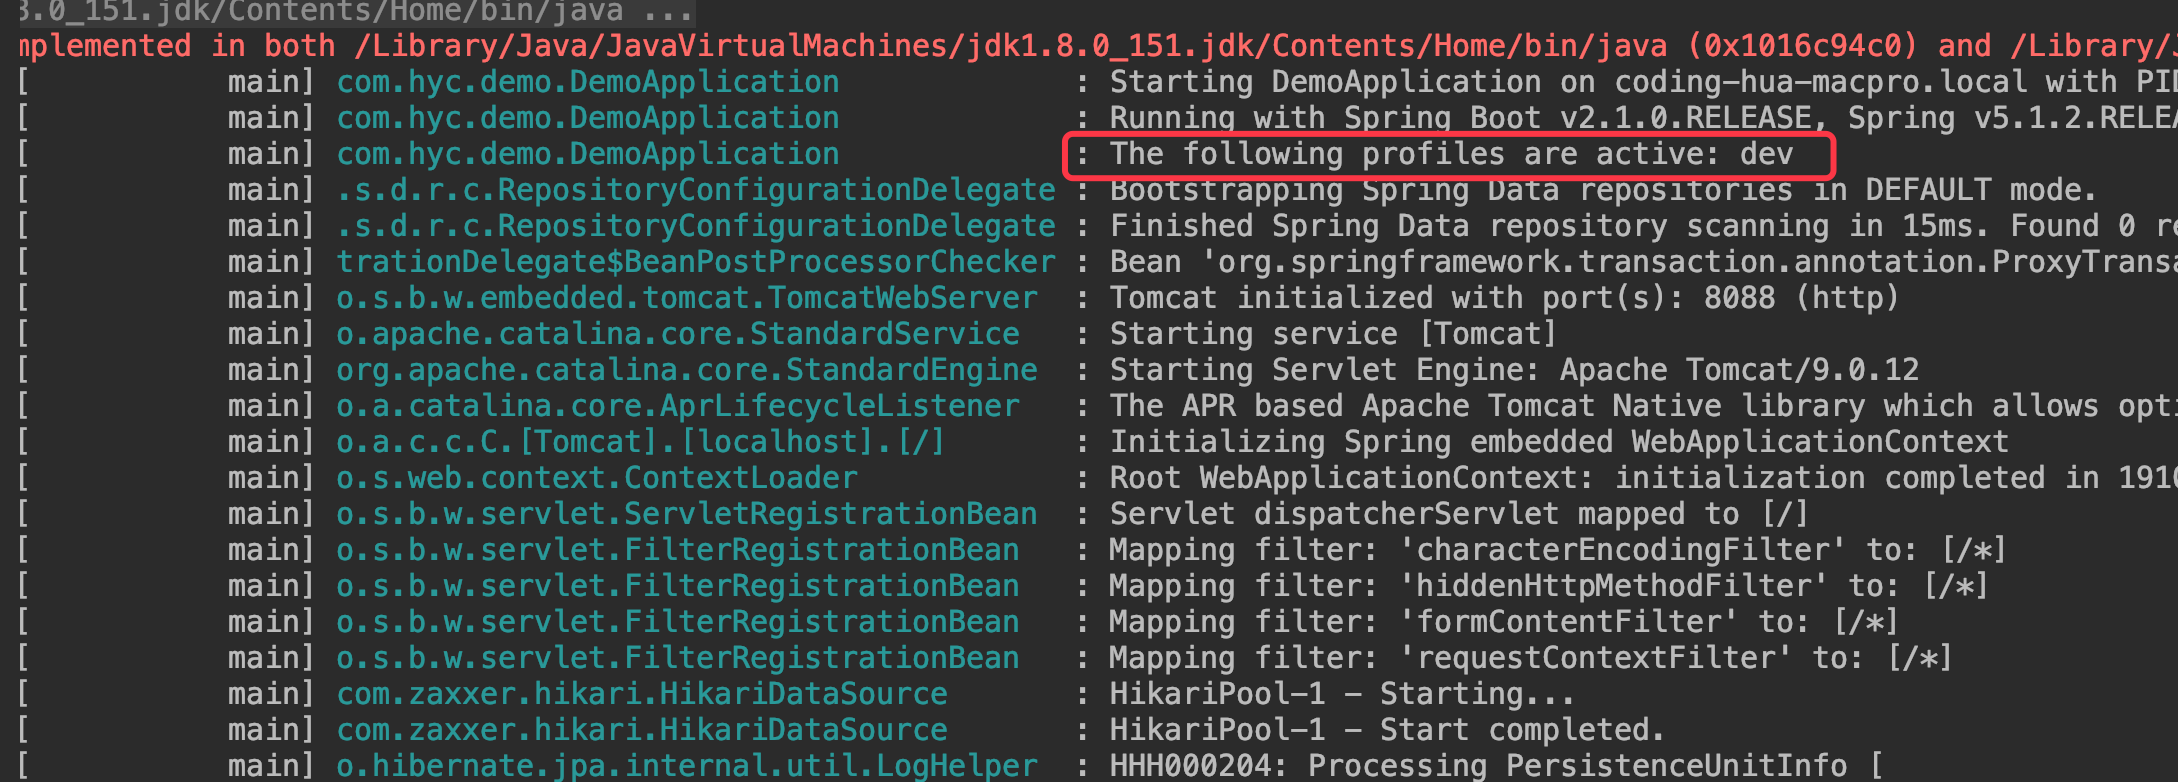
所以,在springboot中可以通过profile来配置多数据源!!
以上就是常用的配置。