1、Nutch简介
Nutch是一个由Java实 现的,开放源代码(open-source)的web搜索引擎。主要用于收集网页数据,然后对其进行分析,建立索引,以提供相应的接口来对其网页数据进行 查询的一套工具。其底层使用了Hadoop来做分布式计算与存储,索引使用了Solr分布式索引框架来做,Solr是一个开源的全文索引框架,从 Nutch 1.3开始,其集成了这个索引架构。
1.1 Nutch的目标
Nutch 致力于让每个人能很容易,同时花费很少就可以配置世界一流的Web搜索引擎。为了完成这一宏伟的目标,Nutch必须能够做到:
-
每个月取几十亿网页
-
为这些网页维护一个索引
-
对索引文件进行每秒上千次的搜索
-
提供高质量的搜索结果
-
以最小的成本运作
1.2 Nutch的优点
-
透明度
Nutch是开放源代码的,因此任何人都可以查看他的排序算法是 如何工作的。商业的搜索引擎排序算法都是保密的,我们无法知道为什么搜索出来的排序结果是如何算出来的。更进一步,一些搜索引擎允许竞价排名,比如百度, 这样的索引结果并不是和站点内容相关的。因此Nutch对学术搜索和政府类站点的搜索来说,是个好选择。因为一个公平的排序结果是非常重要的。
-
扩展性
你是不是不喜欢其他的搜索引擎展现结果的方式呢?那就用 Nutch 写你自己的搜索引擎吧。 Nutch 是非常灵活的,他可以被很好的客户订制并集成到你的应用程序中。使用Nutch 的插件机制,Nutch 可以作为一个搜索不同信息载体的搜索平台。当然,最简单的就是集成Nutch到你的站点,为你的用户提供搜索服务。
-
对搜索引擎的理解
我们并没有google的源代码,因此学习搜索引擎Nutch是个不错的选择。了解一个大型分布式的搜索引擎如何工作是一件让人很受益的事情。 在写Nutch的过程中,从学院派和工业派借鉴了很多知识:比如:Nutch的核心部分目前已经被重新用 Map Reduce 实现了。Map Reduce 是一个分布式的处理模型,最先是从 Google 实验室提出来的。并且 Nutch 也吸引了很多研究者,他们非常乐于尝试新的搜索算法,因为对Nutch 来说,这是非常容易实现扩展的。
1.3 Nutch与Lucene关系
Lucene是一个Java高性能全文索引引擎工具包可以方便的嵌入到各种实际应用中实现全文索引搜索功能。它提供了一系列API,能够对文档进行预处理、过滤、分析、索引和检索排序。在保持高效和简单的特点之外,还保证了开发者可以自由定制和组合各种核心功能。Nutch是一个应用程序,是一个以Lucene为基础实现的搜索引擎应用,Lucene为Nutch 提供了文本搜索和索引的API,Nutch不仅提供搜索,而且还有数据抓取的功能。
简单的说:
-
Lucene 不是完整的应用程序,而是一个用于实现全文检索的软件库。
-
Nutch 是一个应用程序,可以以 Lucene 为基础实现搜索引擎应用。
一个常见的问题是:我应该使用Lucene还是Nutch?
最简单的回答是:如果你不需要抓取数据的话,应该使用Lucene。
常见的应用场合是:你有数据源,需要为这些数据提供一个搜索页面。在这种情况下,最好的方式是直接从数据库中取出数据并用Lucene API建立索引。
在你没有本地数据源,或者数据源非常分散的情况下,应该使用Nutch。
2、Nutch安装
我们现在进行的是Nutch的单机版安装以及配置。
2.1准备
JDK版本:jdk-7u15-linux-x64.tar.gz
Nutch版本:apache-nutch-1.2-bin.tar.gz
Tomcat版本:apache-tomcat-7.0.61.tar.gz
2.2 安装CentOS
2.3 安装JDK
2.4 安装Tomcat
将apache-tomcat-7.0.61.tar.gz拷贝到CentOS系统内,解压。

tar -zxvf /home/hadoop/下载/apache-tomcat-7.0.61.tar.gz -C /opt
添加Tomcat环境变量
vim /etc/profile

source /etc/profile
# set tomcat environment
export CATALINA_HOME=/opt/apache-tomcat-7.0.61/
export CATALINA_BASE=/opt/apache-tomcat-7.0.61/
export PATH=$PATH:$ CATALINA_HOME/bin

启动tomcat
[root@localhost hadoop]# cd /opt/apache-tomcat-7.0.61/
[root@localhost apache-tomcat-7.0.61]# bin/catalina.sh start
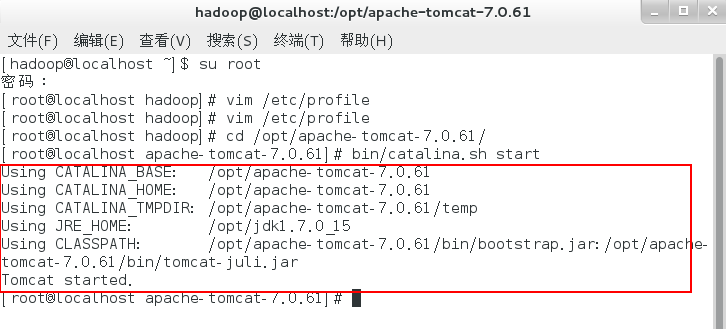
访问地址:http://127.0.0.1:8080
2.5 安装Nutch
将apache-nutch-1.2-bin.tar.gz拷贝到CentOS系统内,解压。
tar -zxvf /home/hadoop/下载/apache-tomcat-7.0.61.tar.gz -C /opt

测试Nutch命令
[root@localhost apache-tomcat-7.0.61]# cd /opt/nutch-1.2/
[root@localhost nutch-1.2]# bin/nutch
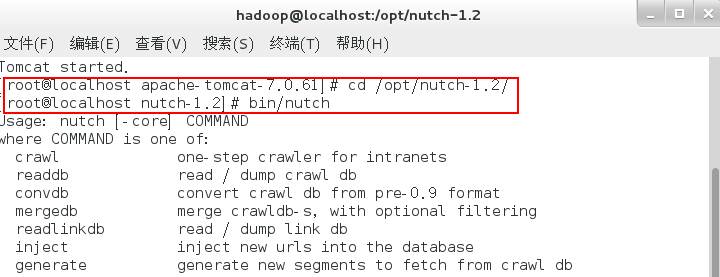
将nutch自带的war文件拷贝到webapps下并解压,修改文件夹名称为ROOT

启动tomcat
[root@localhost nutch-1.2]# cd /opt/apache-tomcat-7.0.61/
[root@localhost apache-tomcat-7.0.61]# bin/catalina.sh start
# bin/catalina.sh stop #关闭tomcat命令
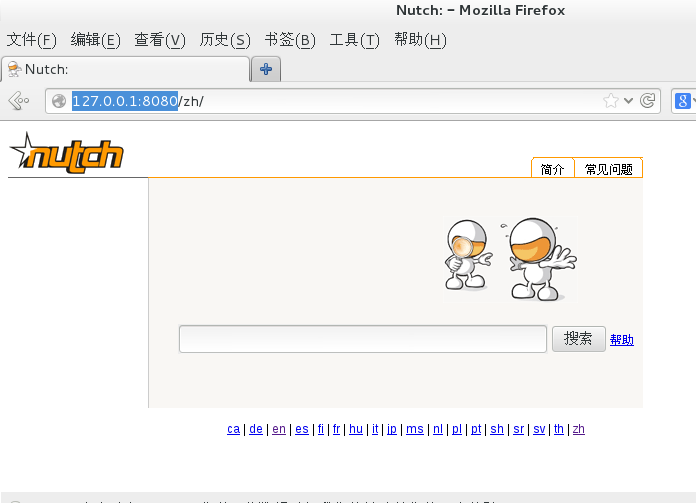
2.6 体验Nutch
增加要抓取的页面
[root@localhost apache-tomcat-7.0.61]# cd /opt/nutch-1.2/
[root@localhost nutch-1.2]# mkdir urls
[root@localhost nutch-1.2]#echo http://news.163.com/>>urls/163

编辑conf/crawl-urlfilter.txt文件,设定要抓取的网址信息。
[root@localhost nutch-1.2]#vim conf/crawl-urlfilter.txt
修改MY.DOMAIN.NAME为:
# accept hosts in MY.DOMAIN.NAME
+^http://([a-z0-9]*.)*163.com/
编辑conf/nutch-site.xml文件,增加代理的属性,并编辑相应的属性值

 1 <?xml version="1.0"?>
 2 <?xml-stylesheet type="text/xsl" href="configuration.xsl"?>
 3
 4 <!-- Put site-specific property overrides in this file. -->
 5
 6 <configuration>
 7 <property>
 8   <name>http.agent.name</name>
 9   <value>hehaiyang</value>
10   <description>HTTP 'User-Agent' request header. MUST NOT be empty - please set this to a single word uniquely related to your organization. NOTE: You should also check other related properties: http.robots.agents http.agent.description http.agent.url http.agent.email http.agent.version and set their values appropriately.</description>
11 </property>
12 <property>
13   <name>http.robots.agents</name>
14   <value>spider,*</value>
15   <description>The agent strings we'll look for in robots.txt files,
16   comma-separated, in decreasing order of precedence. You should
17   put the value of http.agent.name as the first agent name, and keep the
18   default * at the end of the list. E.g.: BlurflDev,Blurfl,*
19   </description>
20 </property>
21 <property>
22   <name>http.agent.description</name>
23   <value></value>
24   <description>Further description of our bot- this text is used in the User-Agent header. It appears in parenthesis after the agent name.</description>
25 </property>
26 <property>
27   <name>http.agent.url</name>
28   <value></value>
29   <description>A URL to advertise in the User-Agent header. This will appear in parenthesis after the agent name. Custom dictates that this should be a URL of a page explaining the purpose and behavior of this crawler.</description>
30 </property>
31 <property>
32   <name>http.agent.email</name>
33   <value></value>
34   <description>An email address to advertise in the HTTP 'From' request header and User-Agent header. A good practice is to mangle this address (e.g. 'info at example dot com') to avoid spamming.</description>
35 </property>
36 </configuration>
设定搜索目录(是由于默认的segment路径与我们实际的路径不符所造成的)
[root@localhost nutch-1.2]# cd /opt/apache-tomcat-7.0.61/
[root@localhost apache-tomcat-7.0.61]# vim webapps/ROOT/WEB-INF/classes/nutch-site.xml
增加四行代码,修改成为
<?xml version="1.0"?>
<?xml-stylesheet type="text/xsl" href="configuration.xsl"?>

<!-- Put site-specific property overrides in this file. -->

<configuration>
  <property>
    <name>searcher.dir</name>
    <value>/opt/nutch-1.2/crawl.demo</value>
  </property>
</configuration>
这里的/opt/nutch-1.2/crawl.demo是nutch路径,爬虫到时候的数据就会放在程序新建的crawl.demo下面,即nutch抓取的页面的保存目录。
nutch对中文的支持还不完善,需要修改tomcat文件夹下conf/server.xml文件
[root@localhost apache-tomcat-7.0.61]# vim conf/server.xml
增加两句,修改为
    <Connector port="8080" protocol="HTTP/1.1"
               connectionTimeout="20000"
               redirectPort="8443" URIEncoding="UTF-8" useBodyEncodingForURI="true" />
抓取网页
[root@localhost nutch-1.2]# bin/nutch crawl urls -dir crawl.demo -depth 2 -threads 4 -topN 5 >& crawl.log
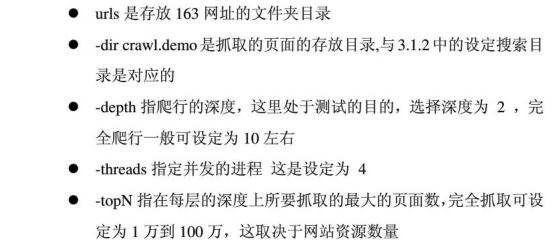
抓取过程写入crawl.log中,可以查看如下
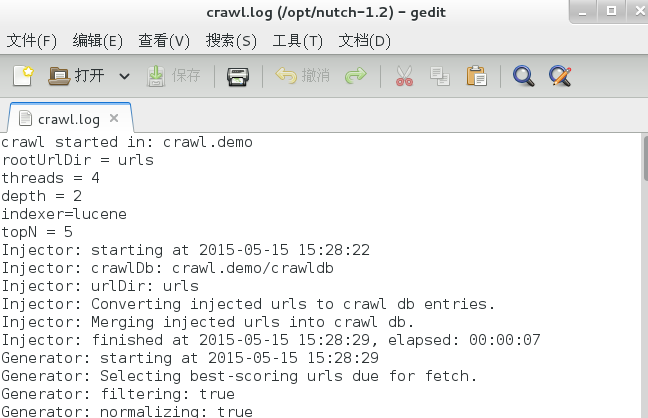
搜索发生错误时,查看crawl.log文件是一个不错的办法。
查看结果
非中文搜索结果:
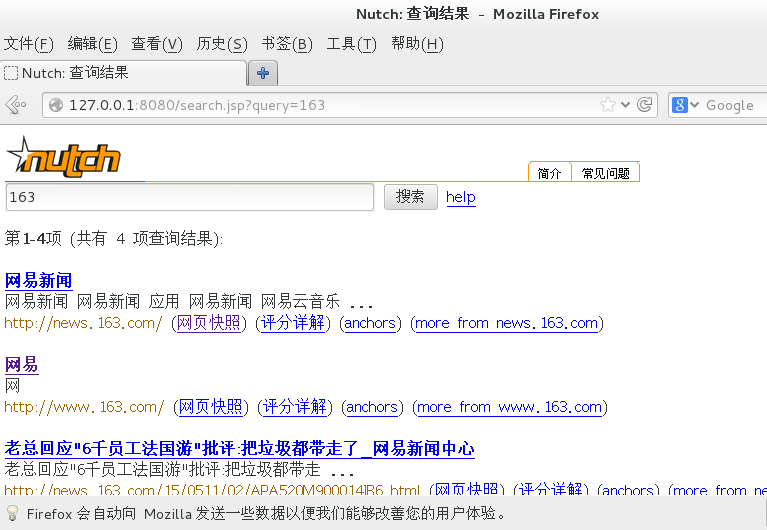
中文搜索结果:

