本章介绍如何自定义SpringBoot的start
在使用SpringBoot的是需要使用那个模块进引入那个模块的starter就行,例如:需要使用web模块,引入spring-boot-starter-web的starter就行。要使用jdbc就引入spring-boot-starter-jdbc
自定义starter理论
1、自动装配Bean
自动装配使用配置类(@Configuration)结合Spring4 提供的条件判断注解@Conditional及Spring Boot的派生注解如@ConditionOnClass完成;
2、配置自动装配Bean
将标注@Configuration的自动配置类,放在classpath下META- INF/spring.factories文件中,如:
1 # Auto Configure
2 org.springframework.boot.autoconfigure.EnableAutoConfiguration=
3 org.springframework.boot.autoconfigure.admin.SpringApplicationAdminJmxAutoConfiguration,
4 org.springframework.boot.autoconfigure.aop.AopAutoConfiguration,
3、自动装配顺序
在特定自动装配Class之前 @AutoConfigureBefore
在特定自动装配Class之后 @AutoConfigureAfter
指定顺序 @AutoConfigureOrder
4、启动器(starter)
启动器模块是一个空 JAR 文件,仅提供辅助性依赖管理,这些依赖可能用于自动装配或者其他类库
命名规约:
推荐使用以下命名规约
官方命名空间
– 前缀:“spring-boot-starter-”
– 模式:spring-boot-starter-模块名
– 举例:spring-boot-starter-web、spring-boot-starter-actuator、spring-boot-starter-jdbc
自定义命名空间
– 后缀:“-spring-boot-starter”
– 模式:模块-spring-boot-starter
– 举例:mybatis-spring-boot-starter
总结:
自动配置类
@Configuration //指定这个类是一个配置类
@ConditionalOnXXX //在指定条件成立的情况下自动配置类生效
@AutoConfigureAfter //指定自动配置类的顺序
@Bean //给容器中添加组件


@ConfigurationPropertie结合相关xxxProperties类来绑定相关的配置
@EnableConfigurationProperties//让xxxProperties生效加入到容器中


自动配置类要能加载
将需要启动就加载的自动配置类,配置在META‐INF/spring.factories


# Auto Configure
org.springframework.boot.autoconfigure.EnableAutoConfiguration=
org.springframework.boot.autoconfigure.admin.SpringApplicationAdminJmxAutoConfiguration,
org.springframework.boot.autoconfigure.aop.AopAutoConfiguration,
自定义starter定义
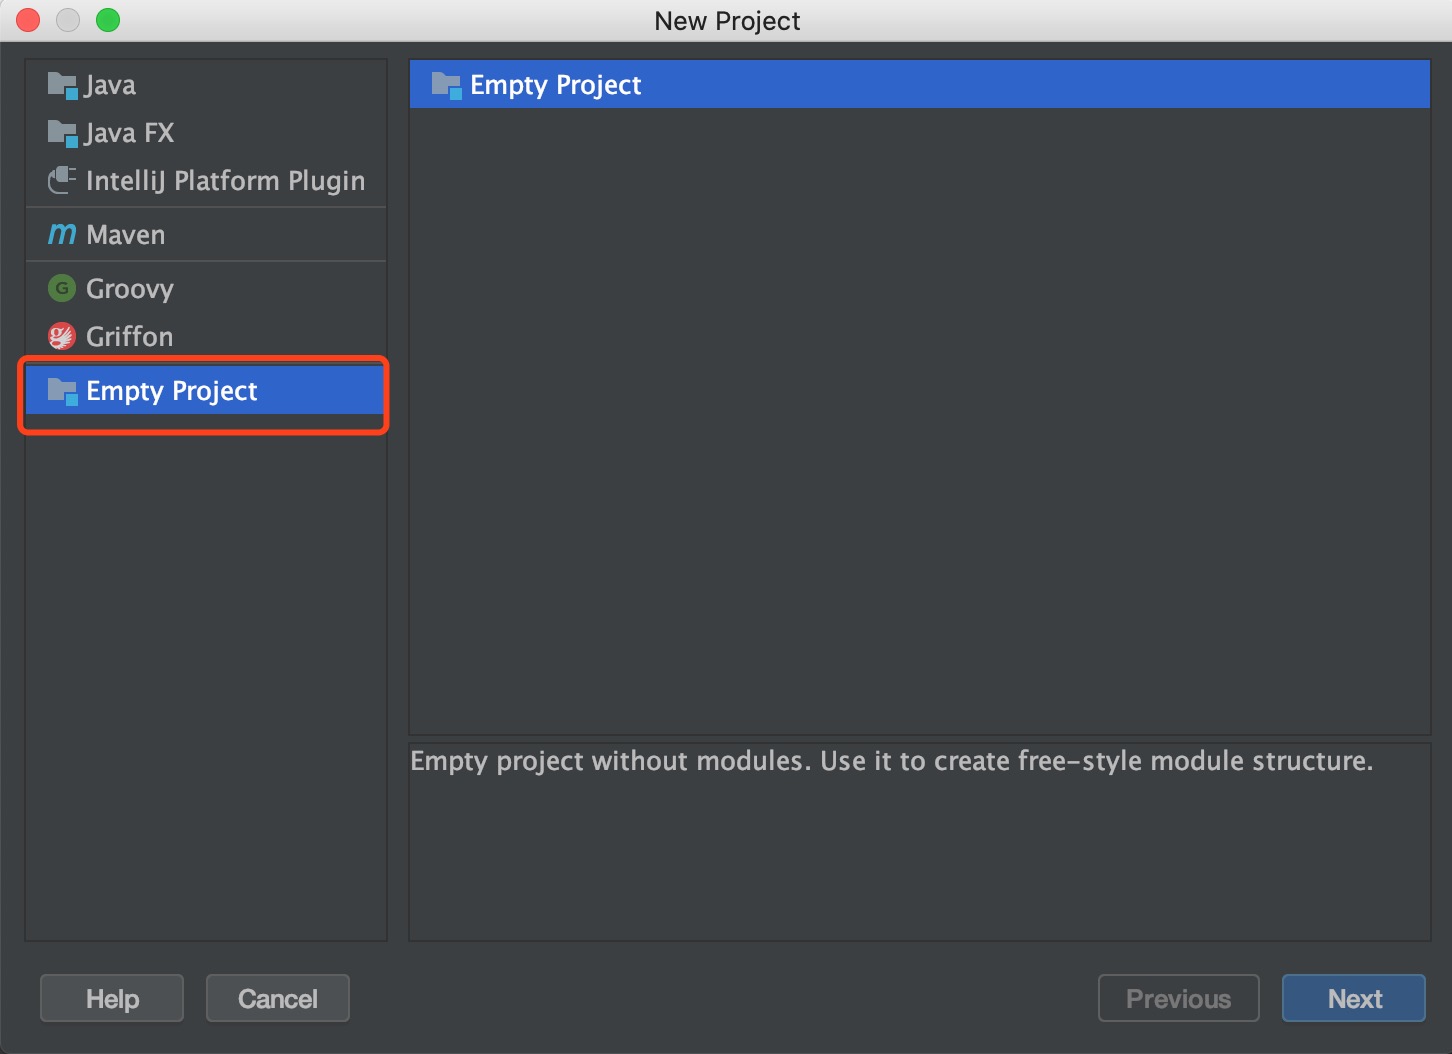
1、在idea中新建一个空工程
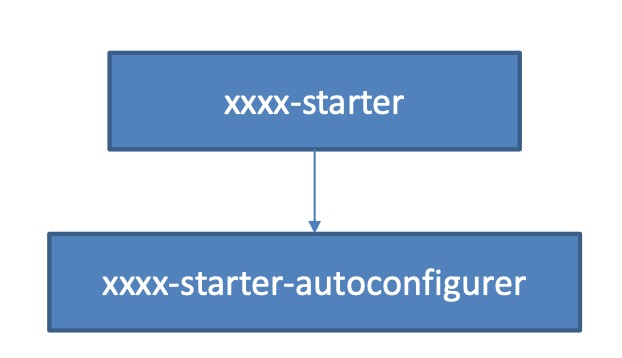
2、在空工程中,新建2个模块 hello-springboot-starter 和 hello-springboot-starter-autoconfiger,2个都是maven工程
hello-springboot-starter 依赖 hello-springboot-starter-autoconfiger工程
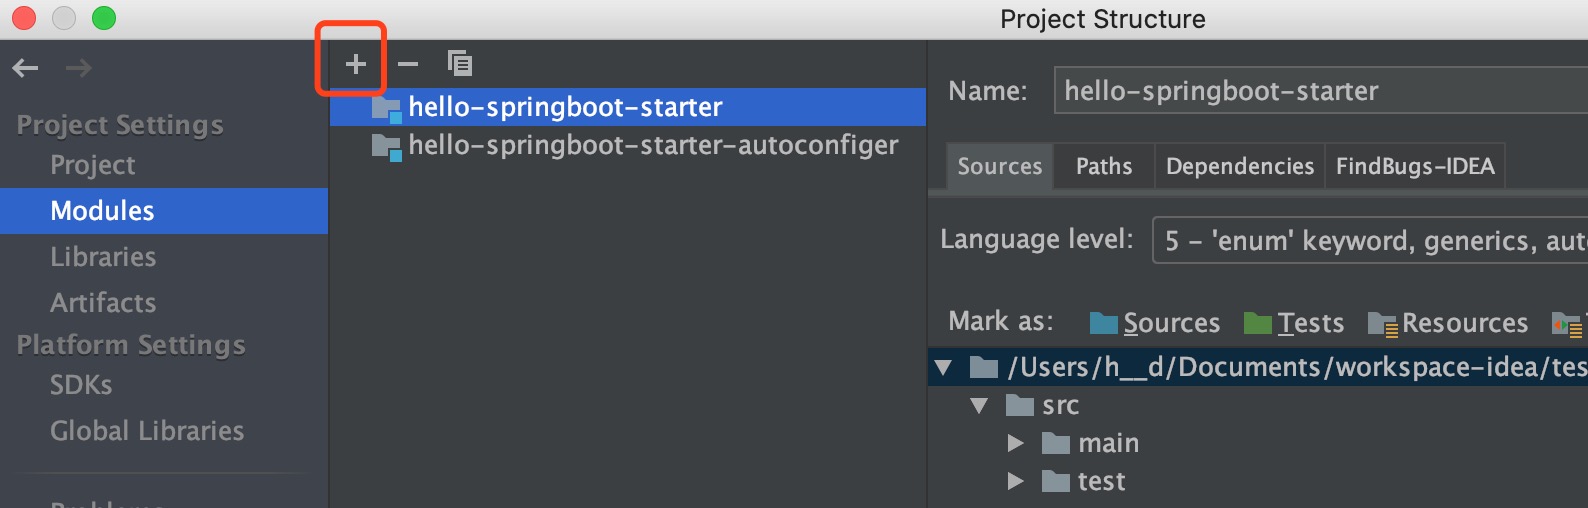
目录结构如下:

hello-springboot-starter的pom.xml文件如下:


 1 <?xml version="1.0" encoding="UTF-8"?>
 2 <project xmlns="http://maven.apache.org/POM/4.0.0"
 3          xmlns:xsi="http://www.w3.org/2001/XMLSchema-instance"
 4          xsi:schemaLocation="http://maven.apache.org/POM/4.0.0 http://maven.apache.org/xsd/maven-4.0.0.xsd">
 5     <modelVersion>4.0.0</modelVersion>
 6
 7     <groupId>com.test</groupId>
 8     <artifactId>hello-springboot-starter</artifactId>
 9     <version>1.0-SNAPSHOT</version>
10
11     <!-- 启动器 -->
12     <dependencies>
13
14         <!-- 引入自动配置模块 -->
15         <dependency>
16             <groupId>com.test</groupId>
17             <artifactId>hello-springboot-starter-autoconfiger</artifactId>
18             <version>1.0-SNAPSHOT</version>
19         </dependency>
20
21     </dependencies>
22
23 </project>
hello-springboot-starter-autoconfiger的pom.xml文件如下:
 1 <?xml version="1.0" encoding="UTF-8"?>
 2 <project xmlns="http://maven.apache.org/POM/4.0.0"
 3          xmlns:xsi="http://www.w3.org/2001/XMLSchema-instance"
 4          xsi:schemaLocation="http://maven.apache.org/POM/4.0.0 http://maven.apache.org/xsd/maven-4.0.0.xsd">
 5     <modelVersion>4.0.0</modelVersion>
 6
 7     <groupId>com.test</groupId>
 8     <artifactId>hello-springboot-starter-autoconfiger</artifactId>
 9     <version>1.0-SNAPSHOT</version>
10
11     <parent>
12         <groupId>org.springframework.boot</groupId>
13         <artifactId>spring-boot-starter-parent</artifactId>
14         <version>2.1.8.RELEASE</version>
15     </parent>
16
17     <properties>
18         <project.build.sourceEncoding>UTF-8</project.build.sourceEncoding>
19         <project.reporting.outputEncoding>UTF-8</project.reporting.outputEncoding>
20         <java.version>1.8</java.version>
21     </properties>
22
23     <dependencies>
24         <!-- 引入spring-boot-starter,所有starter基本配置 -->
25         <dependency>
26             <groupId>org.springframework.boot</groupId>
27             <artifactId>spring-boot-starter</artifactId>
28         </dependency>
29
30     </dependencies>
31
32 </project>
3、在hello-springboot-starter-autoconfiger工程中,新建一个com.test.springboot.starter.HelloProperties类(属性类)
 1 package com.test.springboot.starter;
 2
 3
 4 import org.springframework.boot.context.properties.ConfigurationProperties;
 5
 6 @ConfigurationProperties(prefix = "test.hello")
 7 public class HelloProperties {
 8     // 前缀
 9     private String prefix;
10     // 后缀
11     private String suffix;
12
13     public String getPrefix() {
14         return prefix;
15     }
16
17     public void setPrefix(String prefix) {
18         this.prefix = prefix;
19     }
20
21     public String getSuffix() {
22         return suffix;
23     }
24
25     public void setSuffix(String suffix) {
26         this.suffix = suffix;
27     }
28 }
4、在hello-springboot-starter-autoconfiger工程中,新建一个com.test.springboot.starter.HelloService类(服务类)
 1 package com.test.springboot.starter;
 2
 3 public class HelloService {
 4
 5     HelloProperties helloProperties;
 6
 7     public HelloProperties getHelloProperties() {
 8         return helloProperties;
 9     }
10
11     public void setHelloProperties(HelloProperties helloProperties) {
12         this.helloProperties = helloProperties;
13     }
14
15     public String sayHello(String name){
16         return helloProperties.getPrefix() + "-" +name + "-" + helloProperties.getSuffix();
17     }
18 }
5、在hello-springboot-starter-autoconfiger工程中,新建一个com.test.springboot.starter.HelloServiceAutoConfiguration类(自动配置类)
 1 package com.test.springboot.starter;
 2
 3 import org.springframework.beans.factory.annotation.Autowired;
 4 import org.springframework.boot.autoconfigure.condition.ConditionalOnWebApplication;
 5 import org.springframework.boot.context.properties.EnableConfigurationProperties;
 6 import org.springframework.context.annotation.Bean;
 7 import org.springframework.context.annotation.Configuration;
 8
 9 @Configuration
10 // web应用才生效
11 @ConditionalOnWebApplication
12 // 使HelloProperties文件生效
13 @EnableConfigurationProperties(HelloProperties.class)
14 public class HelloServiceAutoConfiguration  {
15
16     @Autowired
17     HelloProperties helloProperties;
18
19     @Bean
20     public HelloService helloService(){
21         HelloService helloService = new HelloService();
22         helloService.setHelloProperties(helloProperties);
23         return helloService;
24     }
25
26 }
6、在hello-springboot-starter-autoconfiger工程中,新建一个resources/META-INF/spring.factories,编辑以下内容,将HelloServiceAutoConfiguration类(自动配置类)加入到SpringBoot自动配置中
1 # Auto Configure
2 org.springframework.boot.autoconfigure.EnableAutoConfiguration=
3 com.test.springboot.starter.HelloServiceAutoConfiguration
自定义starter使用
1、新建一个SpringBoot Web工程,引入自定义的starter,pom内容如下:
 1 <?xml version="1.0" encoding="UTF-8"?>
 2 <project xmlns="http://maven.apache.org/POM/4.0.0"
 3          xmlns:xsi="http://www.w3.org/2001/XMLSchema-instance"
 4          xsi:schemaLocation="http://maven.apache.org/POM/4.0.0 http://maven.apache.org/xsd/maven-4.0.0.xsd">
 5     <modelVersion>4.0.0</modelVersion>
 6
 7     <groupId>com.test</groupId>
 8     <artifactId>test-springboot-start-test</artifactId>
 9     <version>1.0-SNAPSHOT</version>
10
11     <parent>
12         <groupId>org.springframework.boot</groupId>
13         <artifactId>spring-boot-starter-parent</artifactId>
14         <version>2.1.8.RELEASE</version>
15     </parent>
16
17     <properties>
18         <project.build.sourceEncoding>UTF-8</project.build.sourceEncoding>
19         <project.reporting.outputEncoding>UTF-8</project.reporting.outputEncoding>
20         <java.version>1.8</java.version>
21     </properties>
22
23     <dependencies>
24
25         <dependency>
26             <groupId>org.springframework.boot</groupId>
27             <artifactId>spring-boot-starter-web</artifactId>
28         </dependency>
29
30         <dependency>
31             <groupId>com.test</groupId>
32             <artifactId>hello-springboot-starter</artifactId>
33             <version>1.0-SNAPSHOT</version>
34         </dependency>
35
36         <dependency>
37             <groupId>org.springframework.boot</groupId>
38             <artifactId>spring-boot-starter-test</artifactId>
39             <scope>test</scope>
40         </dependency>
41
42     </dependencies>
43
44
45 </project>
2、编辑测试类
 1 package com.test.springboot.starter;
 2
 3
 4 import org.junit.Test;
 5 import org.junit.runner.RunWith;
 6 import org.springframework.beans.factory.annotation.Autowired;
 7 import org.springframework.boot.test.context.SpringBootTest;
 8 import org.springframework.test.context.junit4.SpringRunner;
 9
10 @RunWith(SpringRunner.class)
11 @SpringBootTest
12 public class TestApplication {
13
14     @Autowired
15     HelloService helloService;
16
17     @Test
18     public void context(){
19         String str = helloService.sayHello(" XXX ");
20         System.out.println(str);
21     }
22 }
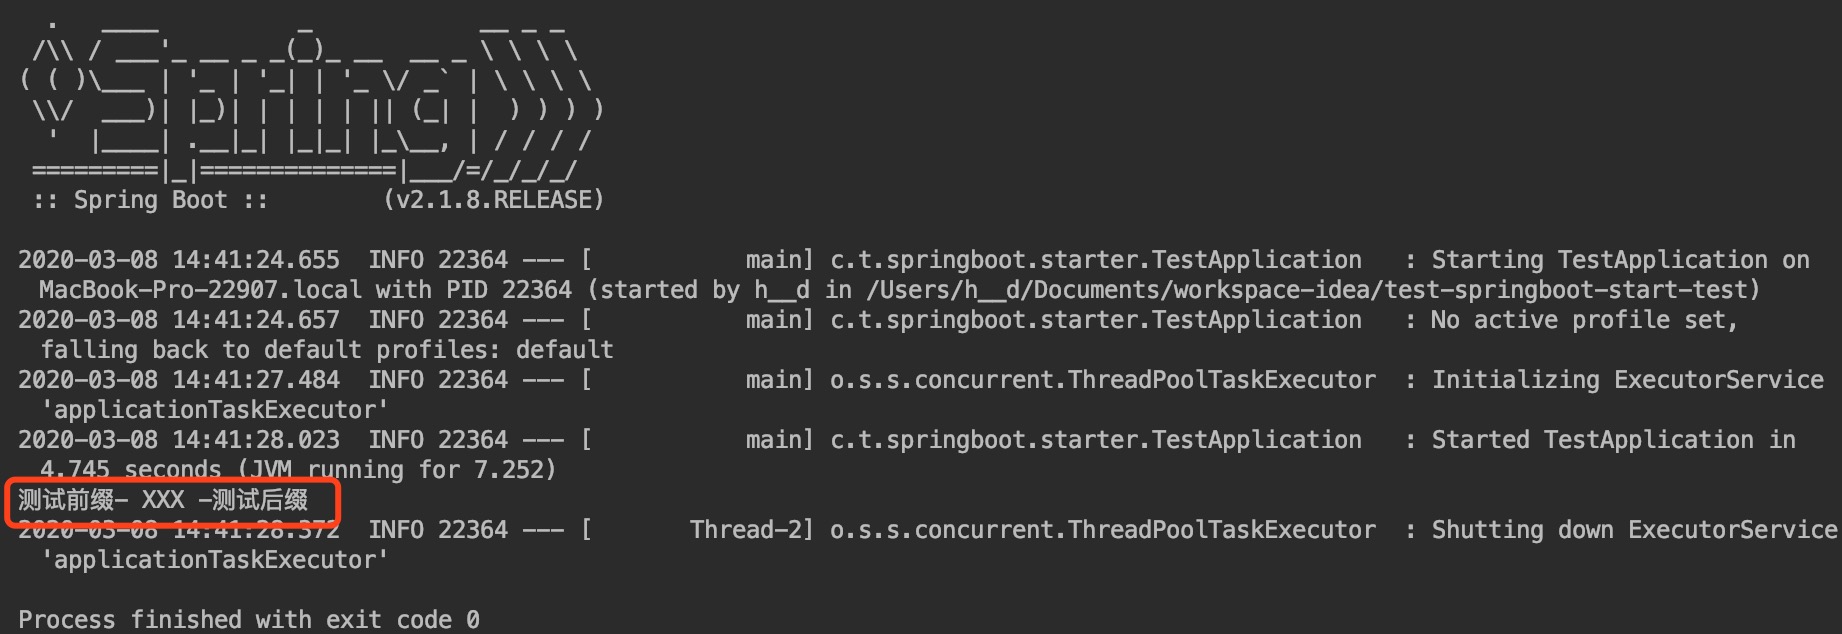
3、在resources/application.yml配置文件中加入配置
1 test:
2   hello:
3     prefix: 测试前缀
4     suffix: 测试后缀
4、运行测试类,效果如下: