内容概览
1.openlayers6结合geoserver利用WFS服务实现图层新增功能
2.源代码demo下载
效果图如下: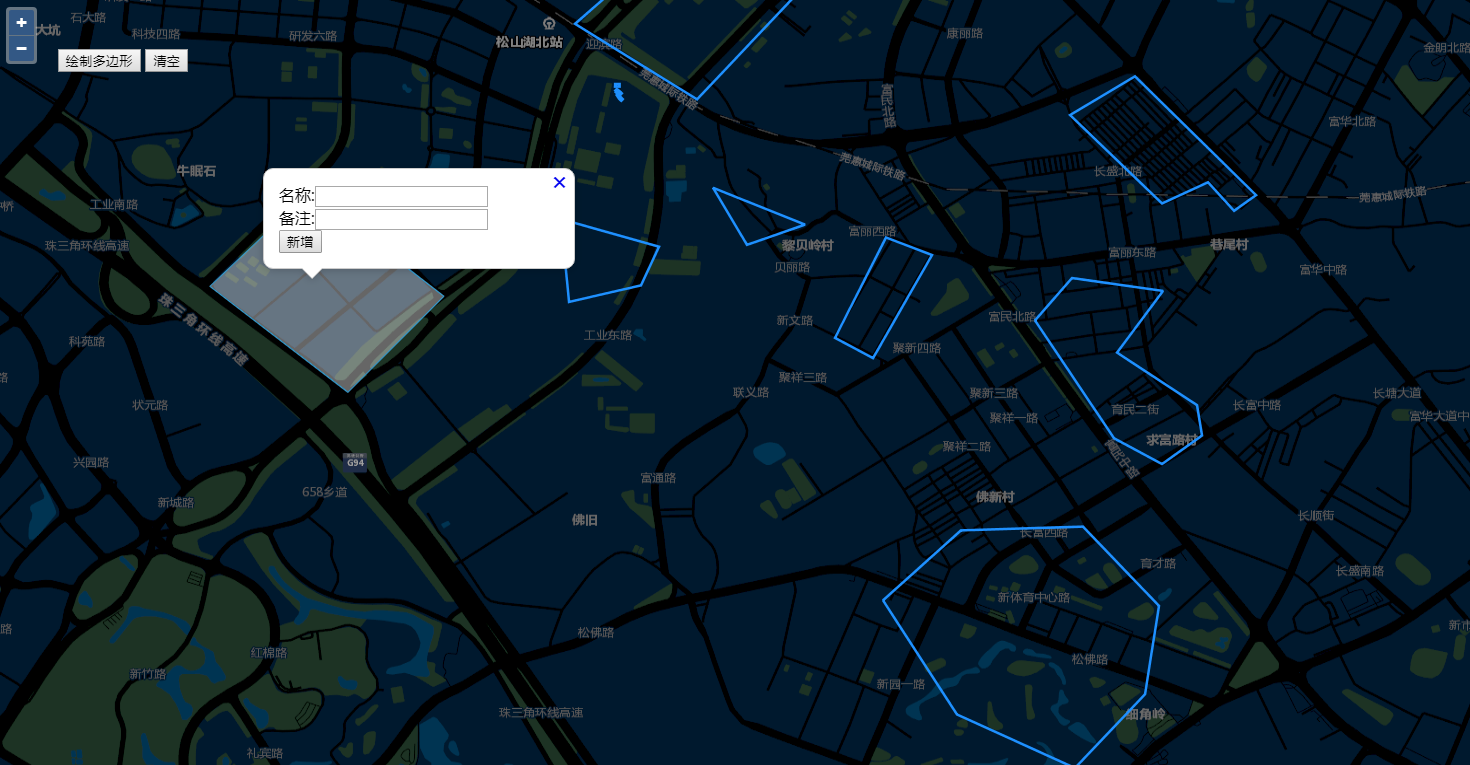
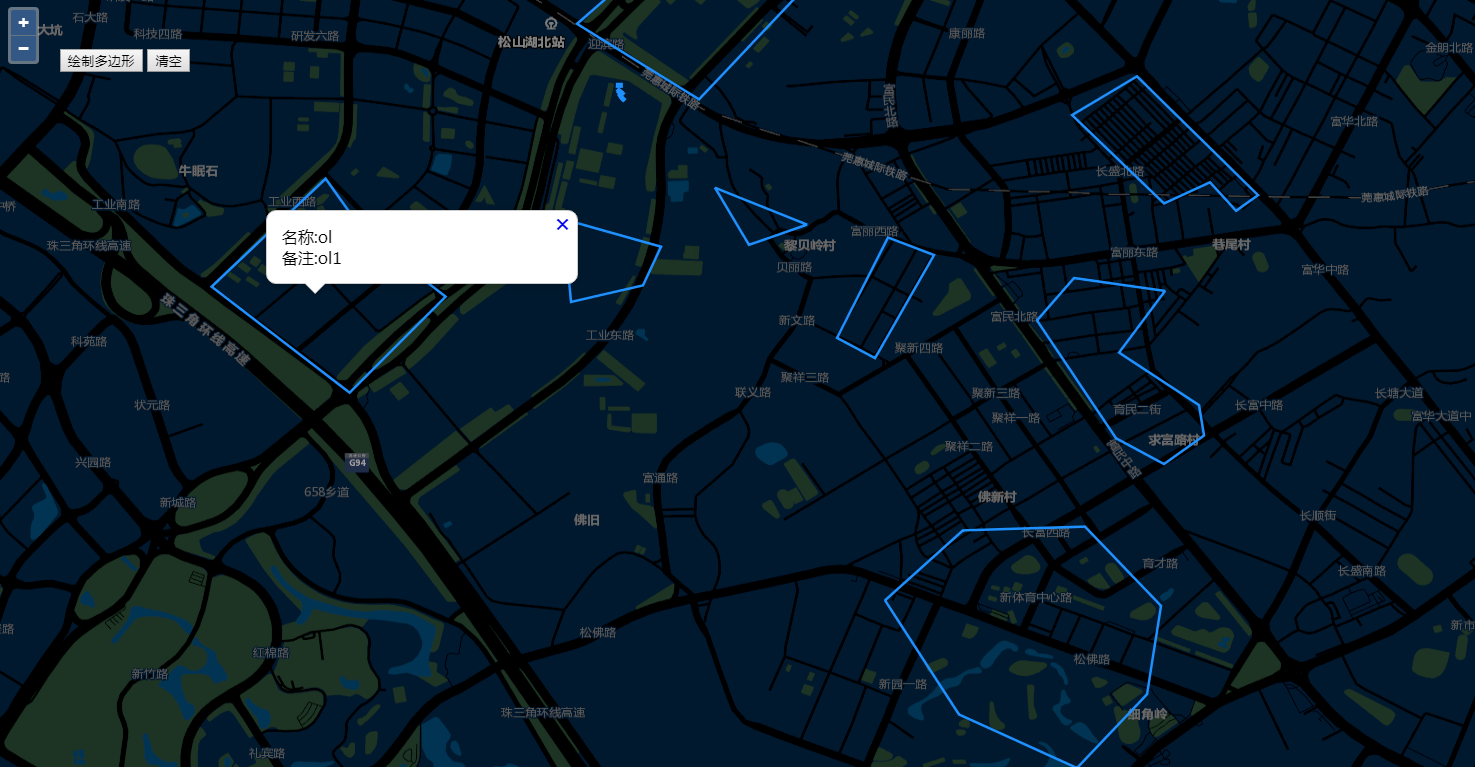
本篇主要是openlayers6通过调用geoserver发布的地图服务WFS来达到图层新增记录的目的。与GeoServer的WFS进行基于Rest交互关键就在于请求参数,值得注意的是这些请求最好采用POST方法发送。查询可以采用json,但增加,删除,修改都只能采用XML形式Transaction
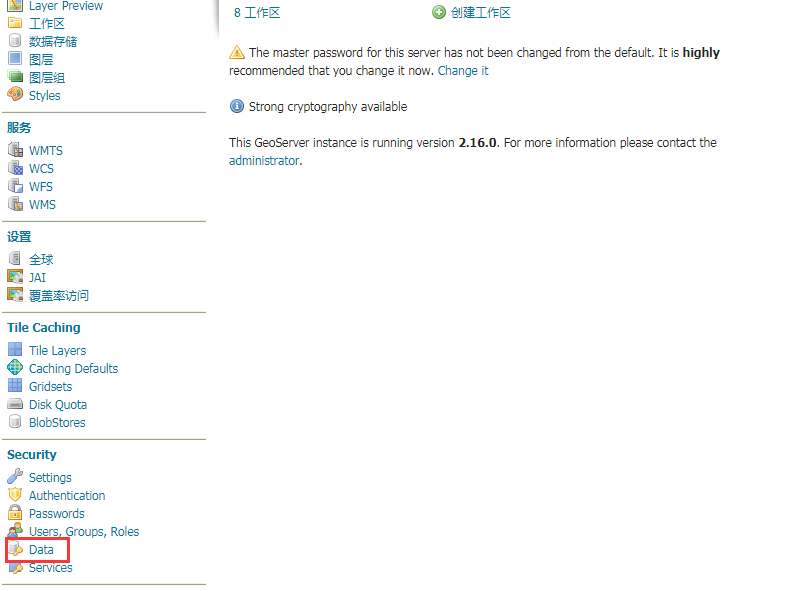
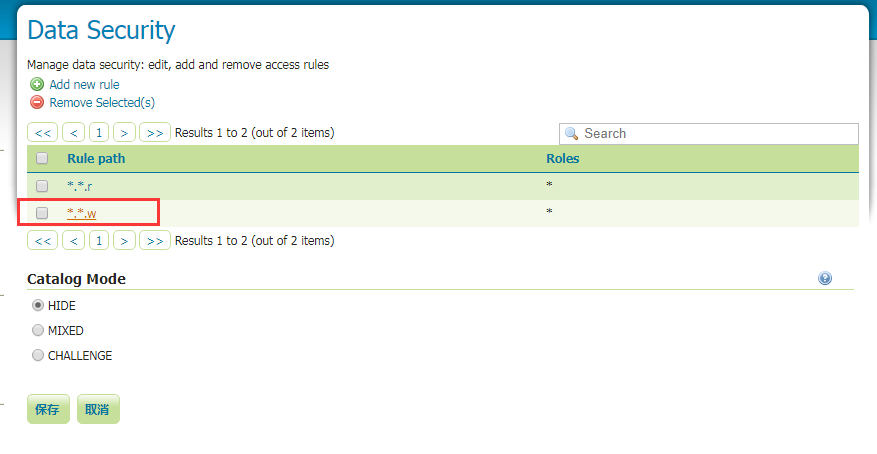
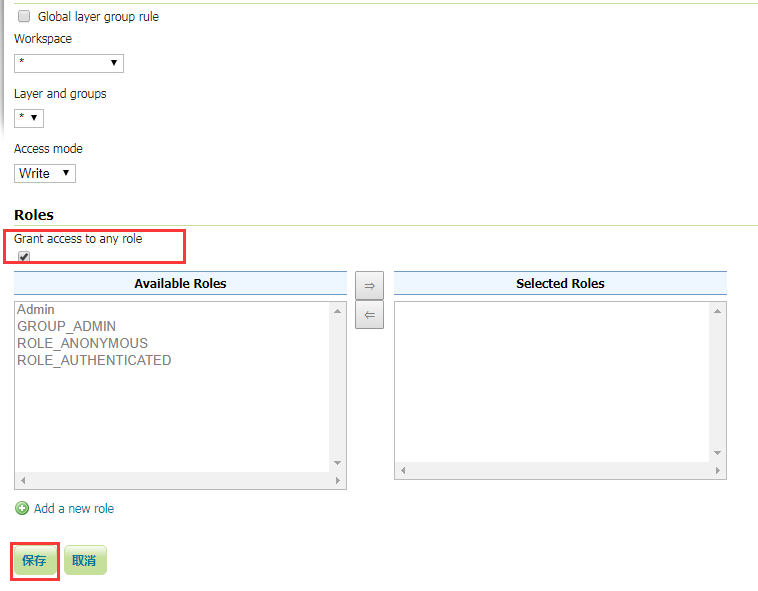
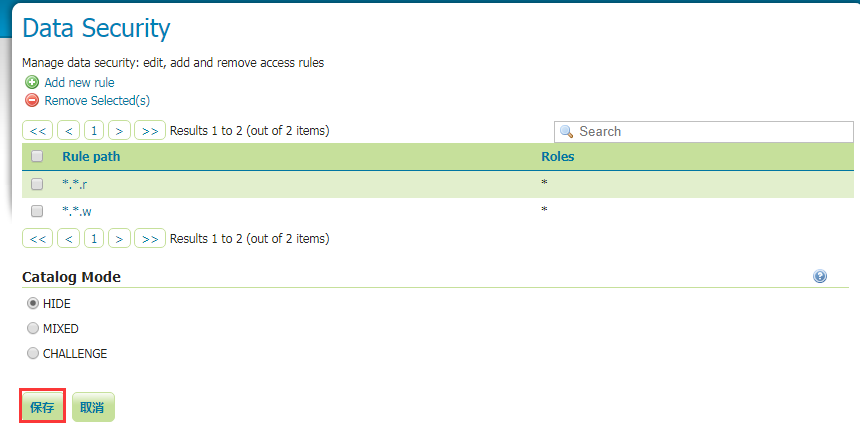
- geoserver默认WFS服务是没有编辑操作权限的,所以需要在geoserver设置权限,允许编辑操作才行,截图如下:
- 部分核心代码:
import {Map, View} from 'ol';
import {Draw} from 'ol/interaction';
import {Vector as VectorLayer} from 'ol/layer';
import XYZ from 'ol/source/XYZ';
import {Vector as VectorSource} from 'ol/source';
import {Circle as CircleStyle, Fill, Stroke, Style} from 'ol/style';
import Overlay from 'ol/Overlay';
import {getCenter} from 'ol/extent';
import TileLayer from 'ol/layer/Tile';
import TileWMS from 'ol/source/TileWMS';
import ImageLayer from 'ol/layer/Image';
import ImageWMS from 'ol/source/ImageWMS';

var container = document.getElementById('popup');
var content = document.getElementById('popup-content');
var closer = document.getElementById('popup-closer');


var overlay = new Overlay({
element: container,
autoPan: true,
autoPanAnimation: {
duration: 250
}
});

closer.onclick = function() {
overlay.setPosition(undefined);
closer.blur();
return false;
};

var polygon = null;
var showpopup = false;
//绘制工具
var draw = null;
//绘制工具图形
var drawsource = new VectorSource();
var drawlayer = new VectorLayer({
source: drawsource
});

//叠加geoserver发布的wms图层
var geoserverUrl = 'http://localhost:8080/geoserver/WebGIS';
var wmsSource = new TileWMS({
url: geoserverUrl+'/wms',
params: {'LAYERS': 'WebGIS:testLayer', 'TILED': true},
serverType: 'geoserver',
crossOrigin: 'anonymous'
});

var wmsLayer = new TileLayer({
source: wmsSource
});


var view = new View({
projection: 'EPSG:4326',
//center: [0, 0],
//zoom: 2
center: [113.90271877, 22.95186415],
zoom: 13
})

var map = new Map({
target: 'map',
layers: [
new TileLayer({
source: new XYZ({
//url: 'https://{a-c}.tile.openstreetmap.org/{z}/{x}/{y}.png'
url: 'http://cache1.arcgisonline.cn/arcgis/rest/services/ChinaOnlineStreetPurplishBlue/MapServer/tile/{z}/{y}/{x}'
})
}),
wmsLayer,
drawlayer
],
overlays: [overlay],
view: view
});

//绘制多边形
$("#rect_btn").click(function(){
clearMap();
showpopup = false;
addInteraction("Polygon");
});
//清空
$("#clear_btn").click(function(){
clearMap();
});

function addInteraction(value){
var geometryFunction;
switch (value) {
case "Box":
value = 'Circle';
geometryFunction = Draw.createBox();
break;
case "Polygon":
value = 'Polygon';
break;
}
draw = new Draw({
source: drawsource,
type: value,
geometryFunction: geometryFunction
});
map.addInteraction(draw);
draw.on('drawend',function(evt){
//clearMap();
showpopup = true;
map.removeInteraction(draw);
var feature = evt.feature;
console.log('geometry',feature.getGeometry().flatCoordinates);
var coordinates = feature.getGeometry().flatCoordinates;
if(coordinates && coordinates.length>0){
//构造polygon
polygon = '';
for(var i=0;i<coordinates.length;i++){
polygon += coordinates[i] + ',' + coordinates[i+1] + ' ' ;
i++;
}
//polygon += coordinates[0] + ',' + coordinates[1];
}
console.log('polygon',polygon);
//绘制多边形结束弹出气泡窗口
var extent = feature.getGeometry().getExtent();
console.log('extent',extent);
var coordinate = [(extent[0]+extent[2])/2,(extent[1]+extent[3])/2];
var elements = '<span>名称:</span><input type="text" id="estate_num" /></br><span>备注:</span><input type="text" id="holder_nam" /></br><button type="button" id="addBtn">新增</button>';
content.innerHTML = elements;
overlay.setPosition(coordinate);

$("#addBtn").click(function(){
if(polygon){
addLayers(polygon,$("#estate_num").val(),$("#holder_nam").val(),callbackAddLayersWFSService);
}
});

});

}
function clearMap(){
map.removeInteraction(draw);
if (drawlayer && drawlayer.getSource()) {
drawlayer.getSource().clear();
}
//隐藏气泡窗口
overlay.setPosition(undefined);
closer.blur();
}
- 图层新增函数
/*图层新增
*@method addLayers
*@param polygon 图形
*@param fieldValue1 字段1值
*@param fieldValue2 字段2值
*@return callback
*/
function addLayers(polygon,fieldValue1,fieldValue2, callback){
var xml = '<wfs:Transaction service="WFS" version="1.0.0" xmlns:opengis="http://webgis.com" xmlns:wfs="http://www.opengis.net/wfs" xmlns:ogc="http://www.opengis.net/ogc" xmlns:gml="http://www.opengis.net/gml" xmlns:xsi="http://www.w3.org/2001/XMLSchema-instance" xsi:schemaLocation="http://www.opengis.net/wfs http://schemas.opengis.net/wfs/1.0.0/WFS-basic.xsd">';
……
完整demo源码见小专栏文章尾部:小专栏
文章尾部提供源代码下载,对本专栏感兴趣的话,可以关注一波