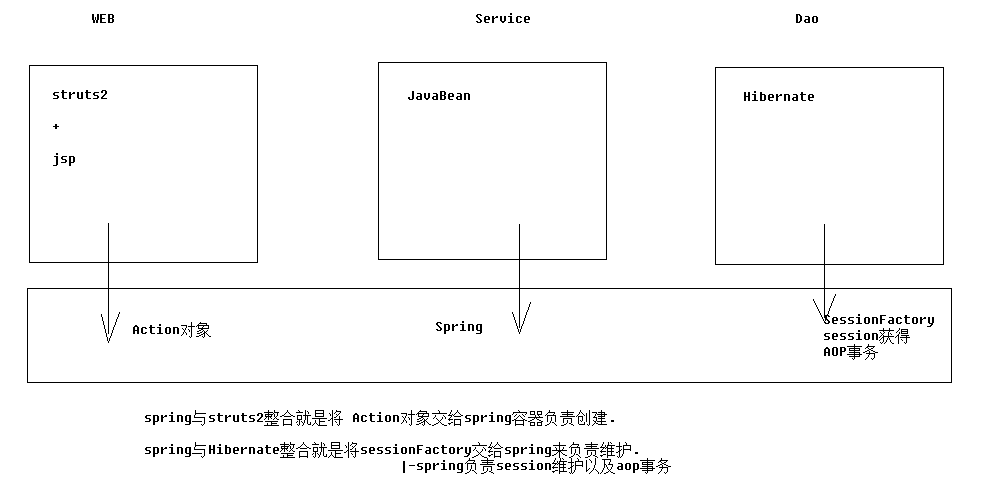
三大框架架构(整合原理)
步骤1:导包
Hibernate包
1、Hibernate包,hibernate/lib/required
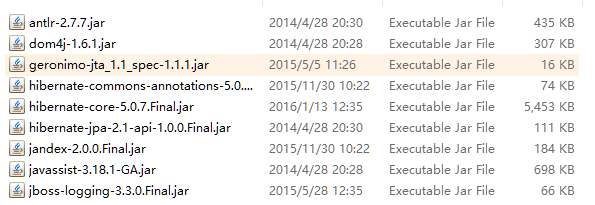
2、hibernate/lib/jpa | java persist api java的持久化规范(接口)

3、数据库驱动

Struts2包
1、struts2包
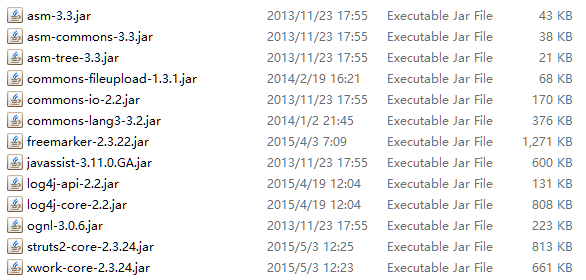
注意:javassist-3.18.1-GA.jar包与hibernate中的重复,删掉版本低的那个。
2、struts整合spring插件包
注意:这个包一旦导入,那么struts2在启动时就会寻找spring容器.找不到将会抛出异常

Spring包
1、spring包(基本:4+2), core|beans|context|expression|logging|log4j
2、spring包(整合web:web包),spring-web
3、spring包(整合aop:4个),spring-aop|spring-aspect|aop联盟|aopweaving
4、spring包(整合Hibernate和事务:4个),spring-jdbc|spring-tx|c3p0|spring-orm
5、spring包(junit4测试:test包 ),spring-test
标签库
standard.jar以及jstl-1.2.jar
步骤2:单独配置spring容器
1、在src目录下创建配置文件applicationContext.xml,并导入约束(4个),beans|context|aop|tx,嫌导入麻烦的话,直接copy下面模板即可。
<?xml version="1.0" encoding="UTF-8"?>
<beans xmlns:xsi="http://www.w3.org/2001/XMLSchema-instance"
       xmlns="http://www.springframework.org/schema/beans"
       xmlns:context="http://www.springframework.org/schema/context"
       xmlns:aop="http://www.springframework.org/schema/aop"
       xmlns:tx="http://www.springframework.org/schema/tx"
       xsi:schemaLocation="http://www.springframework.org/schema/beans http://www.springframework.org/schema/beans/spring-beans-4.2.xsd http://www.springframework.org/schema/context http://www.springframework.org/schema/context/spring-context-4.2.xsd http://www.springframework.org/schema/aop http://www.springframework.org/schema/aop/spring-aop-4.2.xsd http://www.springframework.org/schema/tx http://www.springframework.org/schema/tx/spring-tx-4.2.xsd ">


</beans>
2、在web.xml中配置spring随项目启动
<?xml version="1.0" encoding="UTF-8"?>
<web-app xmlns="http://xmlns.jcp.org/xml/ns/javaee"
         xmlns:xsi="http://www.w3.org/2001/XMLSchema-instance"
         xsi:schemaLocation="http://xmlns.jcp.org/xml/ns/javaee http://xmlns.jcp.org/xml/ns/javaee/web-app_3_1.xsd"
         version="3.1">

    <!--让spring随web的启动而创建-->
    <listener>
        <listener-class>org.springframework.web.context.ContextLoaderListener</listener-class>
    </listener>
    <!--配置spring配置文件位置-->
    <context-param>
        <param-name>contextConfigLocation</param-name>
        <param-value>classpath:applicationContext.xml</param-value>
    </context-param>
</web-app>
步骤3:单独配置Struts2
1、配置struts2主配置文件
<?xml version="1.0" encoding="UTF-8"?>

<!DOCTYPE struts PUBLIC
        "-//Apache Software Foundation//DTD Struts Configuration 2.3//EN"
        "http://struts.apache.org/dtds/struts-2.3.dtd">

<struts>
    <package name="crm" namespace="/" extends="struts-default">
        <action name="UserAction_*" class="com.yyb.action.UserAction" >
            <result name="success">index.jsp</result>
        </action>
    </package>
</struts>
2、在web.xml中配置struts2核心过滤器到web.xml
 <!--配置struts2核心过滤器-->
    <filter>
        <filter-name>Struts2</filter-name>
        <filter-class>org.apache.struts2.dispatcher.ng.filter.StrutsPrepareAndExecuteFilter</filter-class>
    </filter>
    <filter-mapping>
        <filter-name>Struts2</filter-name>
        <url-pattern>/*</url-pattern>
    </filter-mapping>
步骤4:struts2与spring整合
1、导入关键包:struts2-spring-plugin-2.3.24.jar,前面已导入。
2、在struts.xml中配置常量
<?xml version="1.0" encoding="UTF-8"?>

<!DOCTYPE struts PUBLIC
        "-//Apache Software Foundation//DTD Struts Configuration 2.3//EN"
        "http://struts.apache.org/dtds/struts-2.3.dtd">

<struts>
    <!-- #  struts.objectFactory = spring    将action的创建交给spring容器
        struts.objectFactory.spring.autoWire = name spring负责装配Action依赖属性,不用手动陪值
     -->
    <constant name="struts.objectFactory" value="spring"></constant>
    <package name="crm" namespace="/" extends="struts-default">
        <action name="UserAction_*" class="com.yyb.action.UserAction" method="{1}">
            <result name="success">index.jsp</result>
        </action>
    </package>
</struts>
3、整合方案1(不推荐):struts2自己创建action,spring负责组装依赖属性,就是在现有的基础上什么都不做。
整合方案2:spring负责创建action以及组装.
         <!--
             整合方案2:class属性上填写spring中action对象的BeanName
                 完全由spring管理action生命周期,包括Action的创建
                 注意:需要手动组装依赖属性
          -->
        <action name="UserAction_*" class="userAction" method="{1}" >

        </action>
applicationContext.xml配置如下:
   <bean name="userAction" class="com.yyb.action.UserAction" scope="prototype">
                <property name="userService" ref="userService"></property>
        </bean>
        <bean name="userService" class="com.yyb.service.UserServiceimpl"></bean>
步骤5:单独配置Hibernate
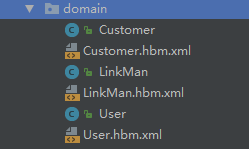
1、导入实体类&orm元数据
2、配置主配置文件hibernate.cfg.xml
<?xml version='1.0' encoding='utf-8'?>
<!DOCTYPE hibernate-configuration PUBLIC
        "-//Hibernate/Hibernate Configuration DTD//EN"
        "http://www.hibernate.org/dtd/hibernate-configuration-3.0.dtd">
<hibernate-configuration>
    <session-factory>
        <!-- 数据库驱动 -->
        <property name="hibernate.connection.driver_class">com.mysql.jdbc.Driver</property>
        <!-- 数据库url -->
        <property name="hibernate.connection.url">jdbc:mysql://localhost:3306/hibernate_crm</property>
        <!-- 数据库连接用户名 -->
        <property name="hibernate.connection.username">root</property>
        <!-- 数据库连接密码 -->
        <property name="hibernate.connection.password">123456</property>
        <property name="hibernate.dialect">org.hibernate.dialect.MySQLDialect</property>

        <!-- 将hibernate生成的sql语句打印到控制台 -->
        <property name="hibernate.show_sql">true</property>
        <!-- 将hibernate生成的sql语句格式化(语法缩进) -->
        <property name="hibernate.format_sql">true</property>
        <property name="hibernate.hbm2ddl.auto">update</property>
        <mapping class="com.yyb.domain.Customer"/>
        <mapping resource="com/yyb/domain/Customer.hbm.xml"/>
        <mapping resource="com/yyb/domain/LinkMan.hbm.xml"/>
        <mapping resource="com/yyb/domain/User.hbm.xml"/>
    </session-factory>
</hibernate-configuration>
步骤6:spring整合hibernate
整合原理:将sessionFactory对象交给spring容器管理,在spring中配置sessionFactory
配置方案一:仍然使用Hibernate.cfg.xml中的配置信息(不推荐)
 <!--将sessionFactory配置到spring容器中-->
        <bean name="sessionFactory" class="org.springframework.orm.hibernate5.LocalSessionFactoryBean">
                <property name="configLocation" value="classpath:hibernate.cfg.xml"></property>
        </bean>
配置方案二:不使用Hibernate.cfg.xml中的配置信息,在applicationContext.xml中进行如下配置:
<!-- 加载配置方案2:在spring配置中放置hibernate配置信息 -->
    <bean name="sessionFactory" class="org.springframework.orm.hibernate5.LocalSessionFactoryBean">
        <!-- 配置hibernate基本信息 -->
        <property name="hibernateProperties">
            <props>
                <!--  必选配置 -->
                <prop key="hibernate.connection.driver_class">com.mysql.jdbc.Driver</prop>
                <prop key="hibernate.connection.url">jdbc:mysql:///crm_32</prop>
                <prop key="hibernate.connection.username">root</prop>
                <prop key="hibernate.connection.password">1234</prop>
                <prop key="hibernate.dialect">org.hibernate.dialect.MySQLDialect</prop>

                <!--  可选配置 -->
                <prop key="hibernate.show_sql">true</prop>
                <prop key="hibernate.format_sql">true</prop>
                <prop key="hibernate.hbm2ddl.auto">update</prop>
            </props>
        </property>
        <!-- 引入orm元数据,指定orm元数据所在的包路径,spring会自动读取包中的所有配置 -->
        <property name="mappingDirectoryLocations" value="classpath:com/yyb/domain"></property>
    </bean>
spring整合c3p0连接池
1、配置db.properties
jdbc.jdbcUrl=jdbc:mysql:///crm
jdbc.driverClass=com.mysql.jdbc.Driver
jdbc.user=root
jdbc.password=123456
2、配置连接池
    <!-- 读取db.properties文件 -->
    <context:property-placeholder location="classpath:db.properties" />
    <!-- 配置c3p0连接池 -->
    <bean name="dataSource" class="com.mchange.v2.c3p0.ComboPooledDataSource" >
        <property name="jdbcUrl" value="${jdbc.jdbcUrl}" ></property>
        <property name="driverClass" value="${jdbc.driverClass}" ></property>
        <property name="user" value="${jdbc.user}" ></property>
        <property name="password" value="${jdbc.password}" ></property>
    </bean>
3、将连接池注入到sessionFactory
<!-- 加载配置方案2:在spring配置中放置hibernate配置信息 -->
    <bean name="sessionFactory" class="org.springframework.orm.hibernate5.LocalSessionFactoryBean">
        <!-- 将连接池注入到sessionFactory, hibernate会通过连接池获得连接 -->
        <property name="dataSource" ref="dataSource"></property>
        <!-- 配置hibernate基本信息 -->
        <property name="hibernateProperties">
            <props>
                <prop key="hibernate.dialect">org.hibernate.dialect.MySQLDialect</prop>

                <!--  可选配置 -->
                <prop key="hibernate.show_sql">true</prop>
                <prop key="hibernate.format_sql">true</prop>
                <prop key="hibernate.hbm2ddl.auto">update</prop>
            </props>
        </property>
        <!-- 引入orm元数据,指定orm元数据所在的包路径,spring会自动读取包中的所有配置 -->
        <property name="mappingDirectoryLocations" value="classpath:com/yyb/domain"></property>
    </bean>
步骤7、spring整合hibernate环境操作数据库
Dao类创建:继承HibernateDaoSupport
package com.yyb.dao;

import com.yyb.domain.User;
import org.hibernate.HibernateException;
import org.hibernate.Query;
import org.hibernate.Session;
import org.hibernate.criterion.DetachedCriteria;
import org.hibernate.criterion.Restrictions;
import org.springframework.orm.hibernate5.HibernateCallback;
import org.springframework.orm.hibernate5.support.HibernateDaoSupport;

import java.util.List;

/**
 * Created by Administrator on 2017/8/17.
 */
public class UserDaoImpl extends HibernateDaoSupport implements UserDao {
    public User getUserByUserCode(String userCode) {
        return getHibernateTemplate().execute(new HibernateCallback<User>() {
            @Override
            public User doInHibernate(Session session) throws HibernateException {
                String hql = "from User where user_code=? ";
                Query query = session.createQuery(hql);
                query.setParameter(0, userCode);
                User user = (User) query.uniqueResult();
                return user;
            }
        });
        //DetachedCriteria detachedCriteria = DetachedCriteria.forClass(User.class);
        //detachedCriteria.add(Restrictions.eq("user_code",userCode));
        //List<User> byCriteria = (List<User>) getHibernateTemplate().findByCriteria(detachedCriteria);
        //if(byCriteria!=null && byCriteria.size()>0){
        //    return byCriteria.get(0);
        //}
        //return  null;
    }
}
在applicationContext.xml中的配置如下:
  <bean name="userDao" class="com.yyb.dao.UserDaoImpl">
        <property name="sessionFactory" ref="sessionFactory"></property>
    </bean>
步骤8:spring的aop事务
1、配置核心事务管理器
    <!--配置核心事务管理器-->
    <bean name="transactionManager" class="org.springframework.orm.hibernate5.HibernateTransactionManager">
        <property name="sessionFactory" ref="sessionFactory"></property>
    </bean>
2、方式一:xml配置aop事务
  <!-- 配置通知 -->
    <tx:advice id="txAdvice" transaction-manager="transactionManager" >
        <tx:attributes>
            <tx:method name="save*" isolation="REPEATABLE_READ" propagation="REQUIRED" read-only="false" />
            <tx:method name="persist*" isolation="REPEATABLE_READ" propagation="REQUIRED" read-only="false" />
            <tx:method name="update*" isolation="REPEATABLE_READ" propagation="REQUIRED" read-only="false" />
            <tx:method name="modify*" isolation="REPEATABLE_READ" propagation="REQUIRED" read-only="false" />
            <tx:method name="delete*" isolation="REPEATABLE_READ" propagation="REQUIRED" read-only="false" />
            <tx:method name="remove*" isolation="REPEATABLE_READ" propagation="REQUIRED" read-only="false" />
            <tx:method name="get*" isolation="REPEATABLE_READ" propagation="REQUIRED" read-only="true" />
            <tx:method name="find*" isolation="REPEATABLE_READ" propagation="REQUIRED" read-only="true" />
        </tx:attributes>
    </tx:advice>
    <!-- 配置将通知织入目标对象
    配置切点、配置切面 -->
    <aop:config>
        <aop:pointcut expression="execution(* com.yyb.service.*ServiceImpl.*(..))" id="txPc"/>
        <aop:advisor advice-ref="txAdvice" pointcut-ref="txPc" />
    </aop:config>
方式二:注解配置aop事务
    <!--开启注解事务-->
    <tx:annotation-driven/>
在类上或者方法上添加注解即可
@Transactional(isolation = Isolation.DEFAULT,propagation = Propagation.REQUIRED,readOnly = false)
步骤9:扩大session的作用范围
为了避免使用懒加载时出现no-session问题.需要扩大session的作用范围,在web.xml中配置filter即可。
    <filter>
        <filter-name>openSessionInViewFilter</filter-name>
        <filter-class>org.springframework.orm.hibernate5.support.OpenSessionInViewFilter</filter-class>
    </filter>
    <filter-mapping>
        <filter-name>openSessionInViewFilter</filter-name>
        <url-pattern>/*</url-pattern>
    </filter-mapping>
注意: 任何filter一定要在struts的filter之前调用
整合到这里终于结束了。源码下载