一、构建工具setup.py的应用场景
在安装python的相关模块和库时,我们一般使用“pip install 模块名”或者“python setup.py install”,前者是在线安装,会安装该包的相关依赖包;后者是下载源码包然后在本地安装,不会安装该包的相关依赖包。所以在安装普通的python包时,利用pip工具相当简单。但是在如下场景下,使用python setup.py install会更适合需求:
|
在编写相关系统时,python 如何实现连同依赖包一起打包发布? 假如我在本机开发一个程序,需要用到python的redis、mysql模块以及自己编写的redis_run.py模块。我怎么实现在服务器上去发布该系统,如何实现依赖模块和自己编写的模块redis_run.py一起打包,实现一键安装呢?同时将自己编写的redis_run.py模块以exe文件格式安装到python的全局执行路径C:Python27Scripts下呢? |
在这种应用场景下,pip工具似乎派不上了用场,只能使用python的构建工具setup.py了,使用此构建工具可以实现上述应用场景需求,只需在 setup.py 文件中写明依赖的库和版本,然后到目标机器上使用python setup.py install安装。
from setuptools import setup, find_packages

setup(
    name = "test",
    version = "1.0",
    keywords = ("test", "xxx"),
    description = "eds sdk",
    long_description = "eds sdk for python",
    license = "MIT Licence",

    url = "http://test.com",
    author = "test",
    author_email = "test@gmail.com",

    packages = find_packages(),
    include_package_data = True,
    platforms = "any",
    install_requires = [],

    scripts = [],
    entry_points = {
        'console_scripts': [
            'test = test.help:main'
        ]
    }
)
setup.py各参数介绍:
 1 from setuptools import setup, find_packages
 2
 3 setup(
 4     name = "test",
 5     version = "1.0",
 6     keywords = ("test", "xxx"),
 7     description = "eds sdk",
 8     long_description = "eds sdk for python",
 9     license = "MIT Licence",
10
11     url = "http://test.com",
12     author = "test",
13     author_email = "test@gmail.com",
14
15     packages = find_packages(),
16     include_package_data = True,
17     platforms = "any",
18     install_requires = [],
19
20     scripts = [],
21     entry_points = {
22         'console_scripts': [
23             'test = test.help:main'
24         ]
25     }
26 )
27 按 Ctrl+C 复制代码
28     setup.py各参数介绍:
29
30 --name 包名称
31 --version (-V) 包版本
32 --author 程序的作者
33 --author_email 程序的作者的邮箱地址
34 --maintainer 维护者
35 --maintainer_email 维护者的邮箱地址
36 --url 程序的官网地址
37 --license 程序的授权信息
38 --description 程序的简单描述
39 --long_description 程序的详细描述
40 --platforms 程序适用的软件平台列表
41 --classifiers 程序的所属分类列表
42 --keywords 程序的关键字列表
43 --packages 需要处理的包目录(包含__init__.py的文件夹)
44 --py_modules 需要打包的python文件列表
45 --download_url 程序的下载地址
46 --cmdclass
47 --data_files 打包时需要打包的数据文件,如图片,配置文件等
48 --scripts 安装时需要执行的脚步列表
49 --package_dir 告诉setuptools哪些目录下的文件被映射到哪个源码包。一个例子:package_dir = {'': 'lib'},表示“root package”中的模块都在lib 目录中。
50 --requires 定义依赖哪些模块
51 --provides定义可以为哪些模块提供依赖
52 --find_packages() 对于简单工程来说,手动增加packages参数很容易,刚刚我们用到了这个函数,它默认在和setup.py同一目录下搜索各个含有 __init__.py的包。
53
54                           其实我们可以将包统一放在一个src目录中,另外,这个包内可能还有aaa.txt文件和data数据文件夹。另外,也可以排除一些特定的包
55
56                           find_packages(exclude=["*.tests", "*.tests.*", "tests.*", "tests"])
57
58 --install_requires = ["requests"] 需要安装的依赖包
59 --entry_points 动态发现服务和插件,下面详细讲
下列entry_points中: console_scripts 指明了命令行工具的名称;在“redis_run = RedisRun.redis_run:main”中,等号前面指明了工具包的名称,等号后面的内容指明了程序的入口地址。
entry_points={'console_scripts': [
        'redis_run = RedisRun.redis_run:main',
]}
这里可以有多条记录,这样一个项目就可以制作多个命令行工具了,比如:
1 setup(
2     entry_points = {
3         'console_scripts': [
4             'foo = demo:test',
5             'bar = demo:test',
6         ]}
7 )
三、setup.py的项目示例代码
 1 #!/usr/bin/env python
 2 # coding=utf-8
 3
 4 from setuptools import setup
 5
 6 '''
 7 把redis服务打包成C:Python27Scripts下的exe文件
 8 '''
 9
10 setup(
11     name="RedisRun",  #pypi中的名称,pip或者easy_install安装时使用的名称,或生成egg文件的名称
12     version="1.0",
13     author="Andreas Schroeder",
14     author_email="andreas@drqueue.org",
15     description=("This is a service of redis subscripe"),
16     license="GPLv3",
17     keywords="redis subscripe",
18     url="https://ssl.xxx.org/redmine/projects/RedisRun",
19     packages=['RedisRun'],  # 需要打包的目录列表
20
21     # 需要安装的依赖
22     install_requires=[
23         'redis>=2.10.5',
24         'setuptools>=16.0',
25     ],
26
27     # 添加这个选项,在windows下Python目录的scripts下生成exe文件
28     # 注意:模块与函数之间是冒号:
29     entry_points={'console_scripts': [
30         'redis_run = RedisRun.redis_run:main',
31     ]},
32
33     # long_description=read('README.md'),
34     classifiers=[  # 程序的所属分类列表
35         "Development Status :: 3 - Alpha",
36         "Topic :: Utilities",
37         "License :: OSI Approved :: GNU General Public License (GPL)",
38     ],
39     # 此项需要,否则卸载时报windows error
40     zip_safe=False
41 )
四、修改后的项目代码(此时RedisRun模块是DrQueue模块的子模块,这是因为要导入某些公用的模块)
 1 #!/usr/bin/env python
 2 # coding=utf-8
 3
 4 from setuptools import setup
 5
 6 '''
 7 把redis服务打包成C:Python27Scripts下的exe文件
 8 '''
 9
10 setup(
11     name="RedisRun",  #pypi中的名称,pip或者easy_install安装时使用的名称
12     version="1.0",
13     author="Andreas Schroeder",
14     author_email="andreas@drqueue.org",
15     description=("This is a service of redis subscripe"),
16     license="GPLv3",
17     keywords="redis subscripe",
18     url="https://ssl.xxx.org/redmine/projects/RedisRun",
19     packages=['DrQueue'],  # 需要打包的目录列表
20
21     # 需要安装的依赖
22     install_requires=[
23         'redis>=2.10.5',
24     ],
25
26     # 添加这个选项,在windows下Python目录的scripts下生成exe文件
27     # 注意:模块与函数之间是冒号:
28     entry_points={'console_scripts': [
29         'redis_run = DrQueue.RedisRun.redis_run:main',
30     ]},
31
32     # long_description=read('README.md'),
33     classifiers=[  # 程序的所属分类列表
34         "Development Status :: 3 - Alpha",
35         "Topic :: Utilities",
36         "License :: OSI Approved :: GNU General Public License (GPL)",
37     ],
38     # 此项需要,否则卸载时报windows error
39     zip_safe=False
40 )
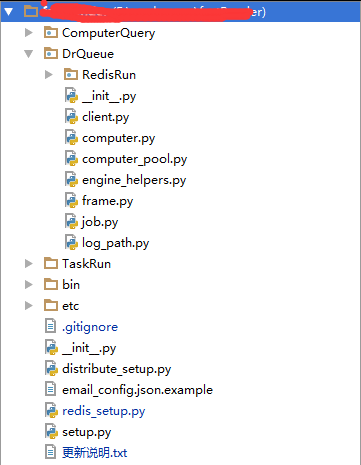
此时项目的目录结构为:
参考博客: