一、创建配置文件
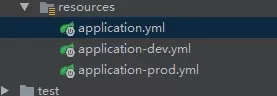
如图所示,我们在resources文件夹中新建配置文件application.yml

结构图
二、一些基本配置
server:
  port: 8090  //配置端口
  session-timeout: 30
  tomcat.max-threads: 0
  tomcat.uri-encoding: UTF-8

spring:
  datasource:  //数据库配置
    url : jdbc:mysql://localhost:3306/newbirds
    username : root
    password : mymysql
    driverClassName : com.mysql.jdbc.Driver
注意:key后面的冒号,后面一定要跟一个空格
三 、自定义的配置
1、在application.yml文件中我们自己定义了age 、name 、manInfo等参数,其中manInfo引用了age、name,引用的格式"${参数名}"
server:
  //端口
  port: 8081

age: 18
name: jason
manInfo: "age:${age},name:${name}"
怎么使用这些配置呢?我们创建GetManInfo文件(参照上面结构图),
使用配置格式
@Value("${配置文件中的参数名}")
类型 参数名
详细如下
package com.alun;

import org.springframework.beans.factory.annotation.Value;
import org.springframework.web.bind.annotation.RequestMapping;
import org.springframework.web.bind.annotation.RequestMethod;
import org.springframework.web.bind.annotation.RestController;

/**
 * Created by Administrator on 2017/5/28.
 */
@RestController
public class GetManInfo {

//获取配置文件中的age
    @Value("${age}")
   private int age;

//获取配置文件中的name
    @Value("${name}")
    private String name;

//获取配置文件中的manInfo
    @Value("${manInfo}")
    private String manInfo;

    @RequestMapping(value = "/getAge",method= RequestMethod.GET)
    public  int getAge(){
     return age;
    }

    @RequestMapping(value = "/getName",method= RequestMethod.GET)
    public  String getNme(){
        return name;
    }

    @RequestMapping(value = "/getManInfo",method= RequestMethod.GET)
    public  String getManInfo(){
        return manInfo;
    }
}
2、一个一个的@Value获取觉得很烦,有办法解决么?这个....当然有啊!
在application.yml我们改成这样
server:
  port: 8081

manInfo:
    age: 18
    name: jason
新建一个ManInfoProperties文件,(结构参照结构图)使用
@Component
@ConfigurationProperties( prefix = "配置文件里的参数名" )
package com.alun;


import org.springframework.boot.context.properties.ConfigurationProperties;
import org.springframework.stereotype.Component;

/**
 * Created by Administrator on 2017/5/28.
 */
@Component
@ConfigurationProperties(  prefix = "manInfo" )
public class ManInfoProperties {
    private String age;
    private String name;

    public String getAge() {
        return age;
    }

    public void setAge(String age) {
        this.age = age;
    }

    public String getName() {
        return name;
    }

    public void setName(String name) {
        this.name = name;
    }
}
在GetManInfo里 使用 @Autowired
package com.alun;

import org.springframework.beans.factory.annotation.Autowired;

import org.springframework.web.bind.annotation.RequestMapping;
import org.springframework.web.bind.annotation.RequestMethod;
import org.springframework.web.bind.annotation.RestController;

/**
 * Created by Administrator on 2017/5/28.
 */
@RestController
public class GetManInfo {

    @Autowired
    private ManInfoProperties manInfoProperties;

    @RequestMapping(value = "/getManInfo",method= RequestMethod.GET)
    public  String getManInfo(){
        return manInfoProperties.getAge();
    }
}
四、多环境配置
多环境配置
如上图,创建application-dev.yml(测试环境)和application-prod.yml(生产)环境
application-dev.yml
server:
  port: 8080

manInfo:
    age: 18
    name: jason
application-prod.yml
server:
  port: 8081

manInfo:
    age: 18
    name: alun
而原有的application.yml则改成这样:
spring:
  profiles:
    active: prod
spring.profiles.active: 配置文件名(比如这里是 prod或者dev)
作者:渝潼不肖生
链接:https://www.jianshu.com/p/fb6731ee53d2
来源:简书
简书著作权归作者所有,任何形式的转载都请联系作者获得授权并注明出处。