1. 在eclipse中使用maven:
- 将插件包解压到eclipse的home目录下
- 在dropins目录中编辑一个maven.link文件
path=D:\develop\eclipse\maven
- 删除configuration目录下的:org.eclipse.update文件夹。
- 启动eclipse检查window下preference中是否有maven选项。

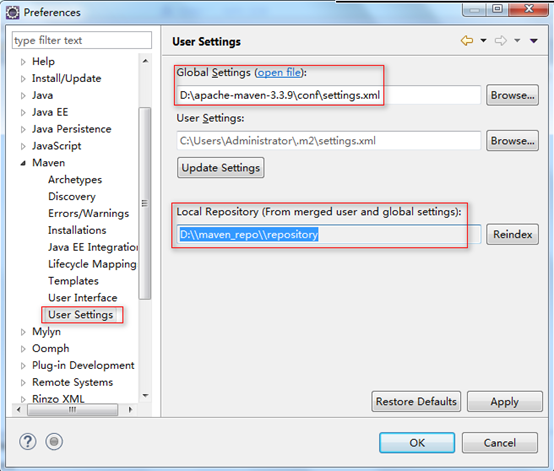
- 在maven下的installations中配置自己安装maven的路径。

- 通过user settings可以设置maven的配置文件。
2.在eclipse中使用maven进行开发项目:
- 新建项目时,选择maven project

- 下一步时,第一次创建maven项目默认即可。

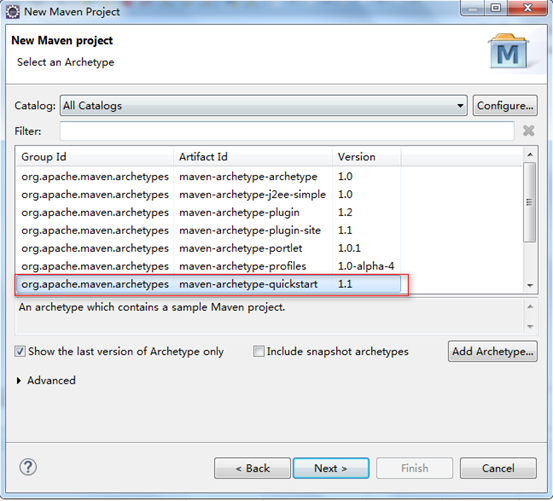
- 选择一个骨架,来创建maven项目
- 下一步 填写项目的相关信息

- finish后,maven项目创建完成。

- 查看 pom.xml并修改
<project xmlns="http://maven.apache.org/POM/4.0.0" xmlns:xsi="http://www.w3.org/2001/XMLSchema-instance"
  xsi:schemaLocation="http://maven.apache.org/POM/4.0.0 http://maven.apache.org/xsd/maven-4.0.0.xsd">
  <modelVersion>4.0.0</modelVersion>

  <groupId>cn.sxt</groupId>
  <artifactId>hello</artifactId>
  <version>0.0.1-SNAPSHOT</version>
  <packaging>jar</packaging>
  <name>hello</name>
  <url>http://maven.apache.org</url>
  <properties>
    <project.build.sourceEncoding>UTF-8</project.build.sourceEncoding>
  </properties>
  <dependencies>
    <dependency>
      <groupId>junit</groupId>
      <artifactId>junit</artifactId>
      <version>4.10</version>
      <scope>test</scope>
    </dependency>
  </dependencies>
</project>
- 在源码包下编写代码
public class Calculator {
    public int add(int a,int b){
        return a+b;
    }
}
- 在测试包下编写测试代码:
import org.junit.Test;
import static junit.framework.Assert.*;
public class CalculatorTest {
    @Test
    public void testAdd(){
        assertEquals(3, new Calculator().add(2, 1));
    }
}
- 在项目上右击,执行maven的相关命令:


- 在myeclipse中,自动集成maven,建议大家使用自己的maven,设置方式和eclipse一致,不用添加插件步骤即可。