注:本篇文章里会介绍以下内容:
- 选择哪些工具来初始化我们的前端工程的基础框架;
- 相关工具的简单介绍;
- 如何良好地完善相关配置
不会涉及工具类的封装、路由系统的设计、权限设计、缓存方案等等趋向于业务结合的内容
文章的关注点:前端开发流程链路各环节的工具配置,初始化项目(包管理器+开发/构建工具)--> 各类开发工具配置(TS + 样式预处理器 + Lint + Git工具 + 前端测试 + 格式化等) --> 测试辅助工具的可用性及适用性 --> 功能/业务代码开发(本文不涉及)--> 校验、测试、规范化、Git操作等
这里提前粘贴一下 package.json 中的依赖配置项,以便从中快速浏览工程初始化时使用到的一些三方类库:
 1   "devDependencies": {
 2     "@commitlint/cli": "^17.0.3",
 3     "@commitlint/config-conventional": "^17.0.3",
 4     "@commitlint/format": "^17.0.0",
 5     "@commitlint/types": "^17.0.0",
 6     "@types/json-server": "^0.14.4",
 7     "@types/node": "^18.6.4",
 8     "@typescript-eslint/eslint-plugin": "^5.32.0",
 9     "@typescript-eslint/parser": "^5.32.0",
10     "@vitejs/plugin-vue": "^3.0.1",
11     "@vitejs/plugin-vue-jsx": "^2.0.0",
12     "eslint": "^8.20.0",
13     "eslint-plugin-vue": "^9.3.0",
14     "husky": "^8.0.1",
15     "json-server": "^0.17.0",
16     "less": "^4.1.3",
17     "lint-staged": "^13.0.3",
18     "only-allow": "^1.1.1",
19     "postcss": "^8.4.14",
20     "postcss-html": "^1.5.0",
21     "postcss-less": "^6.0.0",
22     "stylelint": "^14.9.1",
23     "stylelint-config-recess-order": "^3.0.0",
24     "stylelint-config-recommended-less": "^1.0.4",
25     "stylelint-config-recommended-vue": "^1.4.0",
26     "stylelint-less": "^1.0.6",
27     "stylelint-order": "^5.0.0",
28     "typescript": "^4.7.4",
29     "unplugin-vue-components": "^0.22.0",
30     "vite": "^3.0.4",
31     "vitest": "^0.21.0",
32     "vue-tsc": "^0.39.4"
33   },
34   "dependencies": {
35     "@ant-design/icons-vue": "^6.1.0",
36     "ant-design-vue": "^3.2.10",
37     "axios": "^0.27.2",
38     "dayjs": "^1.11.4",
39     "pinia": "^2.0.17",
40     "rxjs": "^7.5.6",
41     "vue": "^3.2.37",
42     "vue-router": "^4.1.3"
43   }
# PNPM
首先,我们使用 PNPM (快速的,节省磁盘空间的)作为项目的包管理器。
在Mac OS上安装:
curl -fsSL https://get.pnpm.io/install.sh | sh -
(更多详情,可以查看官网)
为什么使用 PNPM?
1. 节约磁盘空间并提升安装速度
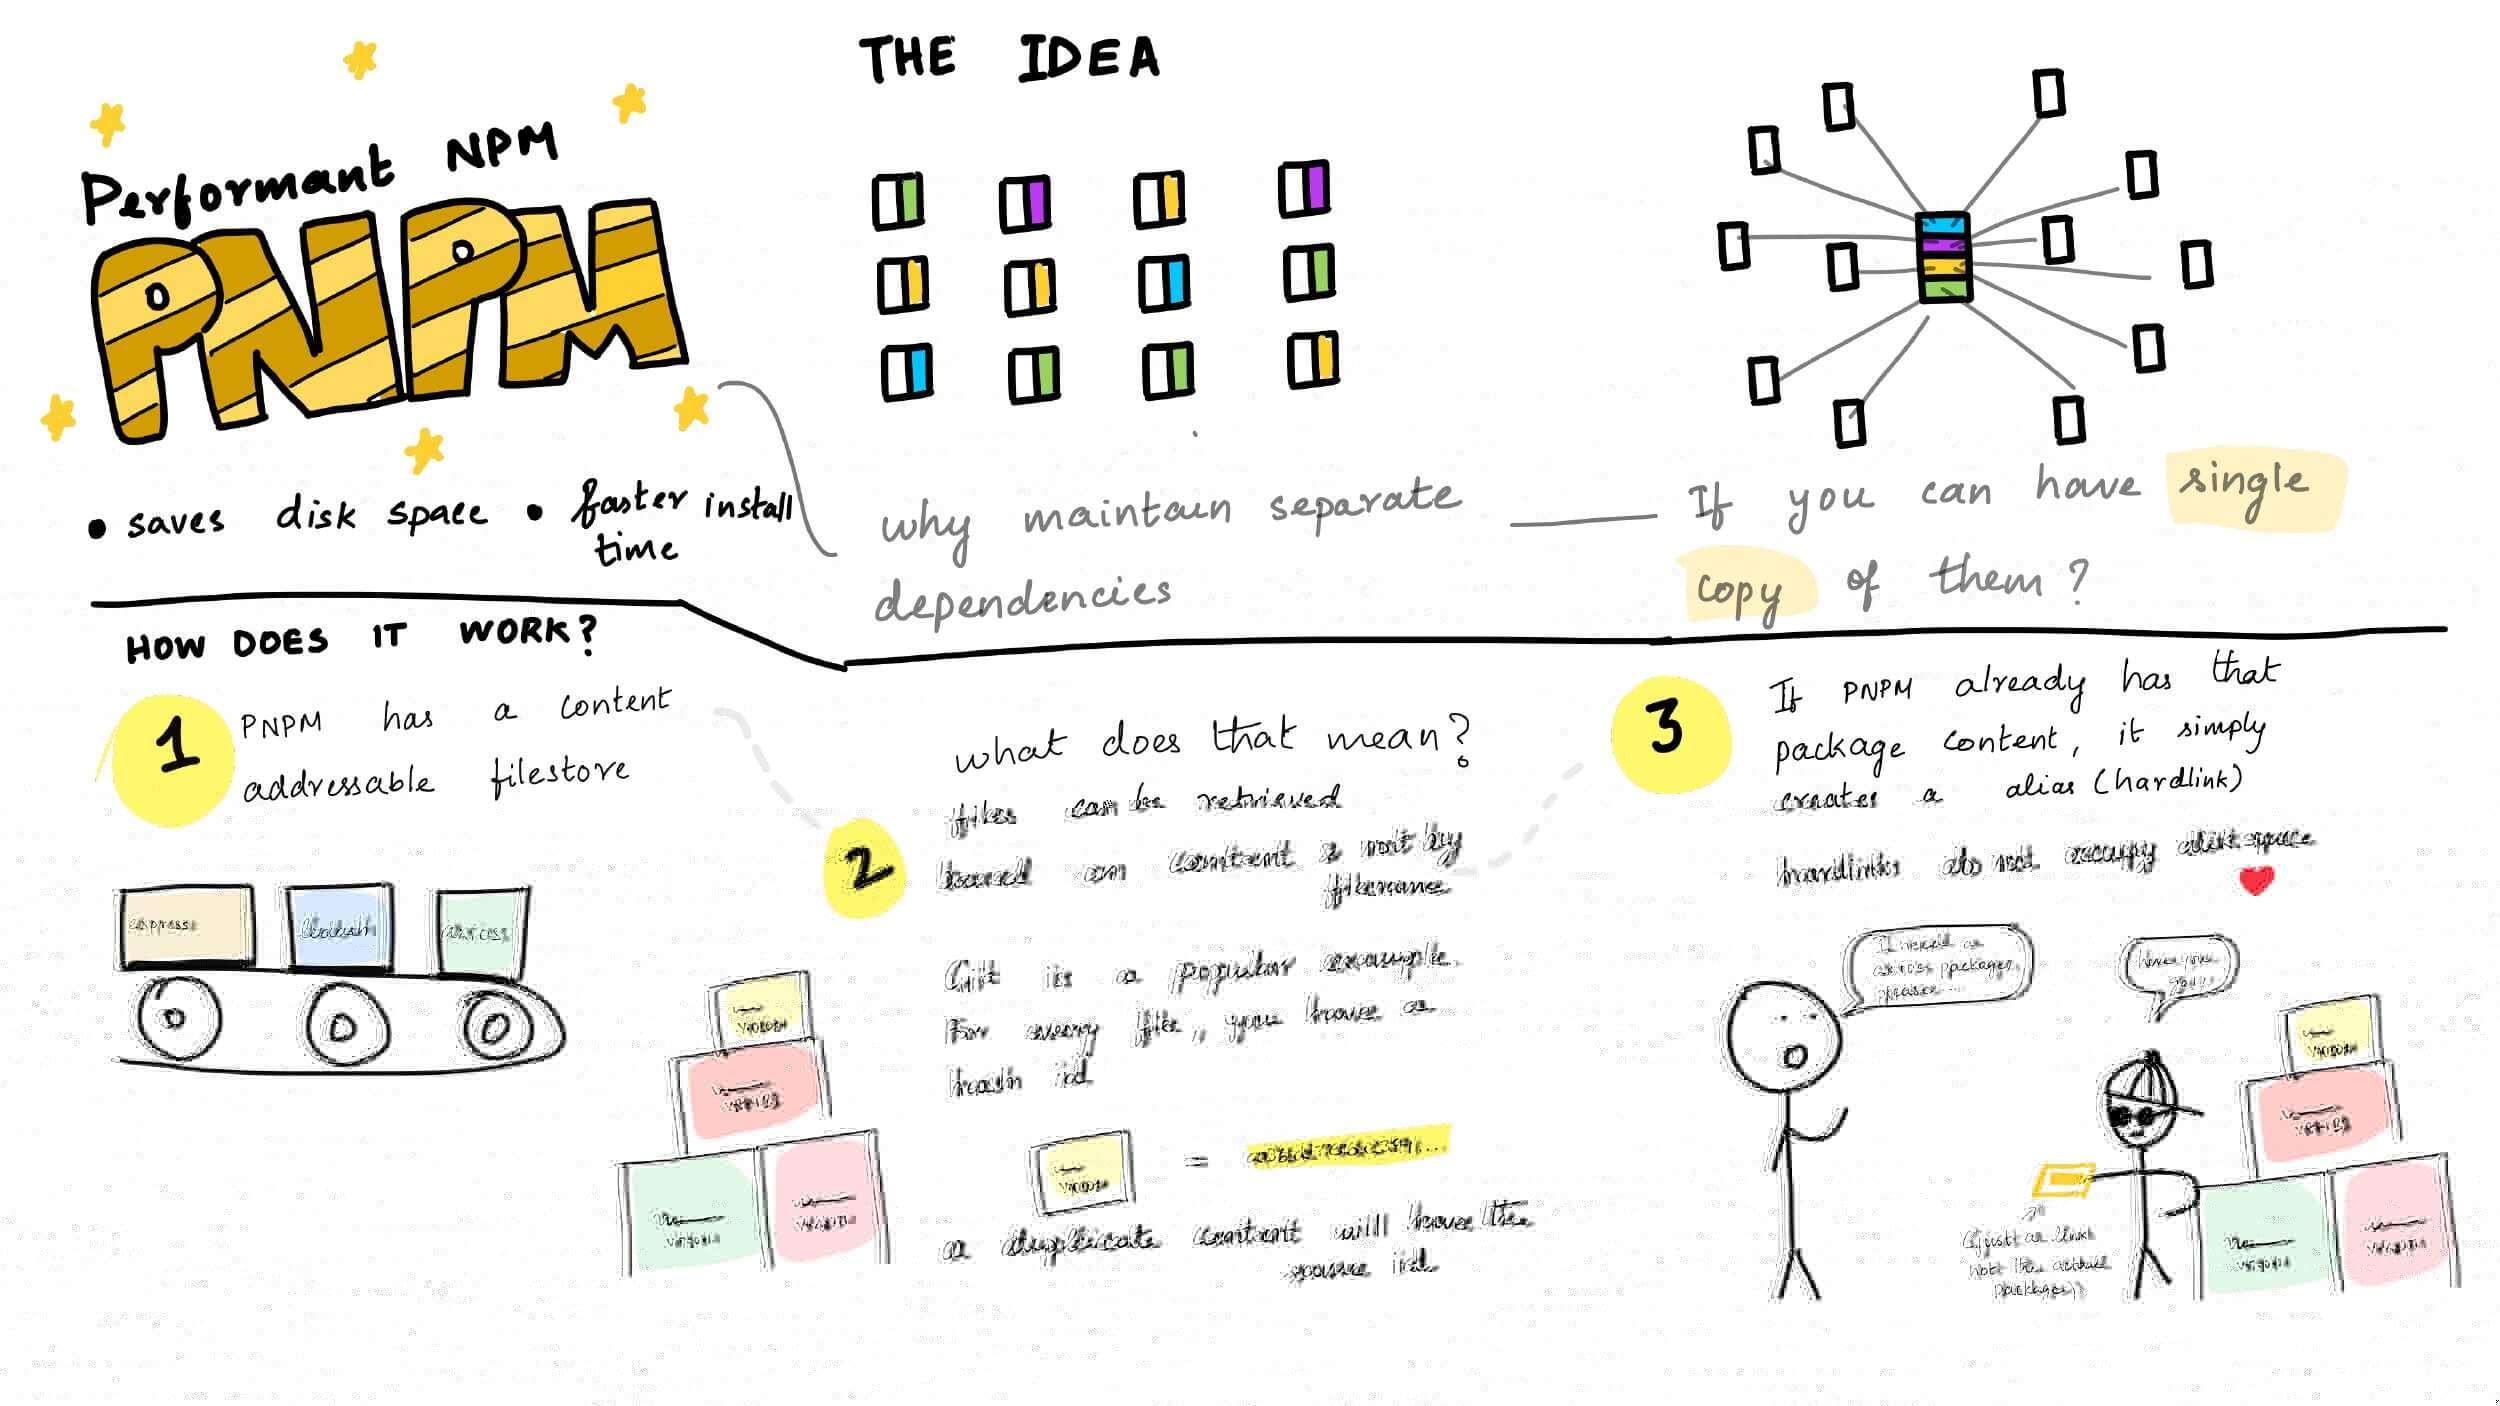
当使用 npm 或 Yarn 时,如果你有 100 个项目使用了某个依赖(dependency),就会有 100 份该依赖的副本保存在硬盘上。 而在使用 pnpm 时,依赖会被存储在内容可寻址的存储中,所以:
- 如果你用到了某依赖项的不同版本,只会将不同版本间有差异的文件添加到仓库。 例如,如果某个包有100个文件,而它的新版本只改变了其中1个文件。那么
pnpm update时只会向存储中心额外添加1个新文件,而不会因为仅仅一个文件的改变复制整新版本包的内容。 - 所有文件都会存储在硬盘上的某一位置。 当软件包被被安装时,包里的文件会硬链接到这一位置,而不会占用额外的磁盘空间。 这允许你跨项目地共享同一版本的依赖。
因此,您在磁盘上节省了大量空间,这与项目和依赖项的数量成正比,并且安装速度要快得多!
2. 创建非扁平化的 node_modules 文件夹
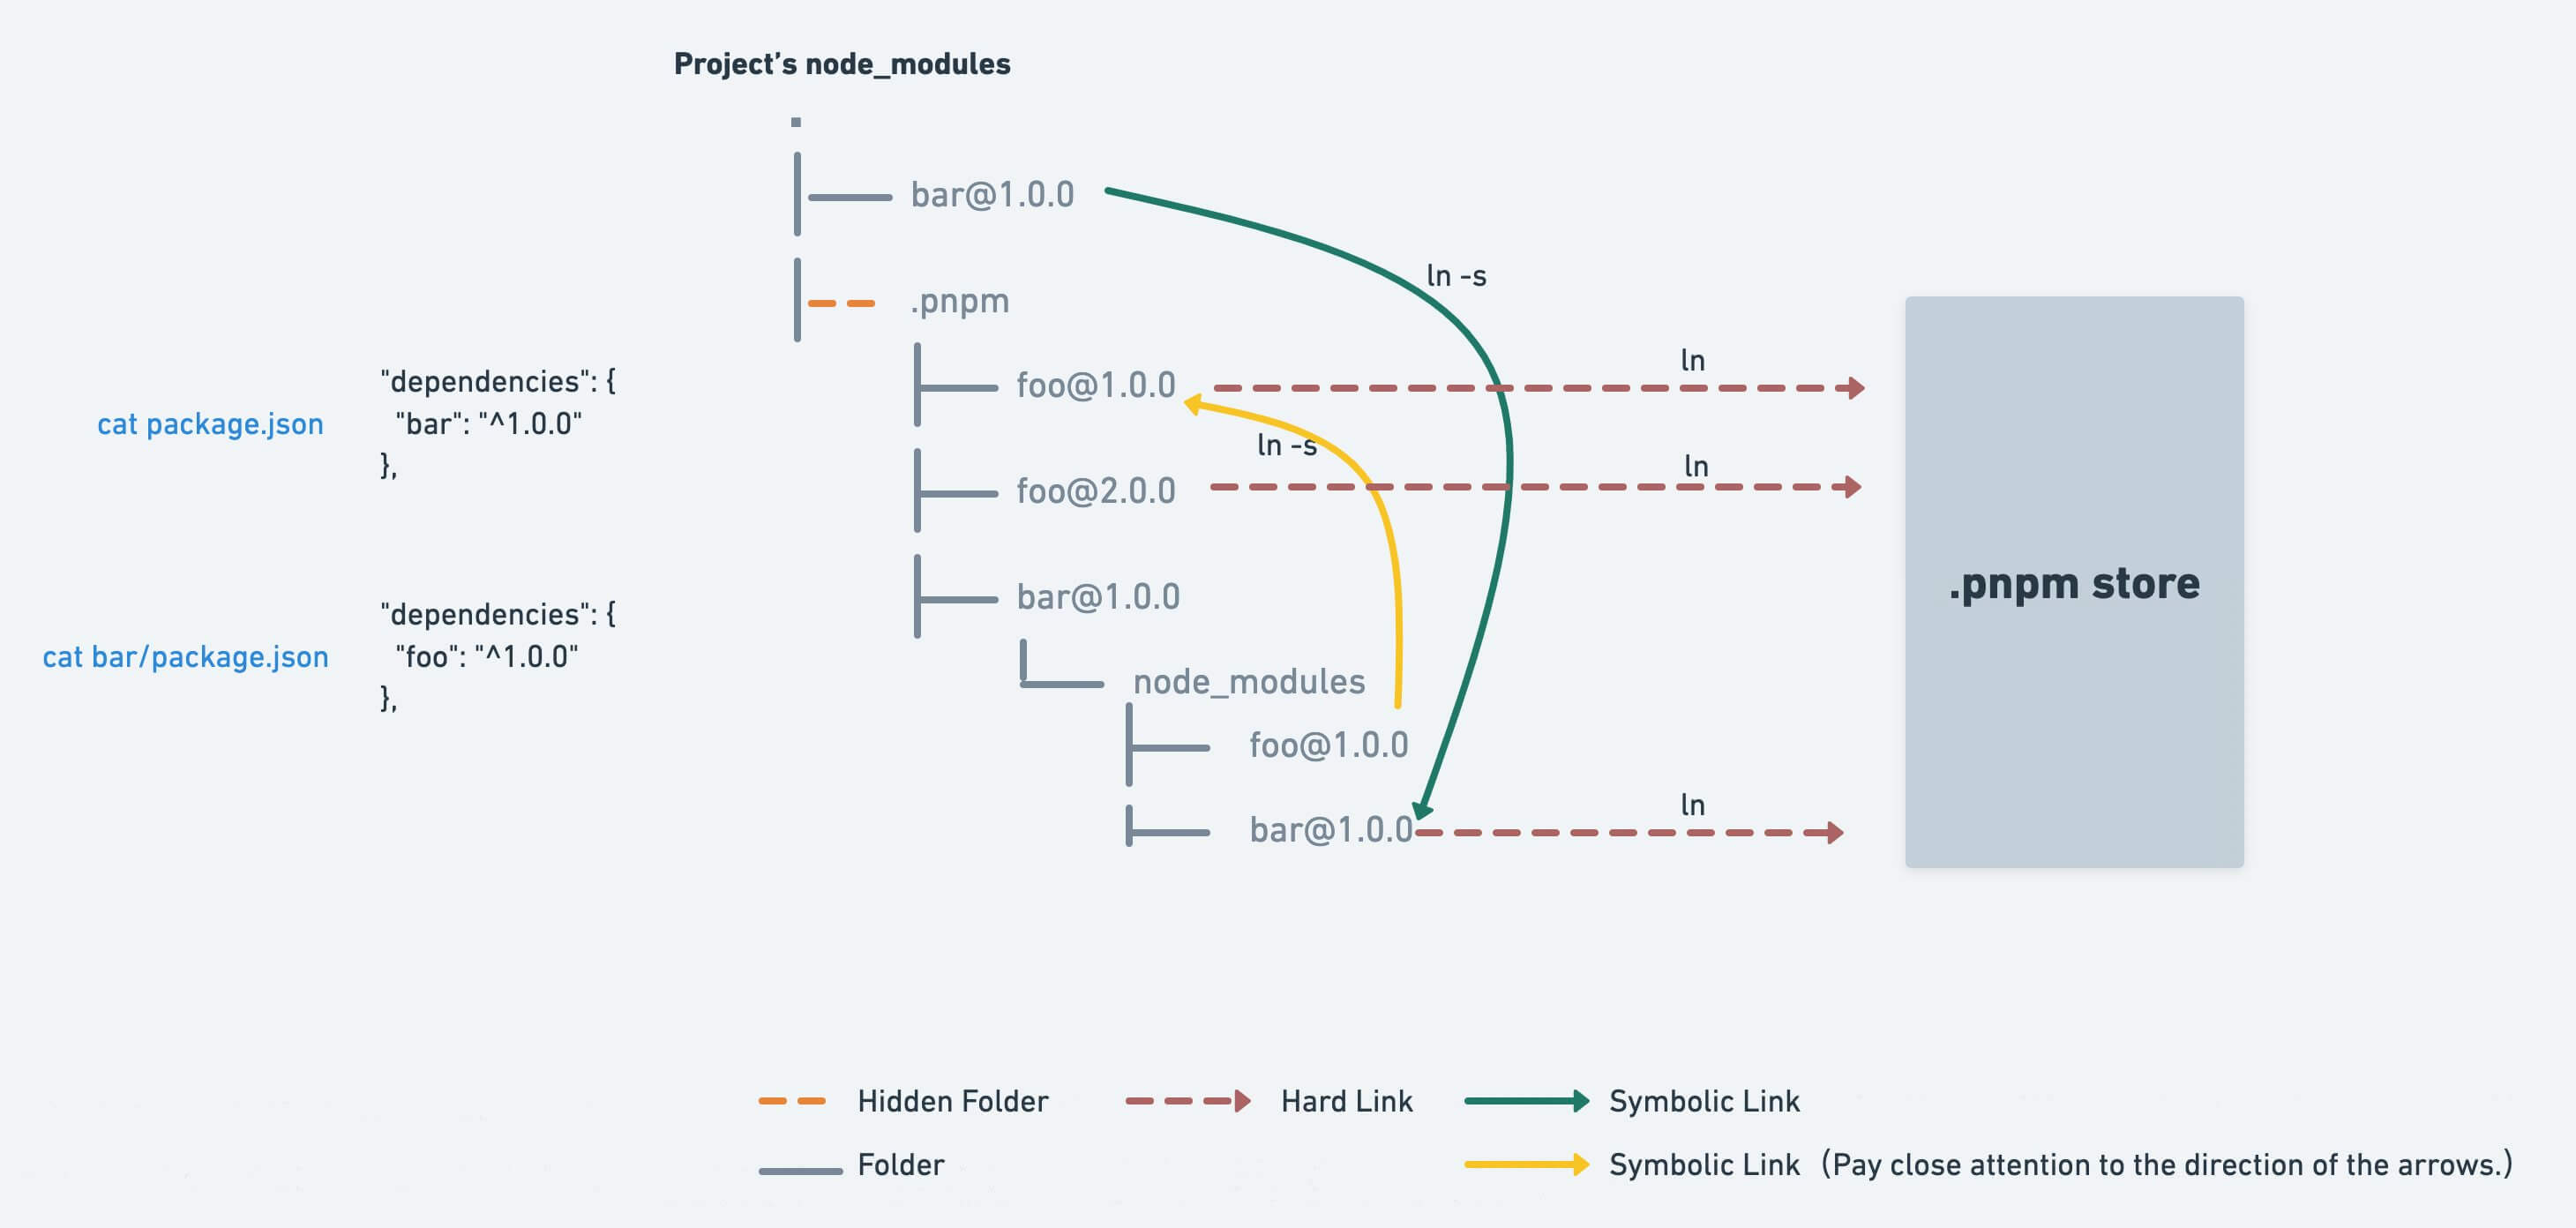
使用 npm 或 Yarn Classic 安装依赖项时,所有包都被提升到模块目录的根目录。 因此,项目可以访问到未被添加进当前项目的依赖。
而使用 pnpm 会避免这种情况出现。默认情况下,pnpm 使用软链的方式将项目的直接依赖添加进模块文件夹的根目录。
注:当使用了 PNPM 后,我们还可以做哪些延伸的配置呢?
1. 可以统一团队项目的包管理器为pnpm
首先,通过 pnpm add -D only-allow 安装only-allow,并在package.json中配置以下命令脚本:
{
  "scripts": {
    "preinstall": "npx only-allow pnpm"
  }
}
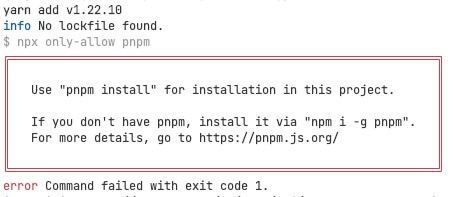
安装并配置好后,当你通过其他包管理器添加/下载依赖时,便会被阻断并提示(如下图)
尝试通过yarn下载dayjs
yarn add dayjs
2. 可以锁定工程所依赖的Node版本
具体配置步骤可查看我的另一篇文章 《锁定前端工程的Node版本》
# Vue
Vue3,就不多说了。。
VS Code插件:
- Vue Language Features (Volar)
- TypeScript Vue Plugin (Volar)
前端工程化开发的新标准。
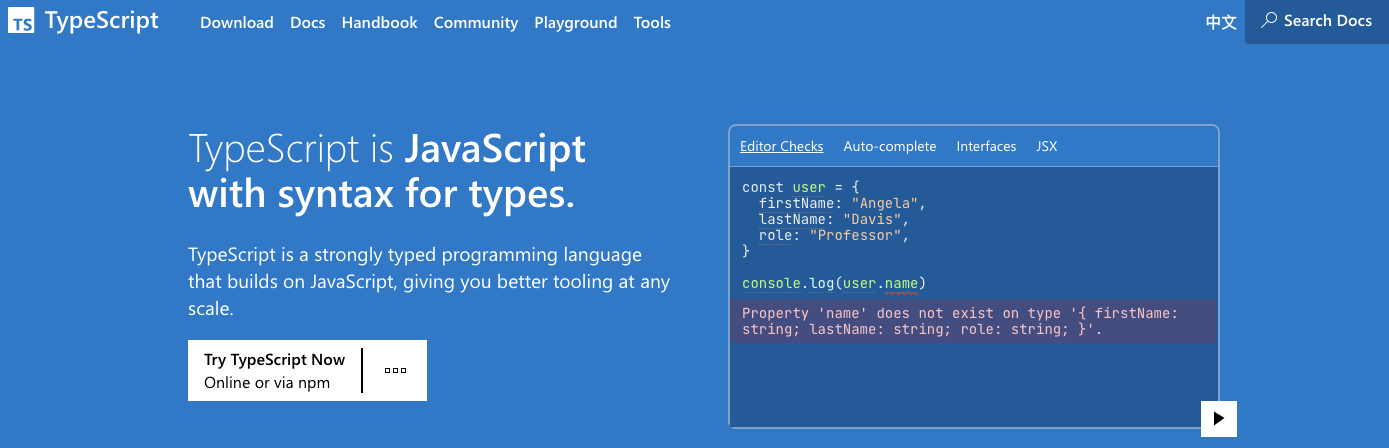
VS Code插件:JavaScript and TypeScript Nightly
配置详情:
tsconfig.json
{
  "compilerOptions": {
    "target": "esnext",
    "useDefineForClassFields": true,
    "module": "esnext",
    "moduleResolution": "node",
    "strict": true,
    "jsx": "preserve",
    "sourceMap": true,
    "resolveJsonModule": true,
    "isolatedModules": true,
    "esModuleInterop": true,
    "lib": ["esnext", "dom"],
    "skipLibCheck": true,
    "types": ["vite/client"],
    "baseUrl": ".",
    "paths": {
      "@/*": ["src/*"]
    }
  },
  "include": [
    "src/**/*.ts",
    "src/**/*.d.ts",
    "src/**/*.tsx",
    "src/**/*.vue",
    "components.d.ts"
  ],
  "references": [{ "path": "./tsconfig.node.json" }]
}
tsconfig.node.json
{
  "compilerOptions": {
    "composite": true,
    "module": "esnext",
    "moduleResolution": "node"
  },
  "include": [
    "vite.config.ts",
    "http-proxy.ts"
  ]
}
# Vite
安装好 pnpm 之后,我们就可以配合使用 vite 初始化项目
pnpm create vite _app-name_ -- --template vue-ts

英文官网:https://vitejs.dev/
早在一年多之前,我所在的团队已经选择使用vite作为前端开发与构建工具,完成的一套上线应用。
目前版本已经更新到3.0.x,完全可以放心应用到新的实际项目中。
最直观的体验是“快速”、“清爽”,开发效率也得到明显提升(解决掉了webpack开发服务器存在的痛点)。
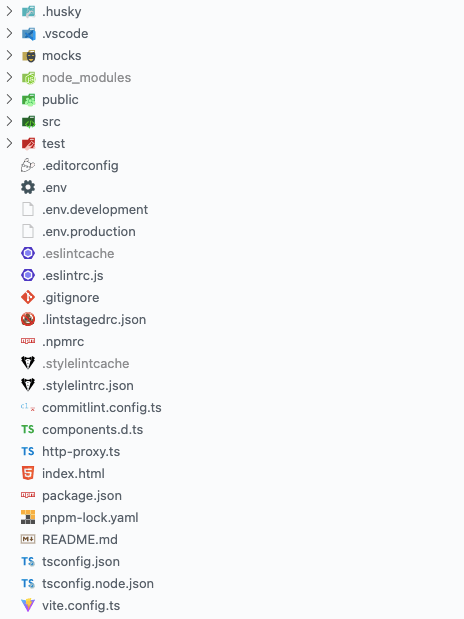
初始化完成后,工程目录如下:

VS Code插件:Vite
配置详情:
vite.config.ts
import { defineConfig, loadEnv } from 'vite';
import vue from '@vitejs/plugin-vue';
import vueJSX from '@vitejs/plugin-vue-jsx';
import Components from 'unplugin-vue-components/vite';
import { AntDesignVueResolver } from 'unplugin-vue-components/resolvers';
import { resolve } from 'path';
import { initDevProxy } from './http-proxy';

// https://vitejs.dev/config/
export default defineConfig(({ mode }) => {
  const env = loadEnv(mode, process.cwd(), '');
  return {
    // 自定义公共基础路径(取自 .env(.*) 文件)
    base: env.VITE_BASE_PATH,
    // 定义全局常量替换方式
    define: {
      // 取消启用Vue.2x中选项式api(这部分不会被打包)
      '__VUE_OPTIONS_API__': false,
    },
    // 配置vite插件
    plugins: [
      vue(),
      vueJSX(),
      // 自动化的组件按需引入配置
      Components({
        extensions: ['vue', 'tsx'],
        resolvers: [
          AntDesignVueResolver({ resolveIcons: true }),
        ],
        include: [/\.vue$/, /\.vue\?vue/, /\.tsx$/],
      }),
    ],
    // 配置解析项
    resolve: {
      // 路径别名
      alias: {
        '@/': resolve(__dirname, 'src') + '/',
      },
    },
    // 样式处理配置项
    css: {
      // CSS module
      modules: {
        generateScopedName: `_[name]_[local]_[hash:base64:6]_`,
      },
      // 传递给特定css样式预处理器的配置
      preprocessorOptions: {
        less: {
          javascriptEnabled: true,
        },
      },
    },
    // 配置开发服务器
    server: {
      open: true,
      proxy: initDevProxy(),
    },
    // 自定义打包项配置
    build: {
      // 大文件告警阈值(kb)
      chunkSizeWarningLimit: 400,
    },
  };
});
http-proxy.ts
import type { ProxyOptions } from 'vite';

/**
 * 初始化开发服务器代理
 */
export const initDevProxy = (): Record<string, string | ProxyOptions> => {
  return {
    // 临时示例
    '/api': {
      target: '',
      changeOrigin: true,
    },
  };
};
# Vitest
上面介绍了vite,所以这里简单介绍一下vitest。
它是一个 Vite 原生的极速单元测试框架。

英文官网:https://vitest.dev/
主要特点:
1. 重复使用 Vite 的配置、转换器、解析器和插件;
2. 由 esbuild 提供的开箱即用 ESM、TypeScript 和 JSX 支持;
3. 拥有预期、快照、覆盖等 - 从 Jest 迁移很简单;
4. 智能文件监听模式,就像是测试的 HMR;
5. 内置 Chai 进行断言 + 与 Jest expect 语法兼容的 API;
6. 使用 jsdom 或 happy-dom 用于 DOM 模拟;
7. 类似于 Rust 语言的 源码内联测试;
等等。。
VS Code插件:Vitest
配置 vitest,需要在项目中的 Vite 配置中添加 test 属性。
如果直接使用 vite 的 defineConfig 方法,还需要将 三斜线指令 写在配置文件的顶部。
配置详情:
vite.config.ts
/// <reference types="vitest" />
import { defineConfig, loadEnv } from 'vite';
// ...
// ...

export default defineConfig(({ mode }) => {
  return {
    // ...
    // 其他配置项 ...
    // ...

    // Vitest配置
    test: {
      /**
       * 可以在测试文件中以全局变量的形式使用,不用在手动import { describe } ...,
       * 注意,同时需要在tsconfig.json中配置 `"types": ["vitest/globals"]`
       */
      globals: true,
      /**
       * 全局调整测试环境,模拟浏览器环境(DOM操作)可设置如下:
       * 或通过在单个文件顶部添加注释 `// @vitest-environment happy-dom` 来单独设置
       * 注意,需安装相关依赖(如happy-dom)
       */
      environment: 'happy-dom',
      /**
       * 调整模块转换方式(如使用到jsx)
       */
      transformMode: {
        web: [/.[tj]sx$/],
      },
    },
  };
});
在根目录下,创建test文件夹,然后根据需要添加相应的测试文件。
示例(test/basic.test.ts):
import { test, expect } from 'vitest';

test('Math.sqrt()', () => {
  expect(Math.sqrt(4)).toBe(2);
});
同时,在package.json文件中添加测试的命令脚本:
"scripts": {
  //...
  "test": "vitest"
  // ...
}
# ESLint
JavaScript 代码监测工具
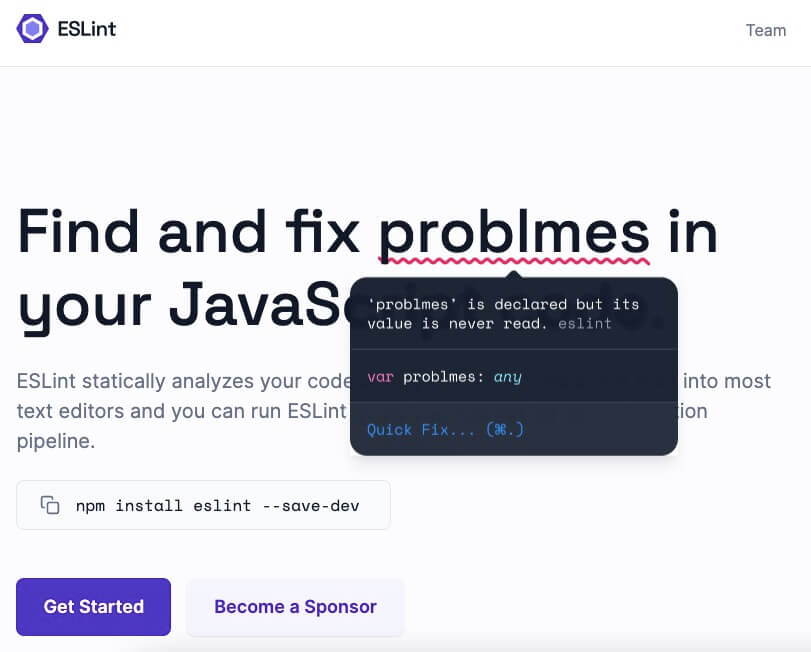
本工程中用到了TS,可能会有疑问需不需要用tslint,答案是:不用,直接用eslint即可。
因为目前TSLint已经被废弃,统一采用ESLint为标准,关于TSLint和ESLint更多的故事,可以查看这篇文章:
个人觉得文章总结得蛮好。
另外,关于ESLint的新配置模式预告(2022.08.05):
VS Code插件:ESLint
配置详情:
.eslintrc.js(.eslintrc.json/.eslintrc.yaml亦可)
module.exports = {
  root: true,
  env: {
    browser: true,
    es2022: true,
    node: true,
  },
  extends: [
    'eslint:recommended',
    'plugin:vue/vue3-essential',
    'plugin:@typescript-eslint/recommended',
  ],
  parser: 'vue-eslint-parser',
  parserOptions: {
    ecmaVersion: 'latest',
    parser: '@typescript-eslint/parser',
    sourceType: 'module',
    ecmaFeatures: {
      jsx: true,
    },
  },
  plugins: [
    'vue',
    '@typescript-eslint',
  ],
  rules: {
    // 强制分号结尾
    semi: ['error', 'always'],
    // 引号
    quotes: ['error', 'single', { avoidEscape: true, allowTemplateLiterals: true }],
    // 属性引号
    'quote-props': ['error', 'as-needed'],
    // JSX内的引号
    'jsx-quotes': ['error', 'prefer-double'],
    // 判等规则
    eqeqeq: ['error', 'smart'],
    // 缩进(2个空格)
    indent: ['error', 2],
    // 箭头函数参数体统一用括号包裹
    'arrow-parens': ['error', 'always'],
    // 函数调用规则(括号前后不能有空格)
    'func-call-spacing': ['error', 'never'],
    // 单个函数的最大代码行数
    'max-lines-per-function': ['error', { max: 108, skipBlankLines: true, skipComments: true }],
    // 连续声明变量
    'one-var': ['error', 'never'],
    // 函数名称与括号之间有一个空格
    'space-before-function-paren': ['error', {
      anonymous: 'never',
      named: 'never',
      asyncArrow: 'always',
    }],
    // 键后的冒号
    'key-spacing': ['error', { beforeColon: false, afterColon: true }],
    // 关键词
    'keyword-spacing': ['error', { before: true, after: true }],
    // switch-case冒号空格
    'switch-colon-spacing': ['error', { after: true, before: false }],
    // 混用操作符
    'no-mixed-operators': 'error',
    // 连续赋值
    'no-multi-assign': 'error',
    // 注释空格
    'spaced-comment': ['error', 'always'],
    // alert
    'no-alert': 'error',
  },
  ignorePatterns: [
    'src/**/*.test.ts',
    'src/**/*.d.ts',
  ],
};
现代的样式书写标准约定和监测工具
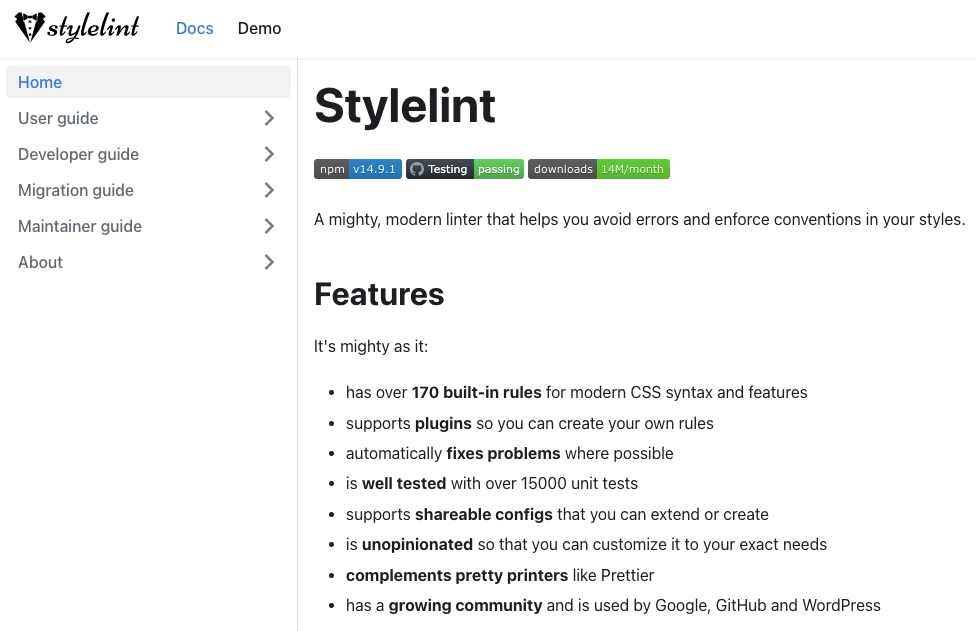
在个人看来,Stylelint的应用普及度不及ESLint。
一方面,可能是因为部分开发者主观上觉得样式没有lint的;
另一方面,可能是因为对样式方面的开发重视度不够(think it is easy ...)
总之,样式规范的确立和校验在团队协作中是绝对有必要的。
VS Code插件:Stylelint
配置详情:
.stylelintrc.json
{
  "extends": [
    "stylelint-config-recess-order",
    "stylelint-config-recommended-less",
    "stylelint-config-recommended-vue"
  ],
  "plugins": [
    "stylelint-order",
    "stylelint-less"
  ],
  "rules": {
    "string-quotes": "single",
    "indentation": 2,
    "color-no-invalid-hex": true,
    "color-hex-case": "lower",
    "color-hex-length": "short",
    "function-calc-no-unspaced-operator": true,
    "function-linear-gradient-no-nonstandard-direction": true,
    "custom-property-no-missing-var-function": true,
    "keyframe-block-no-duplicate-selectors": true,
    "block-no-empty": [true, { "ignore": ["comments"] }],
    "selector-pseudo-element-no-unknown": true,
    "media-feature-name-no-unknown": true,
    "no-invalid-double-slash-comments": true,
    "length-zero-no-unit": true,
    "font-family-name-quotes": "always-where-recommended",
    "function-url-quotes": "always",
    "number-max-precision": 2,
    "declaration-no-important": true,
    "selector-attribute-quotes": "always",
    "max-empty-lines": [2, { "ignore": ["comments"] }],
    "no-eol-whitespace": [true, { "ignore": ["empty-lines"] }],
    "no-extra-semicolons": true
  }
}
## 关于工程的样式
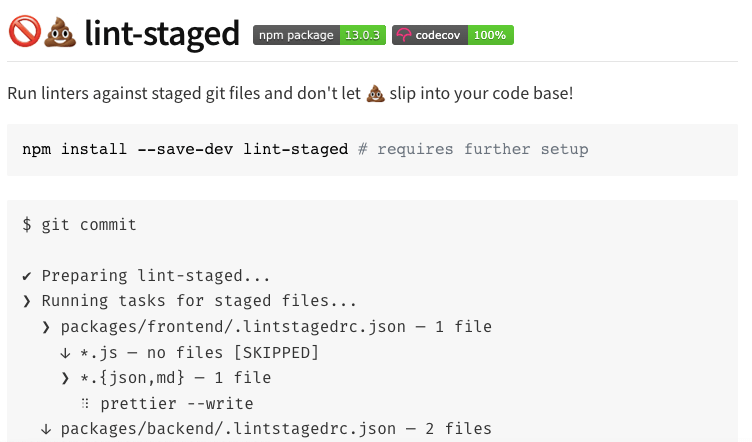
# husky
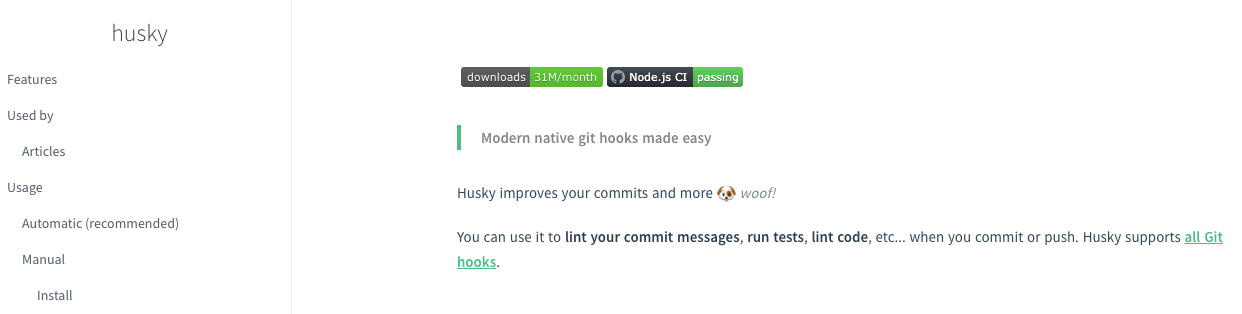
Git Hooks工具,可以让你更容易、更方便地使用git hook。
简单来说,它可以帮你在提交代码前自动地去 校验代码、跑测试case、检验commit备注信息的规范性。
通过官方命令脚本,在根目录创建.husky文件夹后,一般会用到2个文件:
.husky/pre-commit
#!/usr/bin/env sh
. "$(dirname -- "$0")/_/husky.sh"

npx lint-staged
.husky/commit-msg
#!/bin/sh
. "$(dirname -- "$0")/_/husky.sh"

npx --no -- commitlint --edit "\${1}"
一般会用来在pre-commit阶段自定完成一些代码校验工作。
配置详情:
.lintstagedrc.json
{
  "src/**/*.{ts,tsx,vue,js}": "eslint --cache",
  "src/**/*.{less,css}": "stylelint --cache --custom-syntax postcss-less",
  "src/**/*.vue": "stylelint --cache --custom-syntax postcss-html"
}

// 需要跑测试case,可在json配置项中加入代码(示范)
// "src/**/*.test.ts": "vitest"
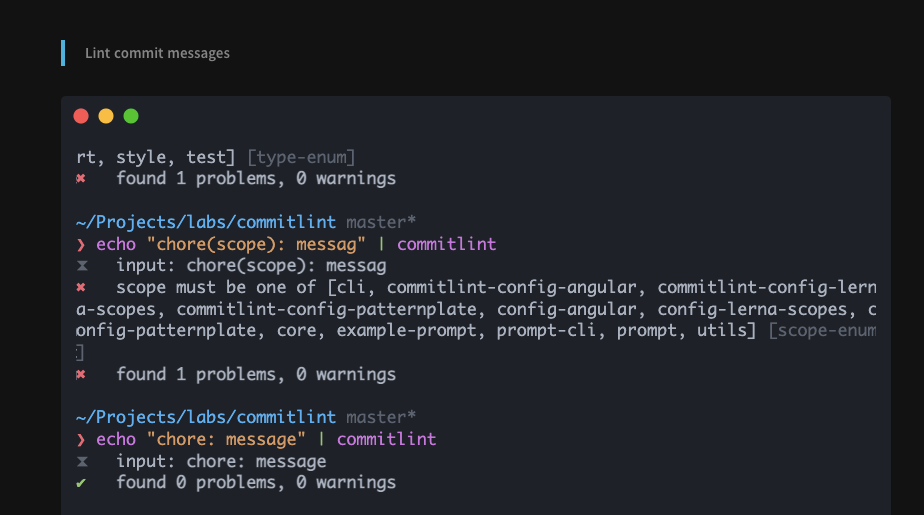
代码提交的commit备注也需要规范、校验的,不过在团队开发中,你会很检索出以前的特定的提交,也有可能无法快速看懂他人的某一次提交具体干了什么。
VS Code插件:commitlint
配置详情:
commitlint.config.ts
import type { UserConfig } from '@commitlint/types';

const CommitlintConfiguration: UserConfig = {
  extends: ['@commitlint/config-conventional'],
  formatter: '@commitlint/format',
  rules: {
    'type-enum': [2, 'always', [
      // 新功能/重要更新
      'feat',
      // 修复BUG
      'fix',
      // 样式相关的调整
      'style',
      // 重构性的代码
      'refactor',
      // 回滚操作
      'revert',
      // 依赖(第三方)升级
      'upgrade',
      // 文档更新
      'docs',
      // 小补丁
      'patch',
      // 代码优化
      'perf',
      // 构建/部署
      'ci',
      // 测试
      'test',
      // 打包
      'build',
      // 不属于以上的日常提交
      'chore',
    ]],
  },
};

export default CommitlintConfiguration;
Mock方案可以采用 json-server,它的主要特点:
1. 配置简易快速,30秒内即可启动一个 Rest 风格的接口服务器;
2. 操作体验接近真实的增删改查;
3. 自定义程度高;
配置详情:
mocks/db.json(简易的本地数据库)
{
  "books": [
    {
      "id": 1,
      "name": "Vue.js设计与实现"
    }
  ]
}
package.json
"scripts": {
  // ...
  "mock": "json-server mocks/db.json --watch",
  // ...
}
# Prettier
Prettier是一个“opinionated”(固执己见)的代码格式化工具。
它很棒,但团队中有些同事觉得它的干预性、入侵性太强,尽管格式化美化工作完成的不错,但扼杀了程序员的个人编程习惯(的确,有些程序员的水平并不需要自动格式化工具)。
一开始,团队项目中使用了Prettier,但大多数成员觉得没必要。最后,我们并没有配置Prettier,尊重大家的意愿,也对大家的能力、编码规范意识有自信,提供一个easy、开放的编程环境是重要的!
所以,这里就不再介绍相关配置。
最终,工程目录概览: